EasyManua.ls Logo

Hozelock cascade 1500 User Manual

Hozelock cascade 1500
24 pages
To Next Page IconTo Next Page
Page #1 background imageLoading...
Page #1 background image
Cascade 1500
INSTALLATION AND OPERATING INSTRUCTIONS.
READ INSTRUCTIONS CAREFULLY BEFORE ATTEMPTING INSTALLATION.
KEEP THESE INSTRUCTIONS FOR FUTURE REFERENCE
INSTALLATION ET MODE D'EMPLOI.
LISEZ CES INSTRUCTIONS ATTENTIVEMENT AVANT D'ENTREPRENDRE L'INSTALLATION.
CONSERVEZ CES INSTRUCTIONS COMME FUTURE REFERENCE
INSTALLATIONS- UND BEDIENUNGSANLEITUNG.
LESEN SIE DIE ANWEISUNGEN VOR DER INSTALLATION DER PUMPE SORGFÄLTIG DURCH.
HEBEN SIE DIESE ANWEISUNGEN ZUR INFORMATION AUF
ISTRUZIONI PER L'INSTALLAZIONE E L'USO
LEGGERE ATTENTAMENTE QUESTE ISTRUZIONI PRIMA DI PROCEDERE CON L'INSTALLAZIONE.
CONSERVARE QUESTE ISTRUZIONI PER EVENTUALI CONSULTAZIONI FUTURE.
INSTRUCCIONES DE INSTALACIÓN Y DE OPERACIÓN.
LEA LAS INSTRUCCIONES CUIDADOSAMENTE ANTES DE COMENZAR LA INSTALACIÓN.
GUARDE ESTAS INSTRUCCIONES PARA CONSULTA FUTURA.
INSTALLATIE EN BEDIENINGSINSTRUCTIES.
LEES DEZE INSTRUCTIES ZORGVULDIG VOORDAT U MET DE INSTALLATIE BEGINT.
HOUD DEZE INSTRUCTIES ALS NASLAGWERK BIJ DE HAND.
INSTRUKTIONER FÖR INSTALLATION OCH DRIFT.
LÄS INSTRUKTIONERNA NOGA INNAN DU BÖRJAR INSTALLERA.
SPARA DESSA INSTRUKTIONER FÖR FRAMTIDA BRUK.
INSTRUÇÕES DE INSTALAÇÃO E OPERAÇÃO.
LEIA CUIDADOSAMENTE ESTAS INSTRUÇÕES ANTES DE EFECTUAR A INSTALAÇÃO.
GUARDE ESTAS INSTRUÇÕES PARA REFERÊNCIA FUTURA
INSTALLASJONS- OG DRIFTSINSTRUKSER.
LES INSTRUKSENE NØYE FØR DU TAR FATT PÅ INSTALLASJON.
TA VARE PÅ DISSE INSTRUKSENE TIL SENERE BRUK
INSTALLATIONS- OG DRIFTSVEJLEDNING.
LÆS DENNE VEJLEDNING GRUNDIGT IGENNEM FØR INSTALLATION UDFØRES.
GEM DENNE VEJLEDNING TIL SENERE BRUG
INSTRUÇÕES DE INSTALAÇÃO E OPERAÇÃO.
LEIA CUIDADOSAMENTE ESTAS INSTRUÇÕES ANTES DE EFECTUAR A INSTALAÇÃO.
GUARDE ESTAS INSTRUÇÕES PARA REFERÊNCIA FUTURA
INSTRUKCJA INSTALACJI I OBS¿UGI.
PRZED PRZYST√PIENIEM DO INSTALOWANIA NALE…Y UWA…NIE PRZECZYTA∏ NINIEJSZ√ INSTRUKCJ≈.
INSTRUKCJ≈ NALE…Y ZACHOWA∏ NA PRZYSZ¿Y U…YTEK
ИНСТРУКЦИЯ ПО УСТАНОВКЕ И ЭКСПЛУАТАЦИИ.
ВНИМАТЕЛЬНО ПРОЧИТАЙТЕ ИНСТРУКЦИЮ ПЕРЕД УСТАНОВКОЙ.
СОХРАНИТЕ ЭТУ ИНСТРУКЦИЮ ДЛЯ ПОСЛЕДУЮЩЕГО ИСПОЛЬЗОВАНИЯ
3354
Question and Answer IconNeed help?

Do you have a question about the Hozelock cascade 1500 and is the answer not in the manual?

Hozelock cascade 1500 Specifications

General IconGeneral
Flow rate1500 l/h
Grain size120 mm
Delivery head1.8 m
Maximum suction height1.2 m
Depth of immersion (max)- m
Maximum operating pressure- bar
TypeIn-well pump
MaterialMetal, PVC
Proper useWater-supply
Product typeWater pump
Product colorBlack
Waterfall width0.12 m
Weight and Dimensions IconWeight and Dimensions
Package depth135 mm
Package width310 mm
Package height175 mm
Package weight1927 g

Summary

Safety and Electrical Connections

Automatic Cut-Out Feature

Pump fitted with automatic thermal overload protection that switches off if it overheats.

Important Safety Precautions

Includes warnings about unplugging, lifting, freezing conditions, running dry, voltage, RCD, and strainer cage.

Electrical Connection Requirements

Details on cable, plug waterproofing, RCD fitting, and earthing connections.

Accessory Assembly Guide

Tee Piece Assembly

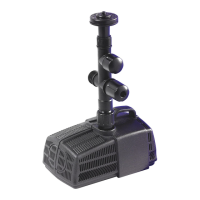
Instructions for assembling the fountain flow adjuster and valve stem to the tee piece.

Telescopic Stem Assembly

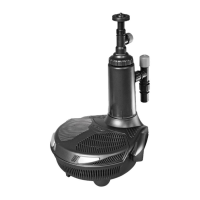
Guide for assembling the inner and outer tubes of the telescopic stem.

Bell Fountain Assembly

Steps to attach the bell support and bell to the main body.

Pump Installation Instructions

Pump Positioning

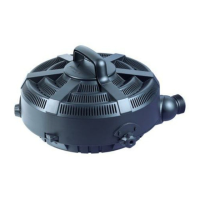
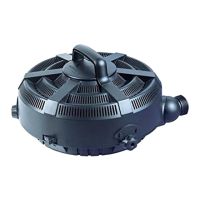
Guidance on placing the pump on a solid, level platform at specific water depths.

Fountain Installation

Steps for setting up the pump for fountain-only operation, including height adjustment.

Waterfall Installation

Instructions for connecting hose and setting up for waterfall flow.

Fountain and Waterfall Combination

Advice on combining fountain and waterfall features and their impact on height.

Maintenance and Care

General Maintenance

Routine cleaning of the strainer cage and fountain spray head is recommended.

Strainer Cleaning

Procedure to remove and clean the strainer cage and its components.

Rotor Assembly Cleaning

Steps to disassemble, clean, and reassemble the rotor assembly using clean water.

All Year Pump Care

Recommendations for daily checks and weekly cleaning of components.

Related product manuals