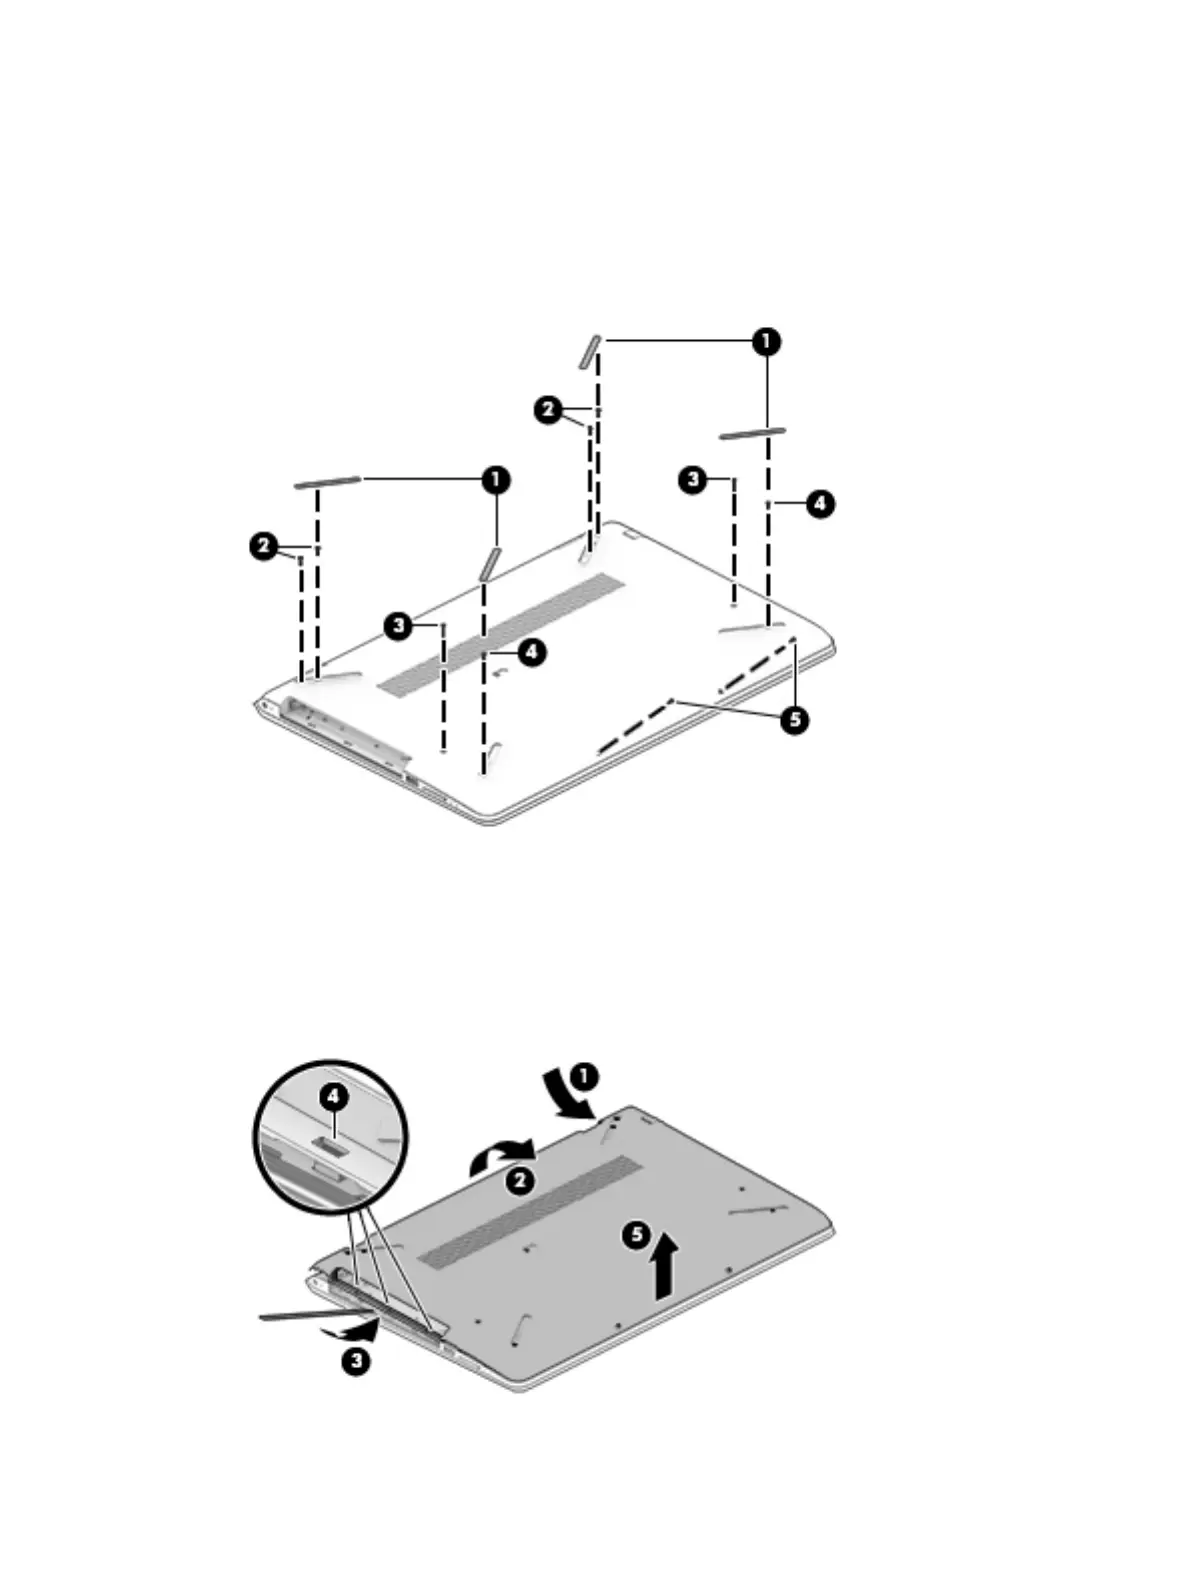
2. Remove the following screws that secure the bottom cover to the computer:
(2) Four Phillips PM2.5×6.7 screws under the rear rubber feet
(3) Two Phillips PM2.0×10.7 screws in the middle of the bottom cover
(4) Two Phillips PM2.0×5.8 screws under the front rubber feet
(5) Two Phillips PM2.0×5.6 screws on the front edge
3. Insert a case utility tool (1) or similar thin, plastic tool into the display hinge areas of the bottom cover.
4. Separate the rear edge of the bottom cover (2) from the keyboard/top cover.
5. Insert a case utility tool (3) or similar thin, plastic tool into the optical drive area of the bottom cover.
6. Separate the tabs (4) built into the keyboard/top cover from the slots built into the bottom cover.
7. Remove the bottom cover (5).
Component replacement procedures 37
 Loading...