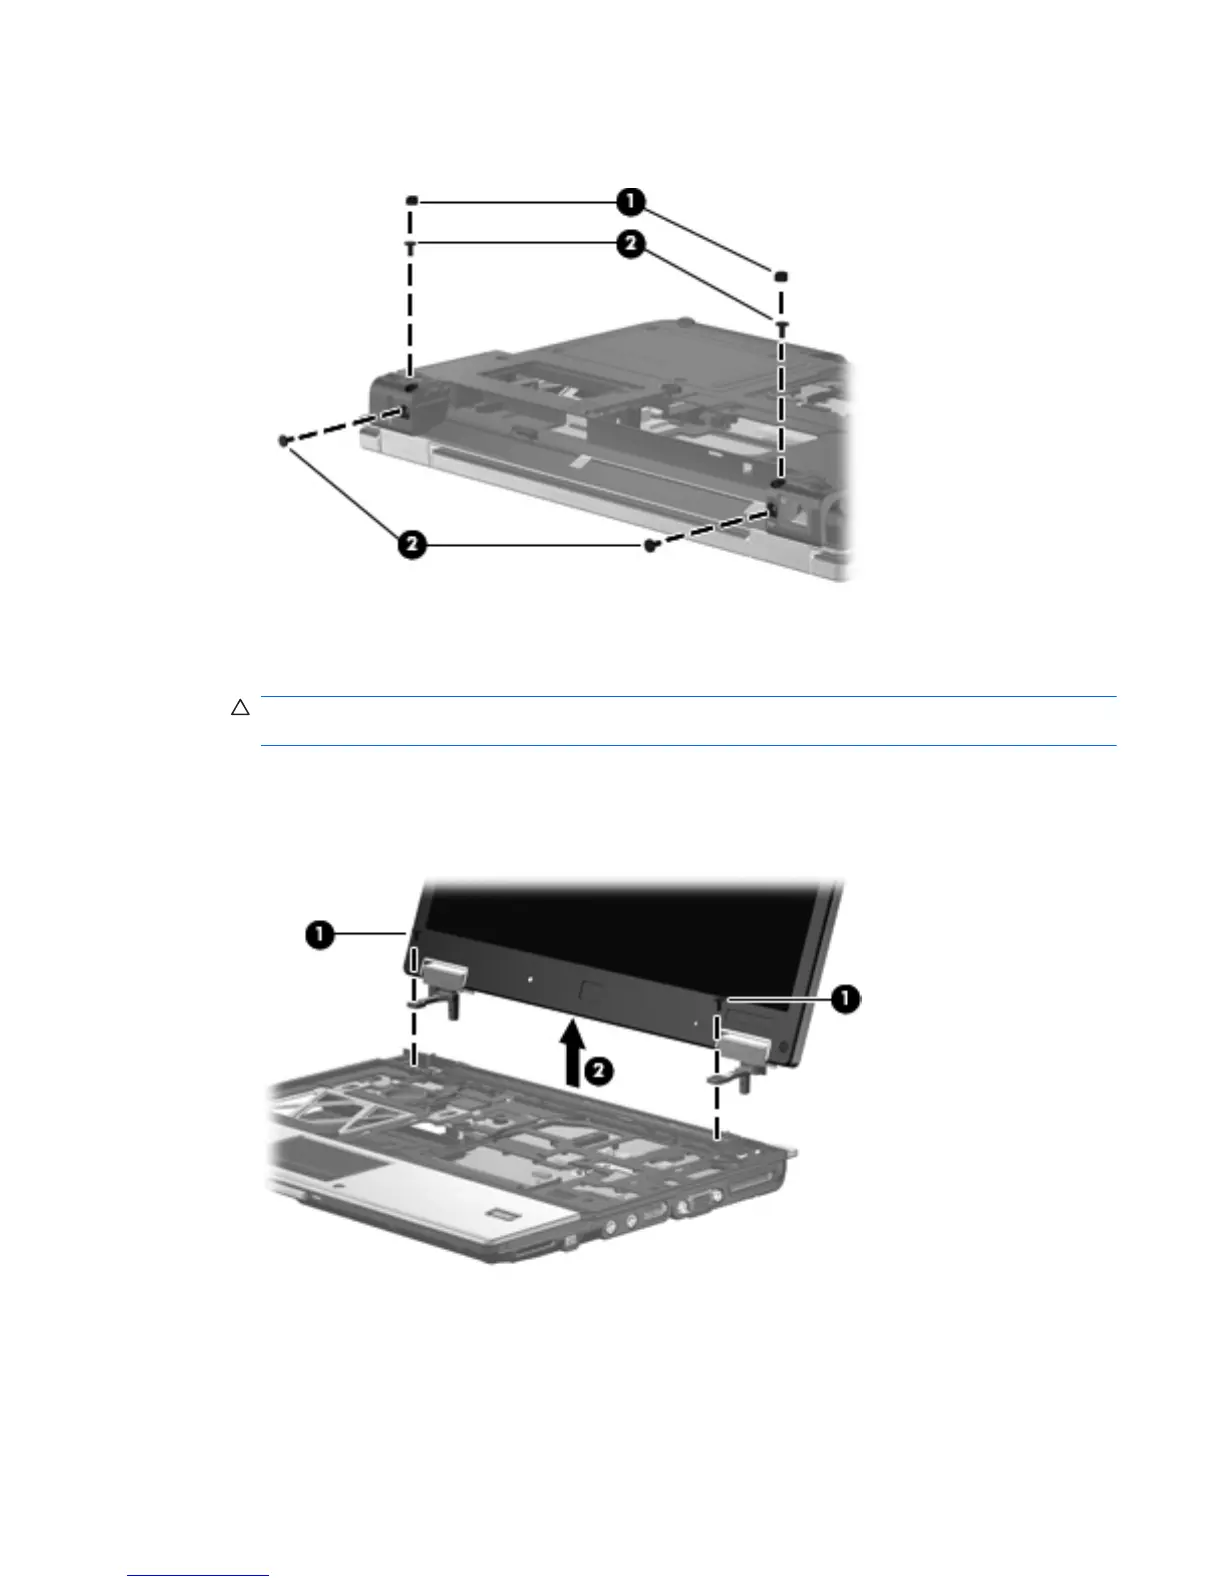
7. Remove the two Mylar screw covers (1) and the four Torx T8M2.0×6.0 screws (2) that secure
the display assembly to the computer.
8. Turn the computer right-side up, with the front toward you.
9. Open the computer.
CAUTION: The display assembly will be unsupported when the following screws are removed.
To prevent damage to the display assembly, support it before removing the screws.
10. Remove the two Torx8 T8M2.5×6.0 screws (one at each hinge) (1) that secure the display
assembly hinges to the computer.
11. Lift the display assembly straight up to remove it (2).
Component replacement procedures 75
 Loading...