EasyManuals Logo

HP 33120A Installation Instructions

HP 33120A
6 pages
To Next Page IconTo Next Page
To Previous Page IconTo Previous Page
Page #5 background imageLoading...
Page #5 background image
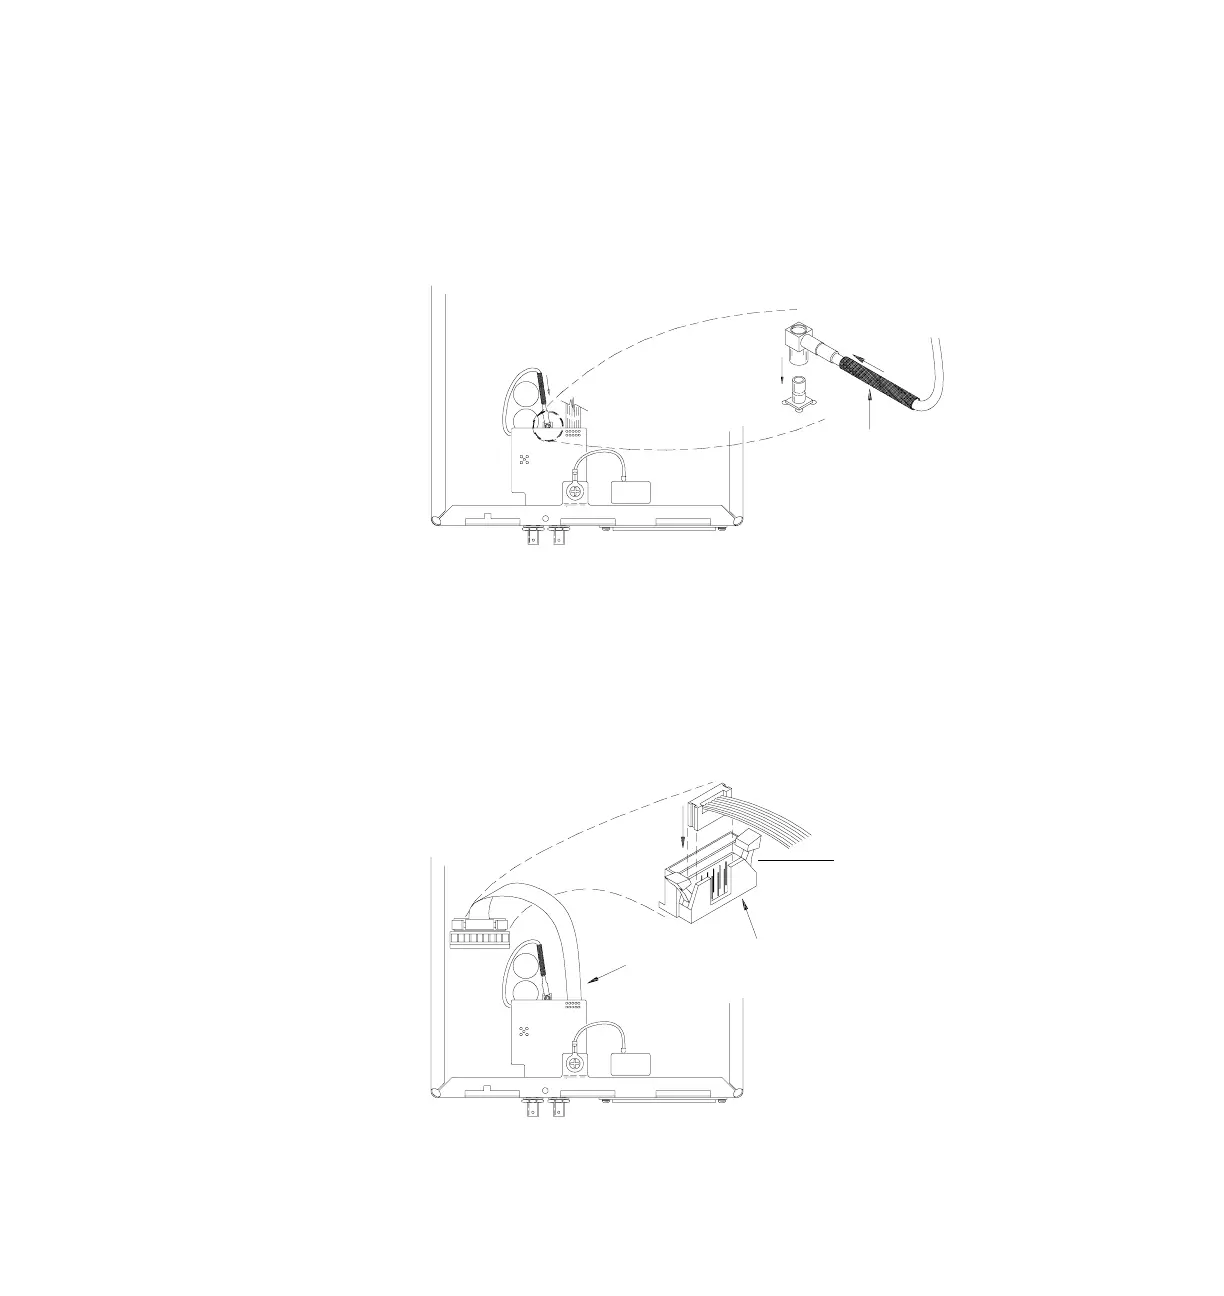
6 Connect the coaxial cable to
HP 33120A circuit board.
First, slide the black ferrite bead to the end of the coaxial cable as shown.
Then, connect the coaxial cable to connector J401 on the
HP 33120A
circuit board. Be sure to position the cable away from the heatsinks on
the circuit board.
7 Connect the ribbon cable to the
HP 33120A circuit board.
Connect the loose end of the grey ribbon cable to connector J102 on the
HP 33120A circuit board. Press down firmly on the ribbon cable
connector and secure the cable in place with the locking clips.
4
Ferrite Bead
J401
Ribbon
Cable
J102
Snap the Locking Clips
over the top of the connector
to secure the Ribbon Cable.

Other manuals for HP 33120A

Questions and Answers:

Question and Answer IconNeed help?

Do you have a question about the HP 33120A and is the answer not in the manual?

HP 33120A Specifications

General IconGeneral
Frequency Range100 µHz to 15 MHz
WaveformsSine, Square, Triangle, Ramp, Arbitrary
Amplitude Range10 mVpp to 10 Vpp into 50 Ohms
Output Impedance50 Ohms
InterfaceGPIB
Function Generator TypeArbitrary
Power Requirements100/120/220/240 VAC ±10%, 50/60 Hz, 60 VA max

Related product manuals