Section
VIII
SERVICE GROUP B
Model
3455A
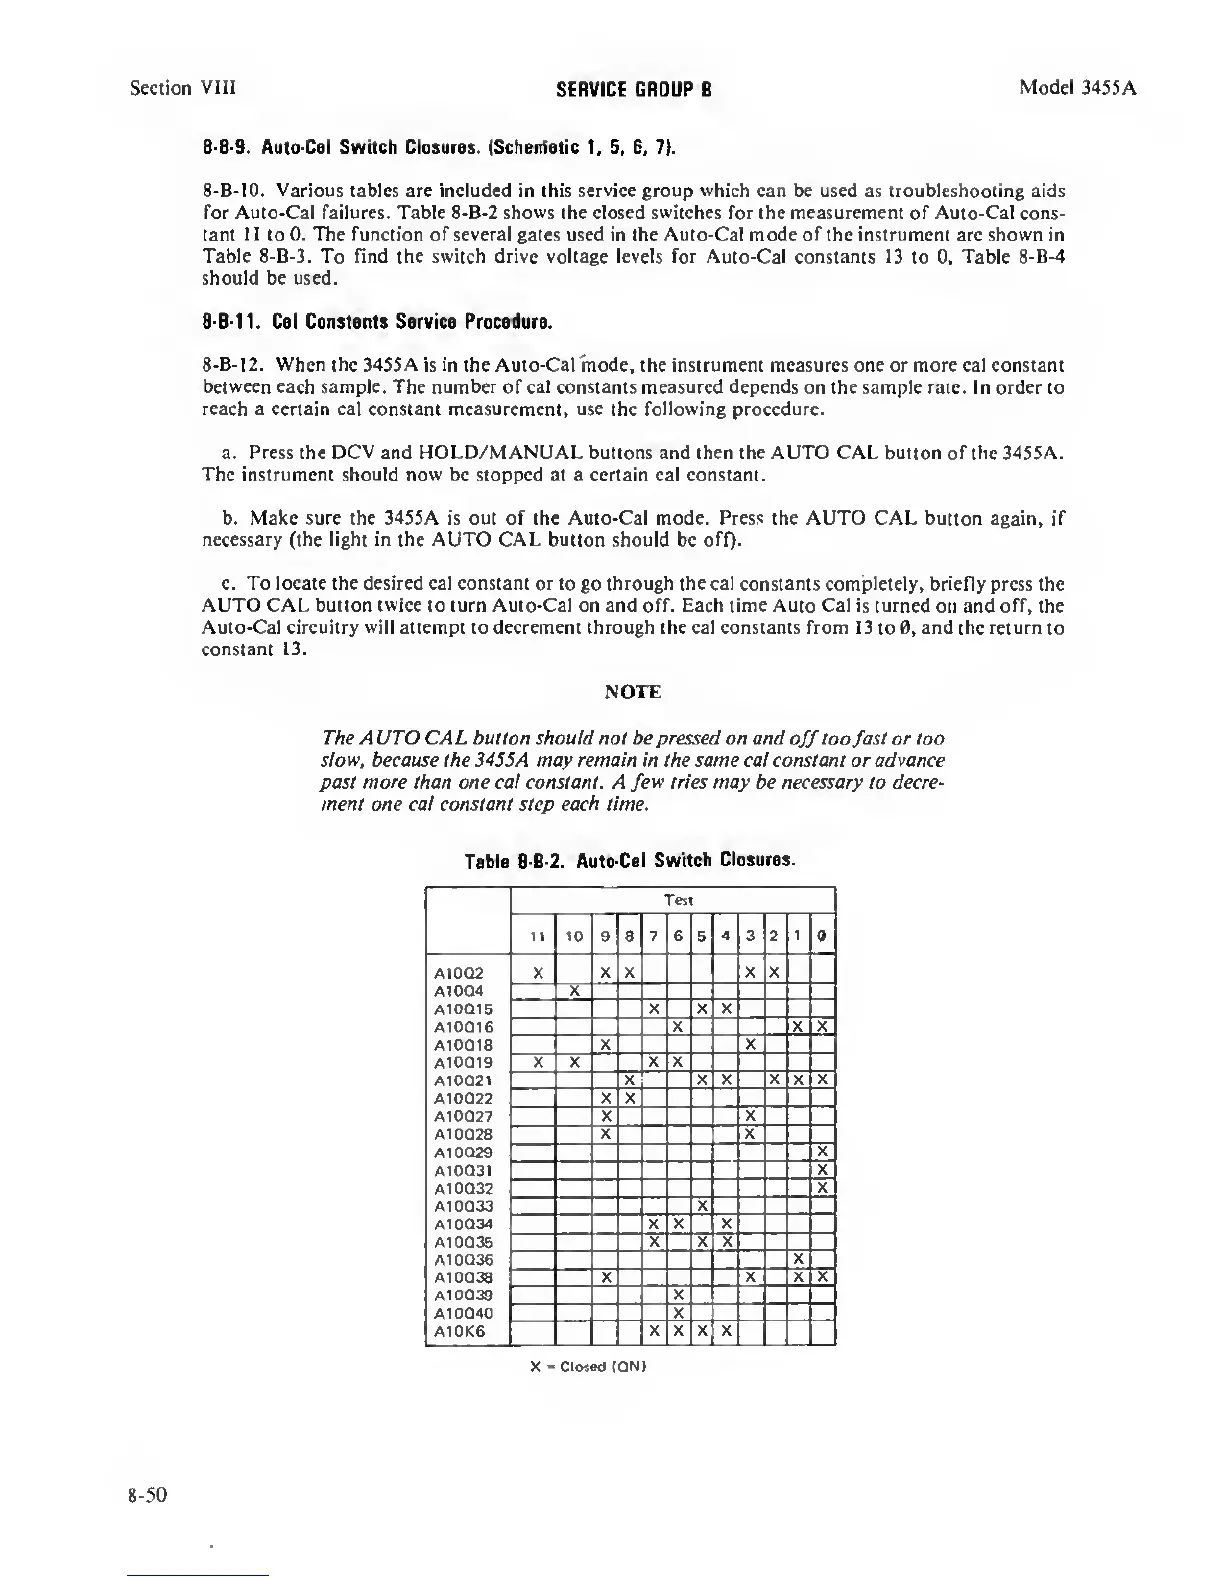
8 B-9. Auto Cal Switch Closures. (Schenfatic
1, 5, 6, 7).
8-B-lO.
Various
tables are included in this
service
group
which
can be used as troubleshooting aids
for Auto-Cal failures. Table 8-B-2
shows
the closed switches for the measurement of Auto-Cal cons-
tant
1
1 to
0. The function of several
gates used in the Auto-Cal mode
of
the instrument are shown in
Table 8-B-3. To find the switch drive voltage levels for Auto-Cal constants 13
to
0,
Table 8-B-4
should be used.
B-B-11. Cal Constants Service Procedure.
8-B-12.
When
the 34S5A is in the Auto-Cal mode, the instrument measures one or more cal constant
between each sample.
The
number
of cal constants measured
depends
on the sample rate. In order to
reach a certain
cal constant measurement, use the
following
procedure.
a. Press the
DCV
and HOLD/MANUAL buttons and then the AUTO CAL button of the 3455A.
The
instrument should
now
be stopped at a certain cal constant.
b. Make sure the 34SSA is out of the Auto-Cal mode. Press the AUTO CAL button again, if
necessary (the light in the AUTO CAL
button should be ofO-
c. To locate the desired cal constant or to
go
through the cal constants completely, briefly
press the
AUTO CAL button
twice
to turn Auto-Cal on and off. Each time Auto Cal is turned
on and
off,
the
Auto-Cal circuitry
will
attempt to decrement through the cal constants from 13
to0,
and the return
to
constant 13.
NOTE
The A UTO CAL button should not be pressed on and
off
too
fast
or loo
slow,
because the3455A may remain in the same cal constant or advance
past more than one cal constant. A few tries may be necessary to decre-
ment one cal constant step each time.
Table
6
B-2. Auto
Cal
Switch Closures.
Test
11
ID 9 8 7
6
5
4
3 2 1
9
A10Q2 X X
X X X
A
1004
“3^
A10Q1S
X X X
A10Q16
X X X
A10Q18
X X
A10O19 X X
X X
A10O21
1
it X X X X
X
A
10023 X X
A10Q27 X
X
A10O28
X X
A10O29
X
A10Q31
X
A
10032
X
A10Q33
X
A10O34
X X
X
A10Q3B T
It X
A10O36 X
A 10038 X
X X X
A10Q39
X
A10040
X
A10K6
X X
5
X
X
-
Closed (ON)
8-50