START HERE
1. Check the Power-On Sequence
See the INSPECT THE POWER-ON SEQUENCE in the chapter 6 for checking the Power-On
Sequence.
Check the
4
Ch 1
5
and
4
Ch 2
5
Operations
a. Press
4
Ch 1
5
and
4
Ch 2
5
alternately.
b. Check that the two LEDs alternately light each time you press the keys.
If both LEDs would not light, continue with the next
Check the A1 Eight LEDs.
If the two LEDs do not alternately light (the
4
Ch 1
5
LED is still lit even if pressing the
4
Ch 2
5
), the A1 CPU is probably faulty. Replace the A1 CPU.
If the two LEDs alternately light each time you press the keys, the A1 CPU is probably
working properly. Continue with the
TROUBLESHOOT THE A51 GSP AND A52 LCD
in
this chapter.
Check the A1 Eight LEDs
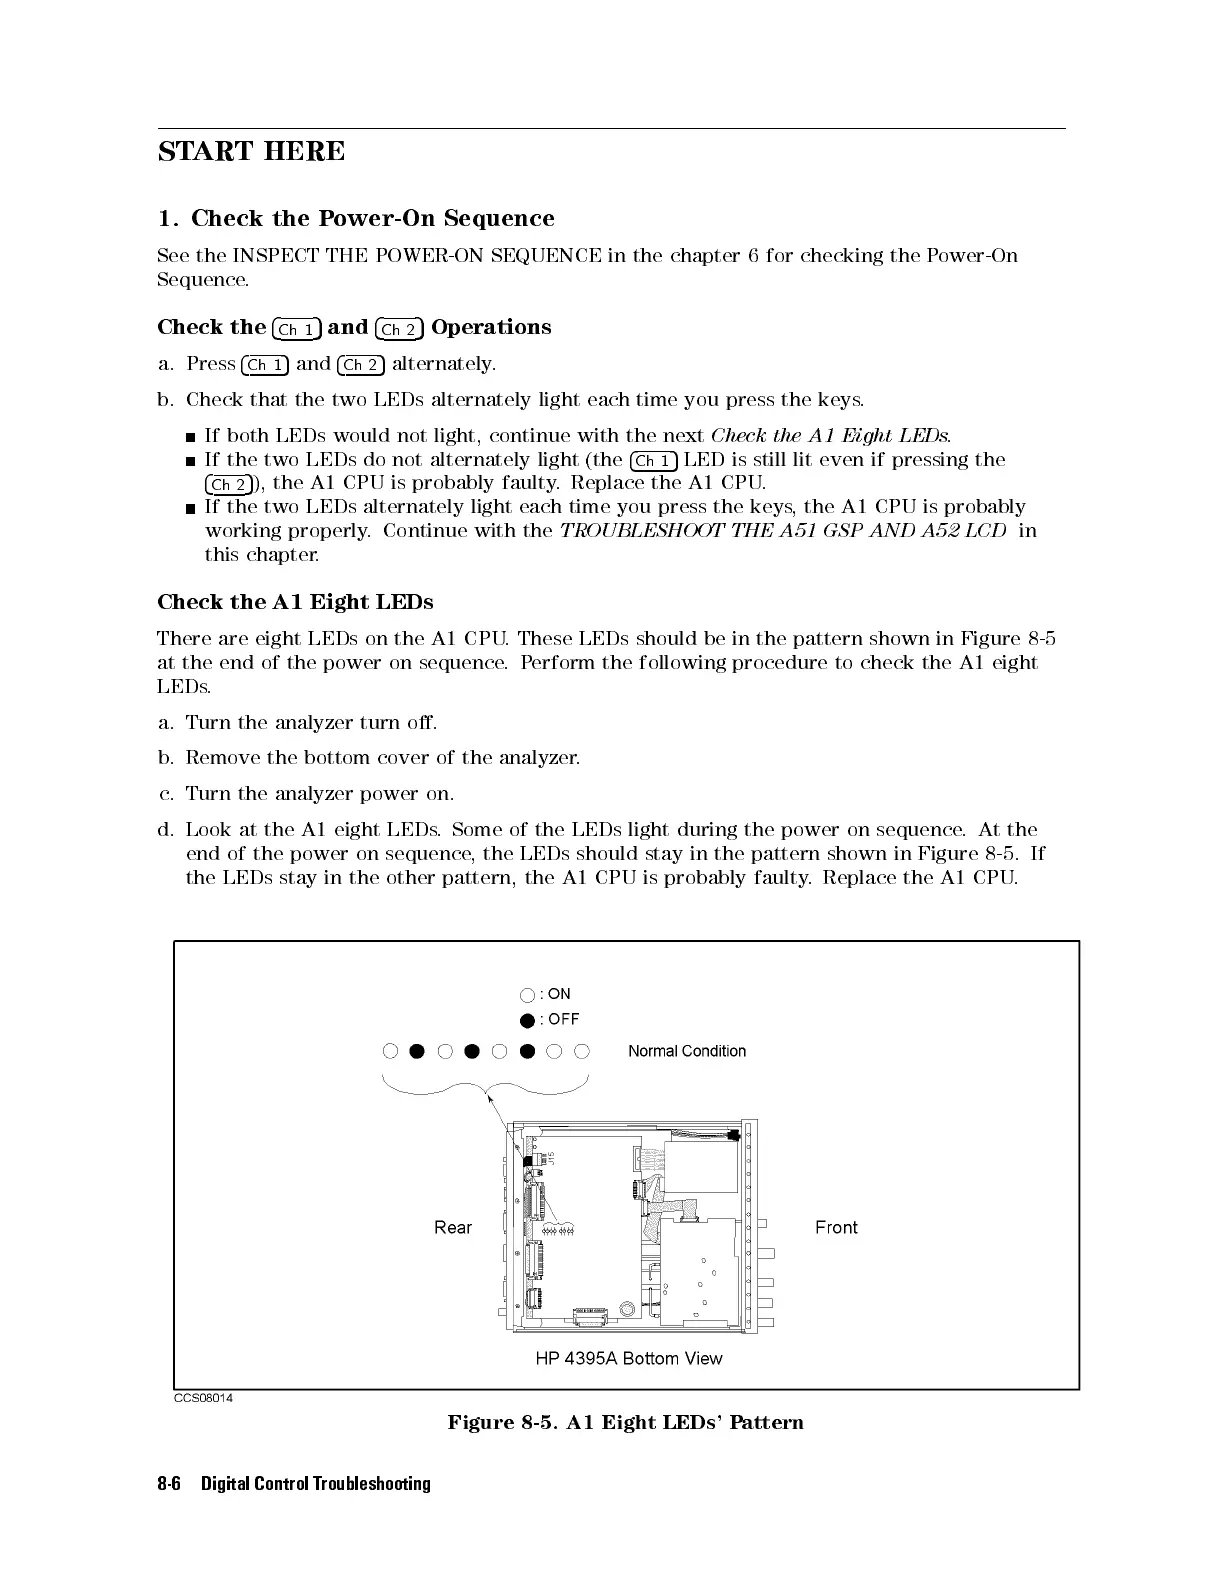
There are eight LEDs on the A1 CPU. These LEDs should be in the pattern shown in Figure 8-5
at the end of the power on sequence.Perform the following procedure to check the A1 eight
LEDs.
a. Turn the analyzer turn o.
b. Remove the bottom cover of the analyzer.
c. Turn the analyzer power on.
d. Look at the A1 eight LEDs. Some of the LEDs light during the power on sequence
. At the
end of the power on sequence, the LEDs should stay in the pattern shown in Figure 8-5. If
the LEDs stay in the other pattern, the A1 CPU is probably faulty
. Replace the A1 CPU.
Figure 8-5. A1 Eight LEDs' Pattern
8-6 Digital Control Troubleshooting
 Loading...