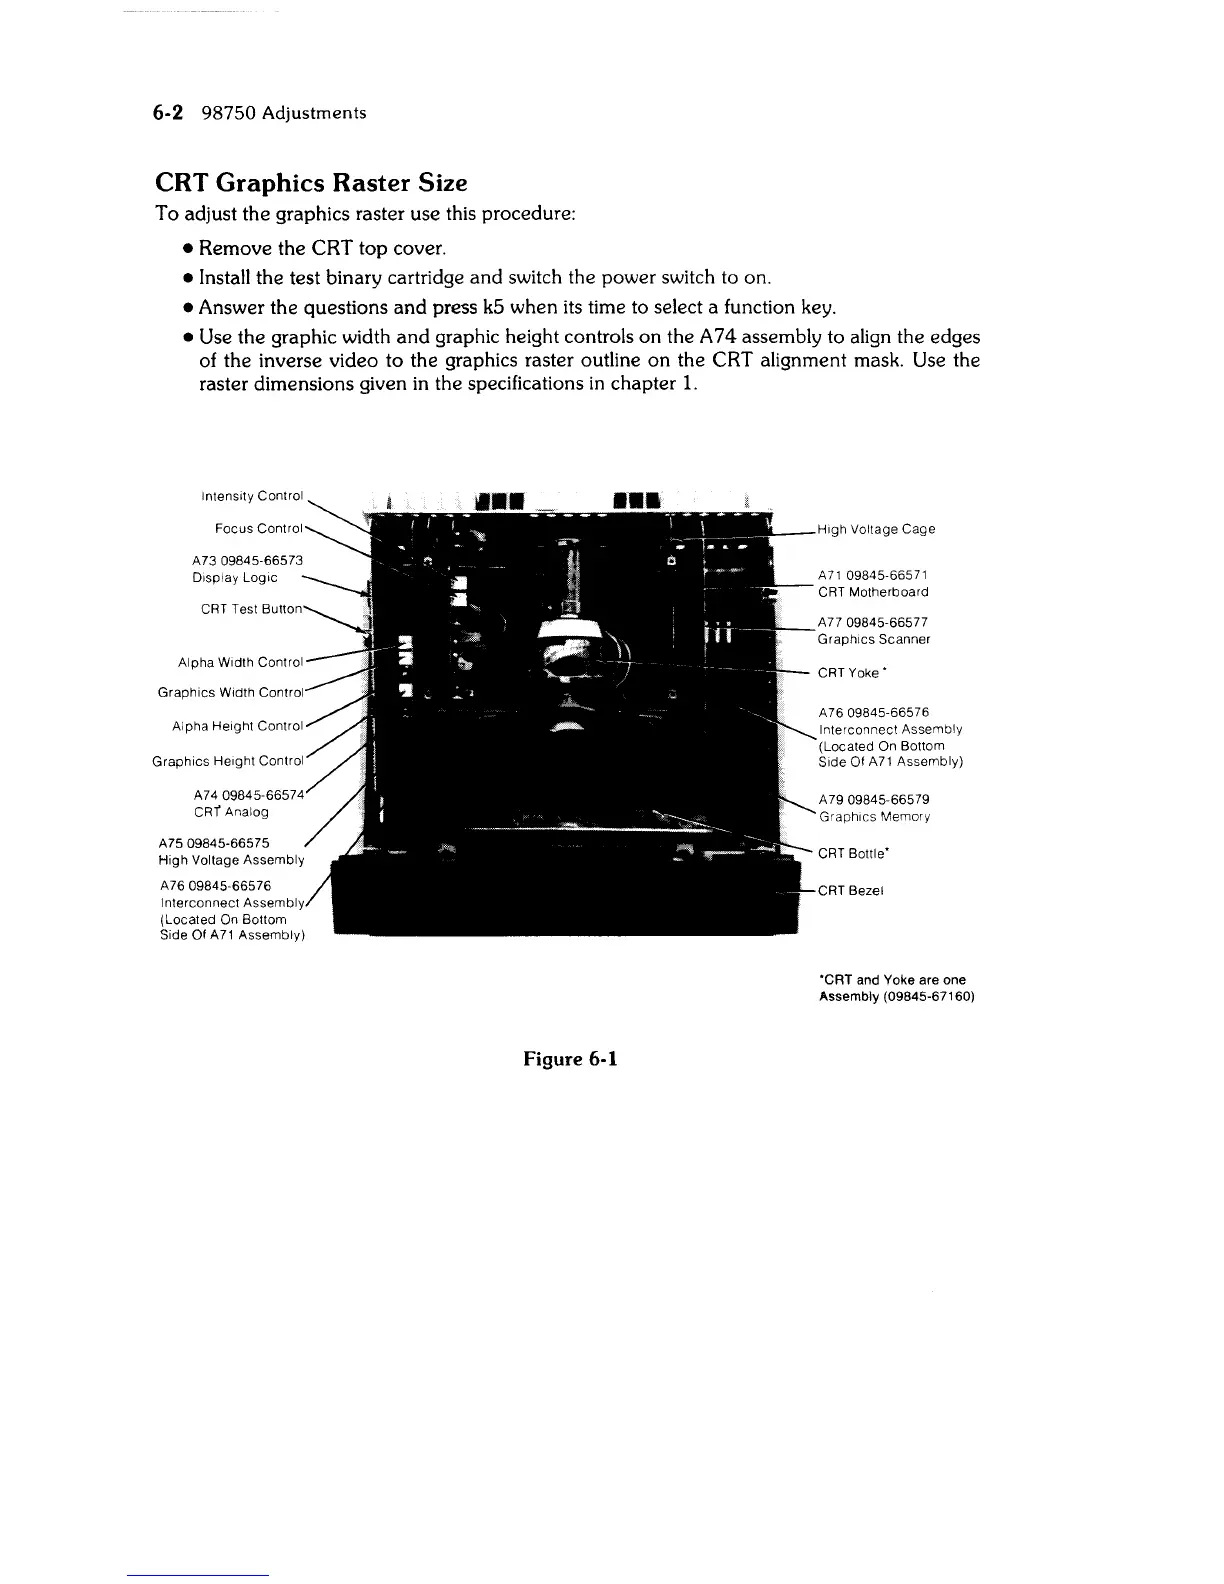
6-2 98750 Adjustments
CRT
Graphics Raster Size
To adjust
the
graphics raster use this procedure:
• Remove the CRT top cover.
• Install the test binary cartridge and switch the power switch to on.
• Answer the questions
and
press k5 when its time to select a function key.
• Use the graphic width
and
graphic height controls on the A 7 4 assembly to align the edges
of the inverse video to the graphics raster outline on the CRT alignment mask. Use the
raster dimensions given in the specifications
in
chapter
1.
Display
Logic
CRT Test
Graphics
Height
Control
A7409845-66574
CRr
Analog
A7509845-66575
High
Voltage Assembly
A7609845-66576
Interconnect
Assembl
(Located On Bottom
Side
Of
A71
Assembly)
Figure 6-1
High Voltage
Cage
A
71
09845-66571
CRT
Motherboard
A77 09845-66577
Graphics
Scanner
CRT
Yoke'
A 76 09845-66576
Interconnect Assembly
(Located On Bottom
Side Of
A71
Assembly)
A7909845-66579
GraphiCS Memory
CRT
Bottle'
CRT Bezel
'CRT
and Yoke are one
Assembly (09845-67160)