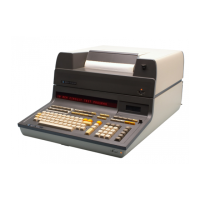
6-2
9825A
B
Adjustments
9825A/B
System
Clock Frequency Adjustment
CAUTION
THE CLOCK
IS
SET AT THE FACTORY; IT
IS
NOT NORMALLY
ADJUSTED IN THE FIELD. IT
IS
NOT TO
BE
ADJUSTED INDIS-
CRIMINATELY. IF THE
CLOCK
FREQUENCY EXCEEDS ITS
TOLERANCE. ERRATIC
OPERA
nON
PRODUCING RANDOM
ERRORS
COULD RESULT.
The
following tools
are
needed
for adjusting the system clock:
Alignment tool.
Frequency
counter.
l.
Measure
the
clock frequency
at
the
"01"
test point using the counter.
2. Adjust
the
clock frequency to
6.0
MHZ
plus
or
minus 0.1
MHZ.
Note
If a
counter
is
not
available, key in
and
run this program:
0:
dsp
I;
wait
10780;
beep;
JMP
(1+10->1)=60
1:
beep;
IAlait
100;
beep;
dsp
"DONE'"
end
This
program
will
beep
every
10
seconds
if
clock frequency
is
6.0
MHZ.
The
double
beep
should
occur
at
60
seconds, plus
or
minus 1 second.
9825A1B
Printer Adjustments
The folloWing tools
are
needed
for printer adjustments:
1
Printhead
Alignment Fixture
2
Printhead
Alignment Tool
1 1116 inch
hex
wrench
1 Adjustment Gage.
··GO··
1 Adjustment Gage,
"NO-GO"
1 Small bottle of
enamel
paint
1
1/8
inch flat tip screwdriver
9825A/B
Print
Head
Alignment:
98240-67901
8710-0693
8750-0350
8750-0351
Install printer on alignment fixture. load
paper
in
printer.
2.
Loosen
set
screws with
116"
hex wrench.
3. Turn
on
9825
and
fixture. insert alignment tools
in
holes.
4.
Adjust print
head
until print across
paper
is
darkest
and
even.
5.
Turn
off fixture
and
tighten set screws.
don't
overtighten.
6.
Turn
on
fixture
and
verify print quality.