982SAlB
Adjustments
6-3
9825A/B
Paper
Advance Adjustment:
1.
Install printer
on
alignment fixture, load
about
6 feet of paper.
2.
Turn
on
9825
and
fixture
and
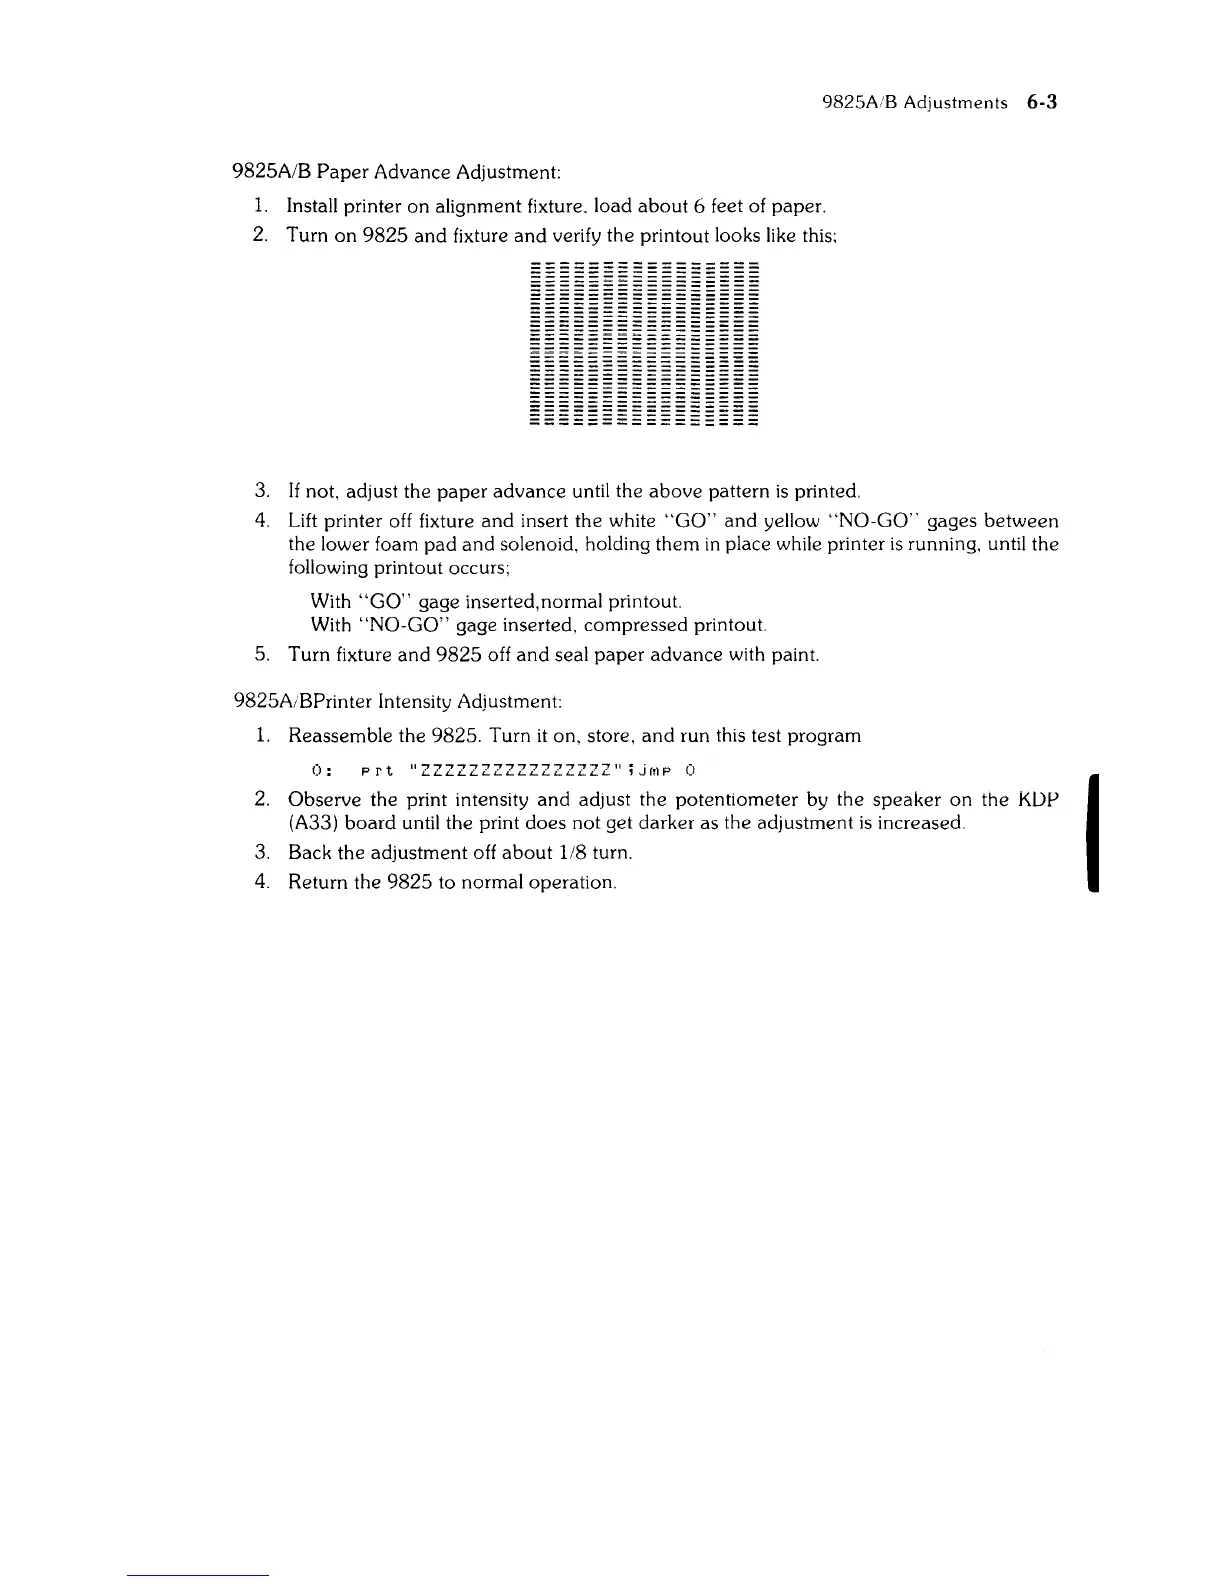
verify the printout looks like this:
IIIIIII111111111
3.
If not, adjust the
paper
advance
until the
above
pattern
is
printed.
4.
Lift printer off fixture
and
insert the white
"GO"
and
yellow
"NO-GO"
gages
between
the lower foam
pad
and
solenoid, holding
them
in
place while printer
is
running, until
the
following printout occurs;
With
"GO"
gage inserted, normal printout.
With
"NO-GO"
gage inserted,
compressed
printout.
5.
Turn fixture
and
9825
off
and
seal
paper
advance
with paint.
9825AiBPrinter IntenSity Adjustment:
1.
Reassemble the 9825. Turn
it
on, store,
and
run this test program
0:
prt
UZZZZZZZZZZZZZZZZII
;JfrlP
0
2.
Observe
the print intensity
and
adjust the potentiometer by the
speaker
on
the
KDP
(A33)
board
until the print
does
not
get darker as the adjustment
is
increased.
3.
Back the adjustment off
about
1/8 turn.
4. Return the
9825
to normal operation.
I