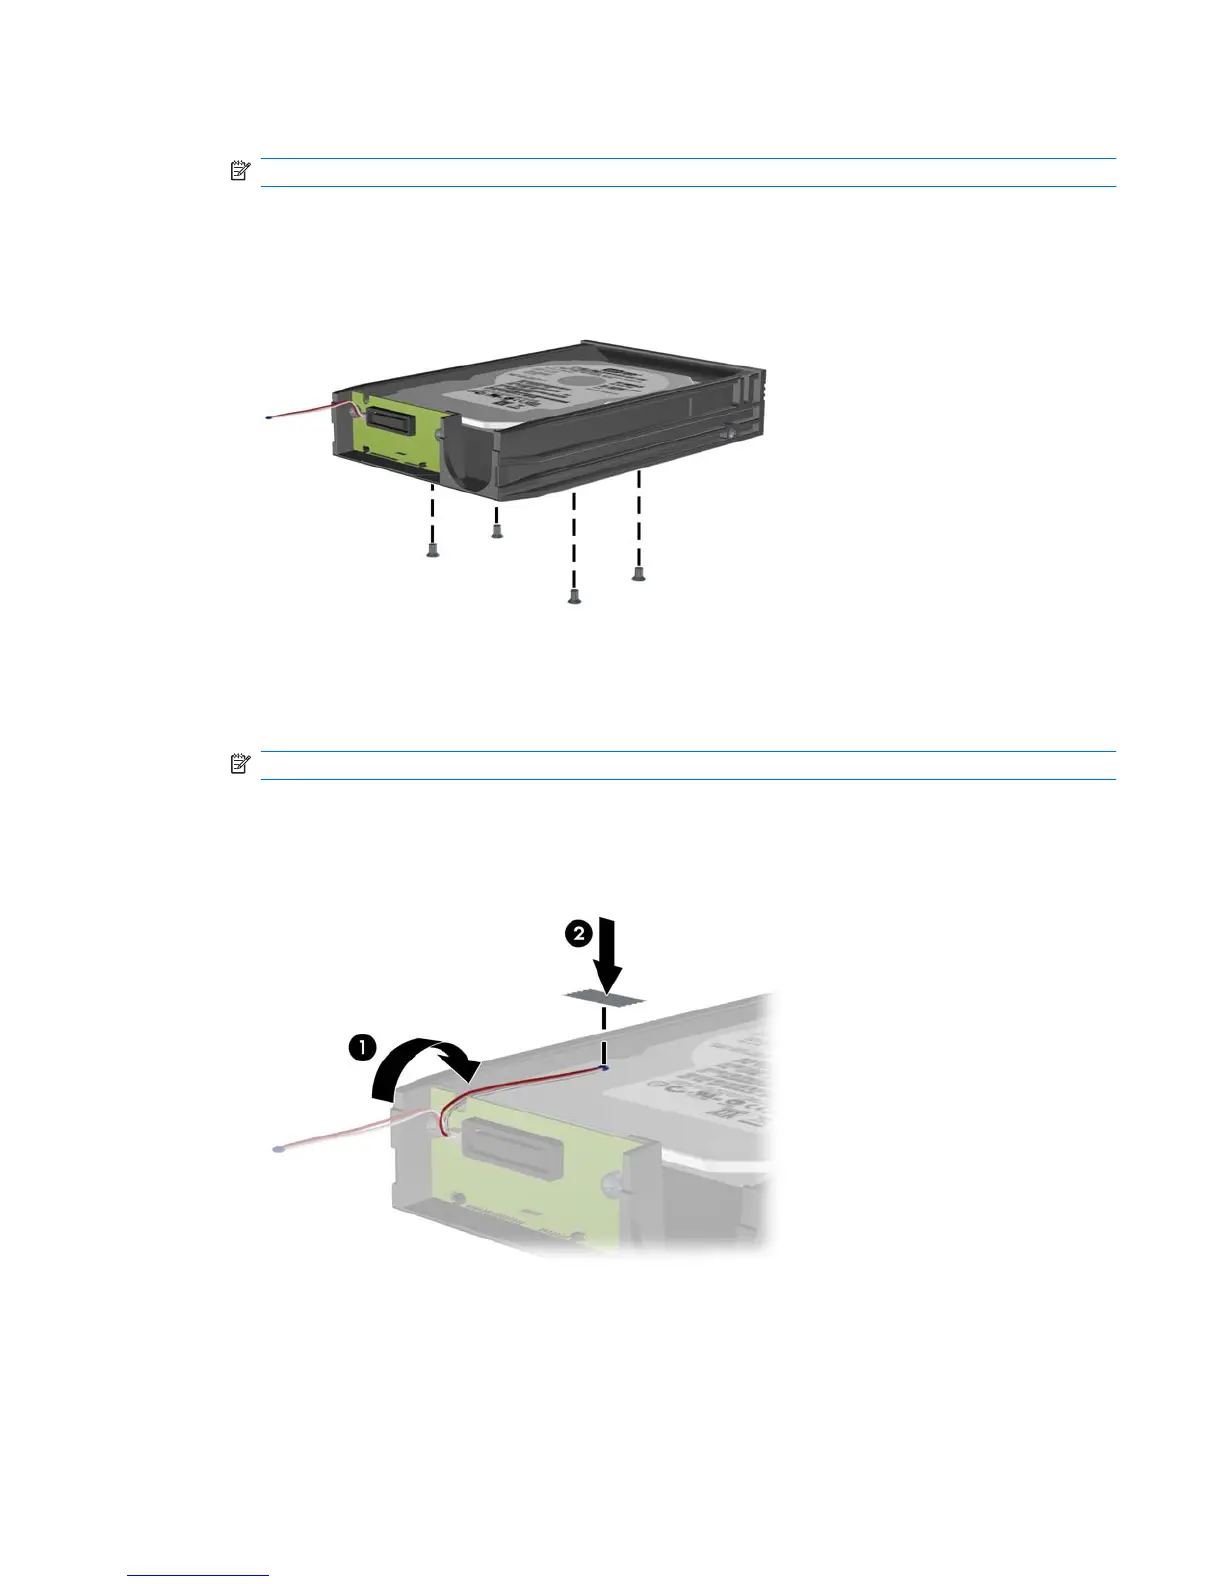
7. Replace the four screws in the bottom of the carrier to hold the drive securely in place.
NOTE: Your computer may look different than the illustration shown below.
Figure 43 Replacing the Security Screws
8. Place the thermal sensor on top of the hard drive in a position that does not cover the label (1) and
attach the thermal sensor to the top of the hard drive with the adhesive strip (2).
NOTE: Your computer may look different than the illustration shown below.
Figure 44 Replacing the Thermal Sensor
ENWW Installing and Removing Drives 39
 Loading...