List the type and size of the tools that would typically be used to disassemble the product to a point where components
and materials requiring selective treatment can be removed.
Tool Description Tool Size (if
applicable)
Description #1 Phillips screwdriver
Description #2 Dikes
Description #3 Torx screwdriver T-15
3.0 Product Disassembly Process
3.1 List the basic steps that should typically be followed to remove components and materials requiring
selective treatment:
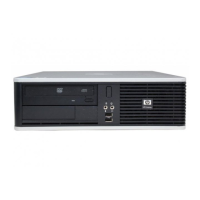
1 To remove the access panel, press the buttons on the left and right sides of the computer (1), slide
the access panel back until it stops, and then lift it up and off the chassis (2) (see Figure 1).
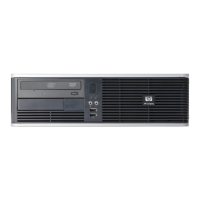
2 To remove the front bezel, lift up the green latch behind the upper right side of the bezel (1), pull the
right side of the bezel off the chassis (2), and then remove the bezel from the chassis (see Figure 2).
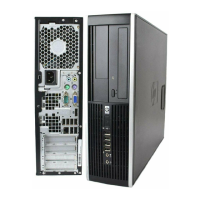
3 Remove or cut all expansion cards, cables, and any other devices from the system board.
4. To remove the system board (see Figure 3):
a. Remove the fan shroud from the chassis.
b. Rotate the drive cage to its upright position.
c. Rotate the power supply to its full upright position.
d. Disconnect all data and power cables from the system board.
e. Disconnect the serial port from the system board.
f. Remove the heatsink from the system board by loosening the four captive screws that secure the
heatsink to the system board, and then lifting the heatsink from the system board.
g. Remove the eight screws that secure the system board to the chassis (1).
h. Lift up the front of the system board (2), and then pull the system board forward, up, and out of the
chassis (3).
4 To remove the battery: Locate the battery and battery holder on the system board. Depending on the
type of battery holder on the system board, complete the following instructions to remove the battery. TYPE
1 BATTERY HOLDER (see Figure 4): Lift the battery out of the holder. TYPE 2 BATTERY HOLDER (see
Figure 5): To release the battery from its holder, squeeze the metal clamp that extends above one edge of
the battery. When the battery pops up, lift it out. TYPE 3 BATTERY HOLDER (see Figure 6): Pull back on
the clip that holds the battery in place, and then remove the battery.
6. To remove the power supply (see Figure 7):
a. Rotate the drive cage up and disconnect the power cables from all of the drives.
b. Disconnect the power cables from the system board.
c. Release the power supply cables from the cable retaining clips on the bottom of the chassis and
under the drive cage.
d. Rotate the power supply to its full upright position (1), pull the power supply forward (2), and then
lift the power supply straight up and out of the chassis (3).
7. HP uses four different power supply vendors. See the instructions below to disassemble and
remove required power supply components: POWER SUPPLY 1:
a. Using dikes, cut the two plastic clamps that secure the wires to the power supply covers (see
Figure 9).
b. Using a phillips screwdriver, remove the eight screws that secure the cover to the power supply
chassis - two screws
on back, four screws on the top, and two screws on the back (see Figures 8 & 9).
NOTE: You do not need to remove the screws from the fan guard or the power connector.

 Loading...