image quality
The Troubleshooting Procedure 17
to accept their alignment now. This procedure
requires a few centimeters of paper loaded and takes
several minutes to perform. (Note that you do not
have to interpret the patterns printed by the
Printhead Alignment routine.) See page 44 on the
reverse of this Pocket Guide.
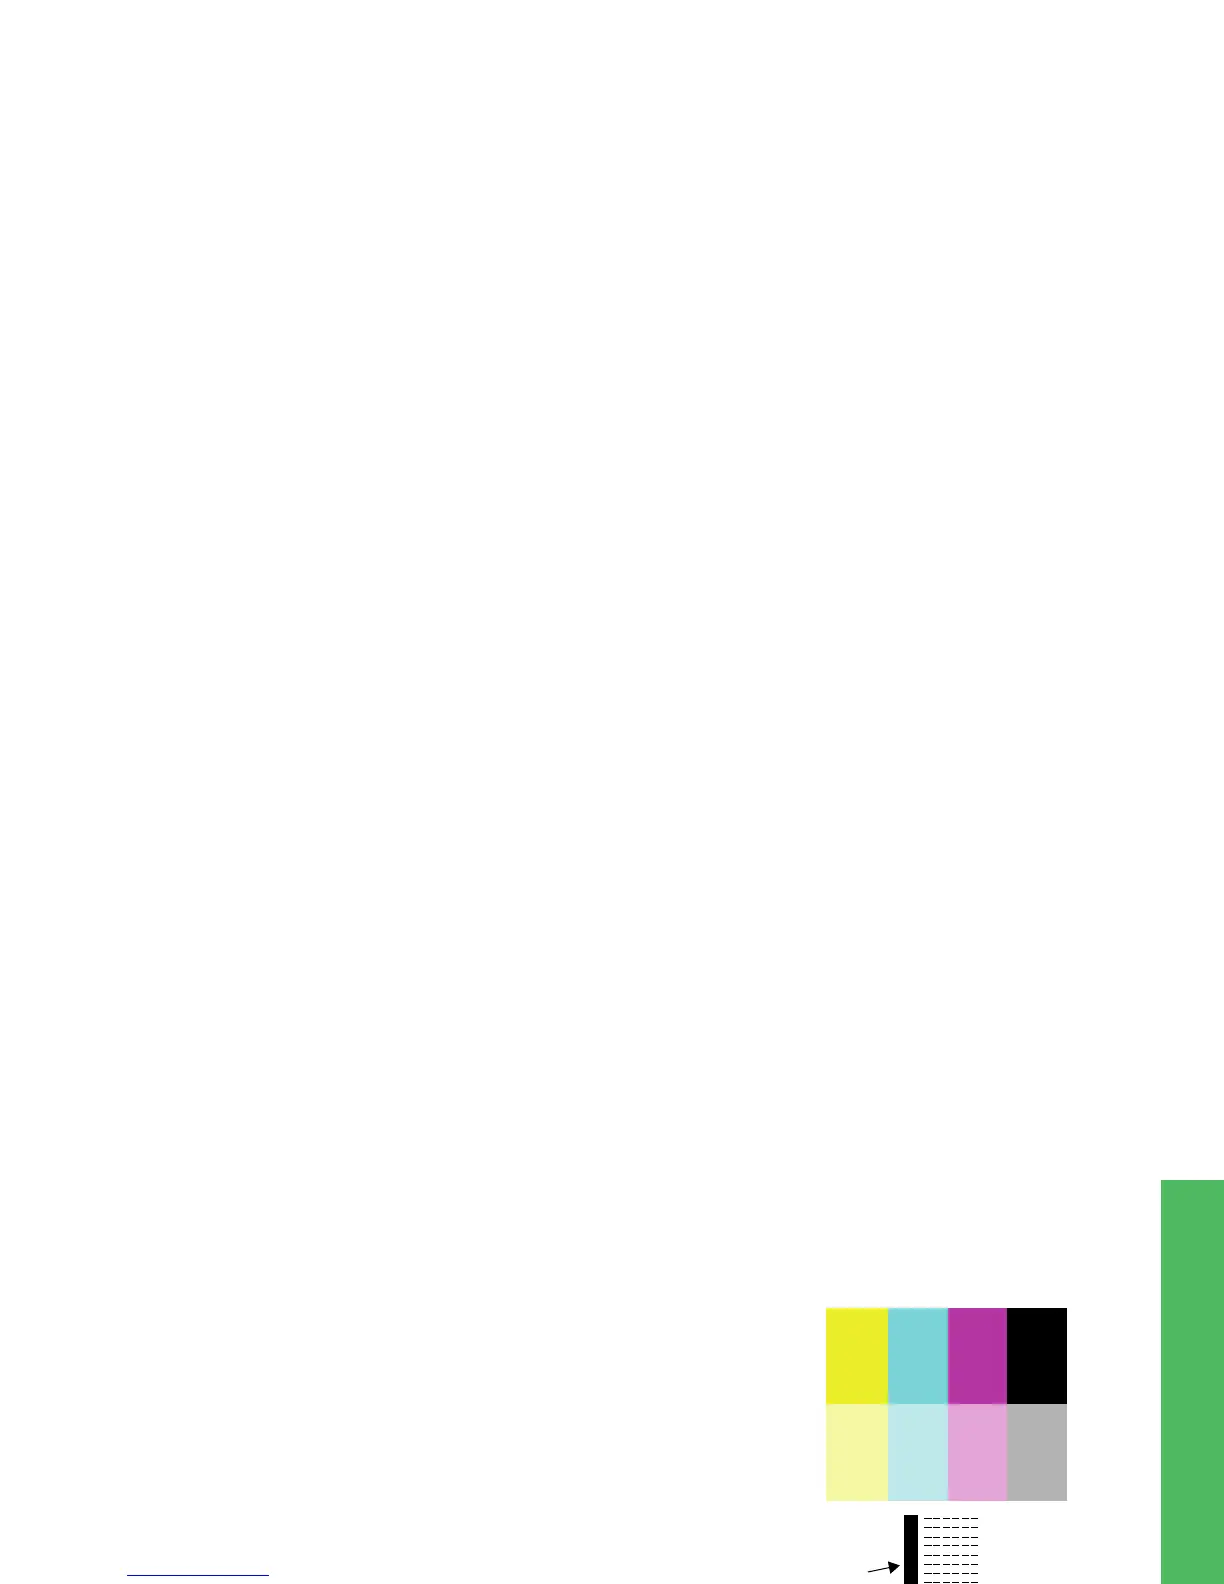
4 If the printheads do not seem to require alignment,
the printer prints Diagnostic Print A, several blocks
of color and a block of thin black broken lines (the
lines are actually very much closer than those
represented here).
5 Examine the broken lines in Diagnostic Print A
carefully and indicate whether there are problems
with them.
The sorts of problems to look for here are:
• Jaggedness or serrations in the thin lines, like
this: ;
the thin lines should be straight, though not
necessarily perfectly aligned.
The irregularities that are significant extend along
Diagnostic Print A
(Ignore this black bar)
 Loading...