6-126 HP Designjet T Series — Service Manual
Removal and Installation
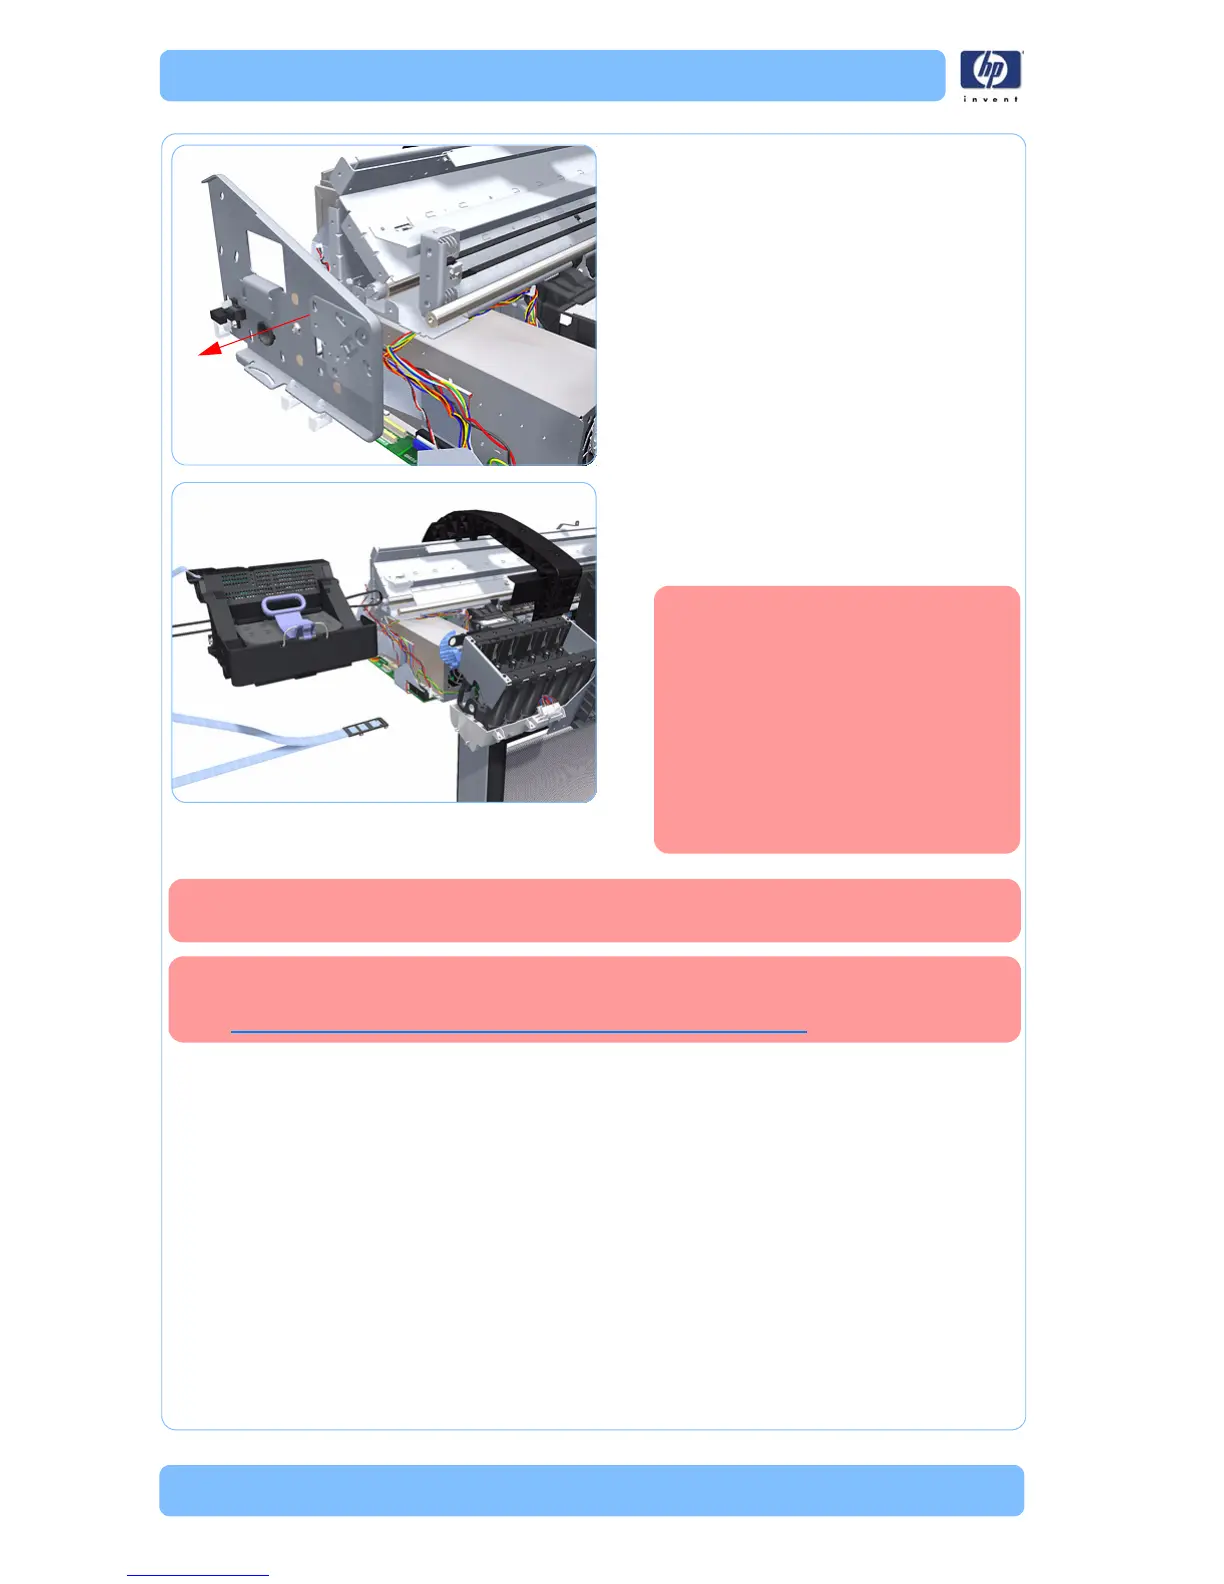
40.Remove the Scan Side Panel.
41. Carefully slide the Carriage Assembly and
Belt Assembly out of the printer (and the
Trailing Cable if you are removing it with
the Carriage Assembly).
Before you reinstall the
Carriage Assembly use an
alcohol dampened cloth to
remove all traces of residual
adhesive remaining from the
double sided pads removed
earlier before applying new
pads in the same positions as
the original pads.
When you reinstall the Carriage Assembly, take care not to damage the PRS
Slider.
When you finish installing or replacing this component, you must perform the
necessary Service Calibrations. To find which calibrations you must perform,
see Service Calibration Guide to Removal and Installation
on page 6-5.
Carriage Assembly without Trailing Cable
shown
 Loading...