HP Designjet T Series — Service Manual 6-205
Removal and Installation - Electronics Module Main PCA and PSU (T1120/T1120ps)
Electronics Module Main PCA and PSU (T1120/T1120ps)
Removal
1. Remove the Left Cover on page 6-30.
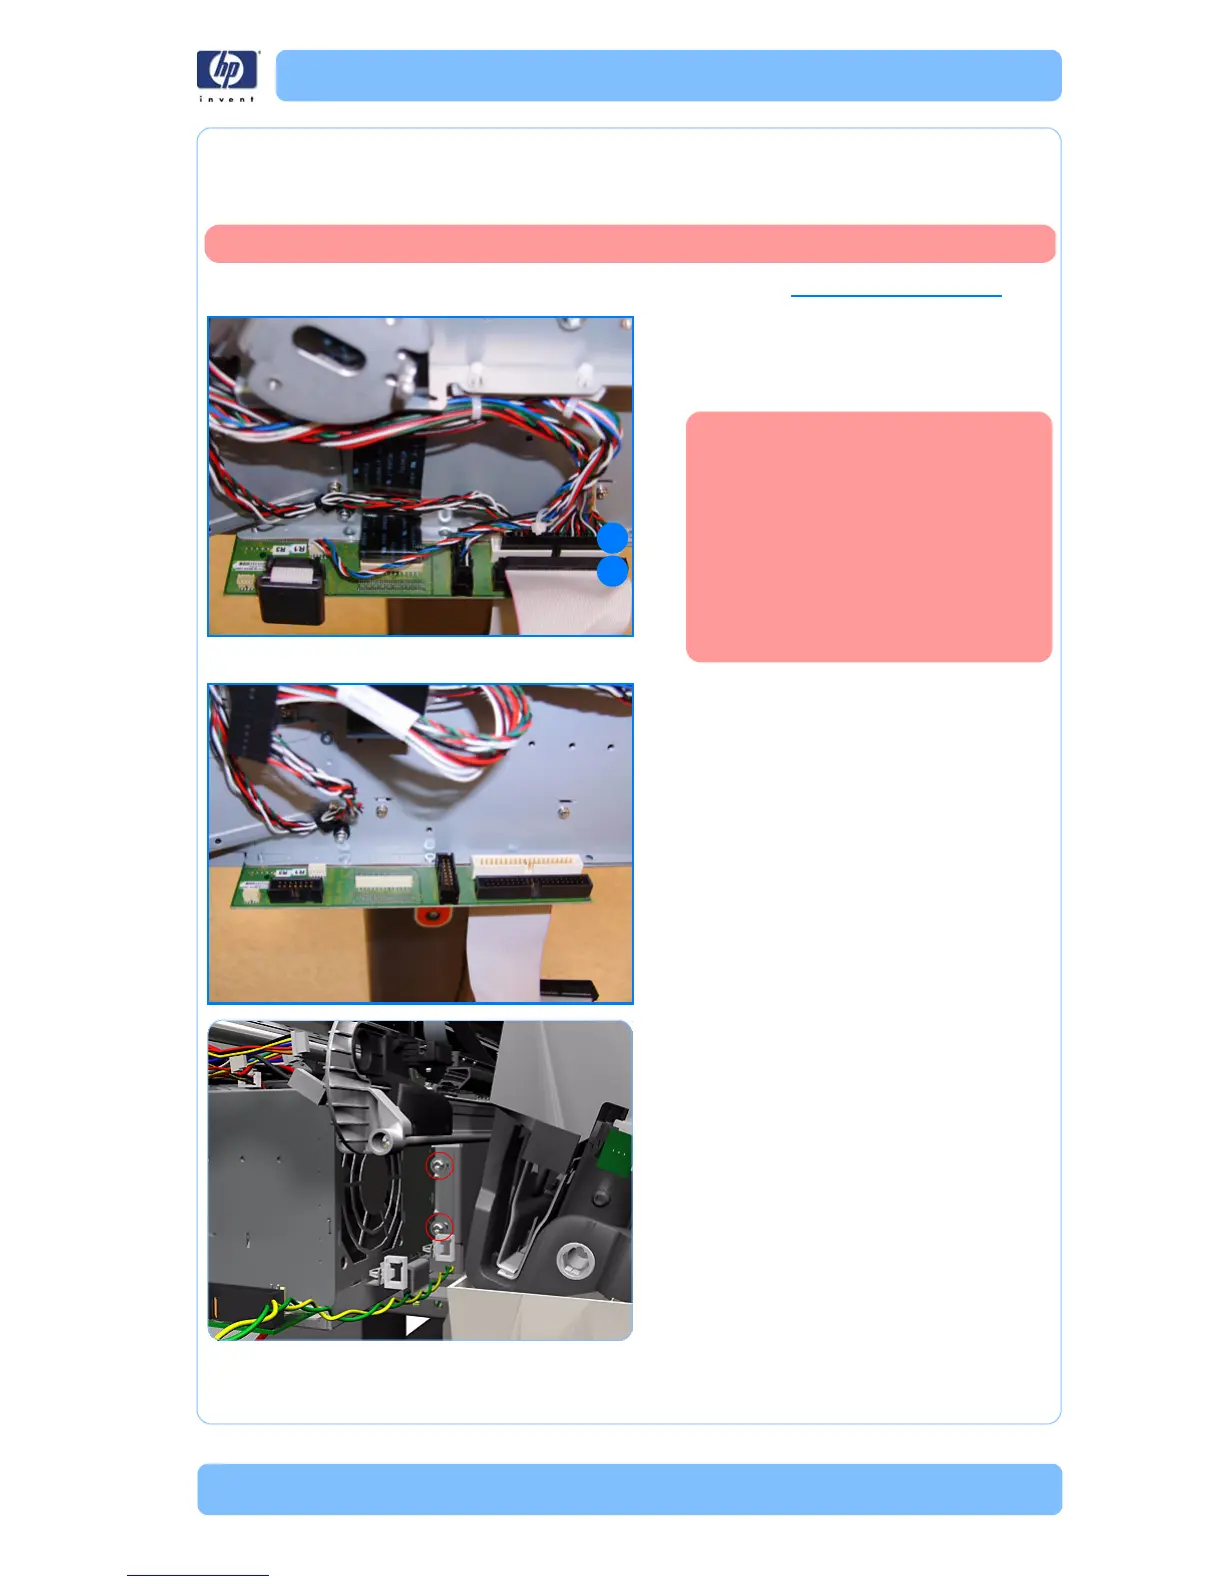
2. Disconnect all the connectors on the
Electronics Module. The ferrite on the left
will be located under the board, so take
care.
The two parallel connectors,
white (A) and black (B), on the
right of the board, cannot be
connected backwards or
swapped.
The harness cable (A) connects to
the white connector. The flat
cable (B)connects to the black
connector.
3. Unroute all the cables disconnected in the
previous step.
4. Remove two T-15 screws that secure the
Electronics Module to the Printer.
Switch off the printer and remove the power cable.
A
B
 Loading...