HP Designjet T Series — Service Manual 6-230
Removal and Installation - Pinchwheel Assembly
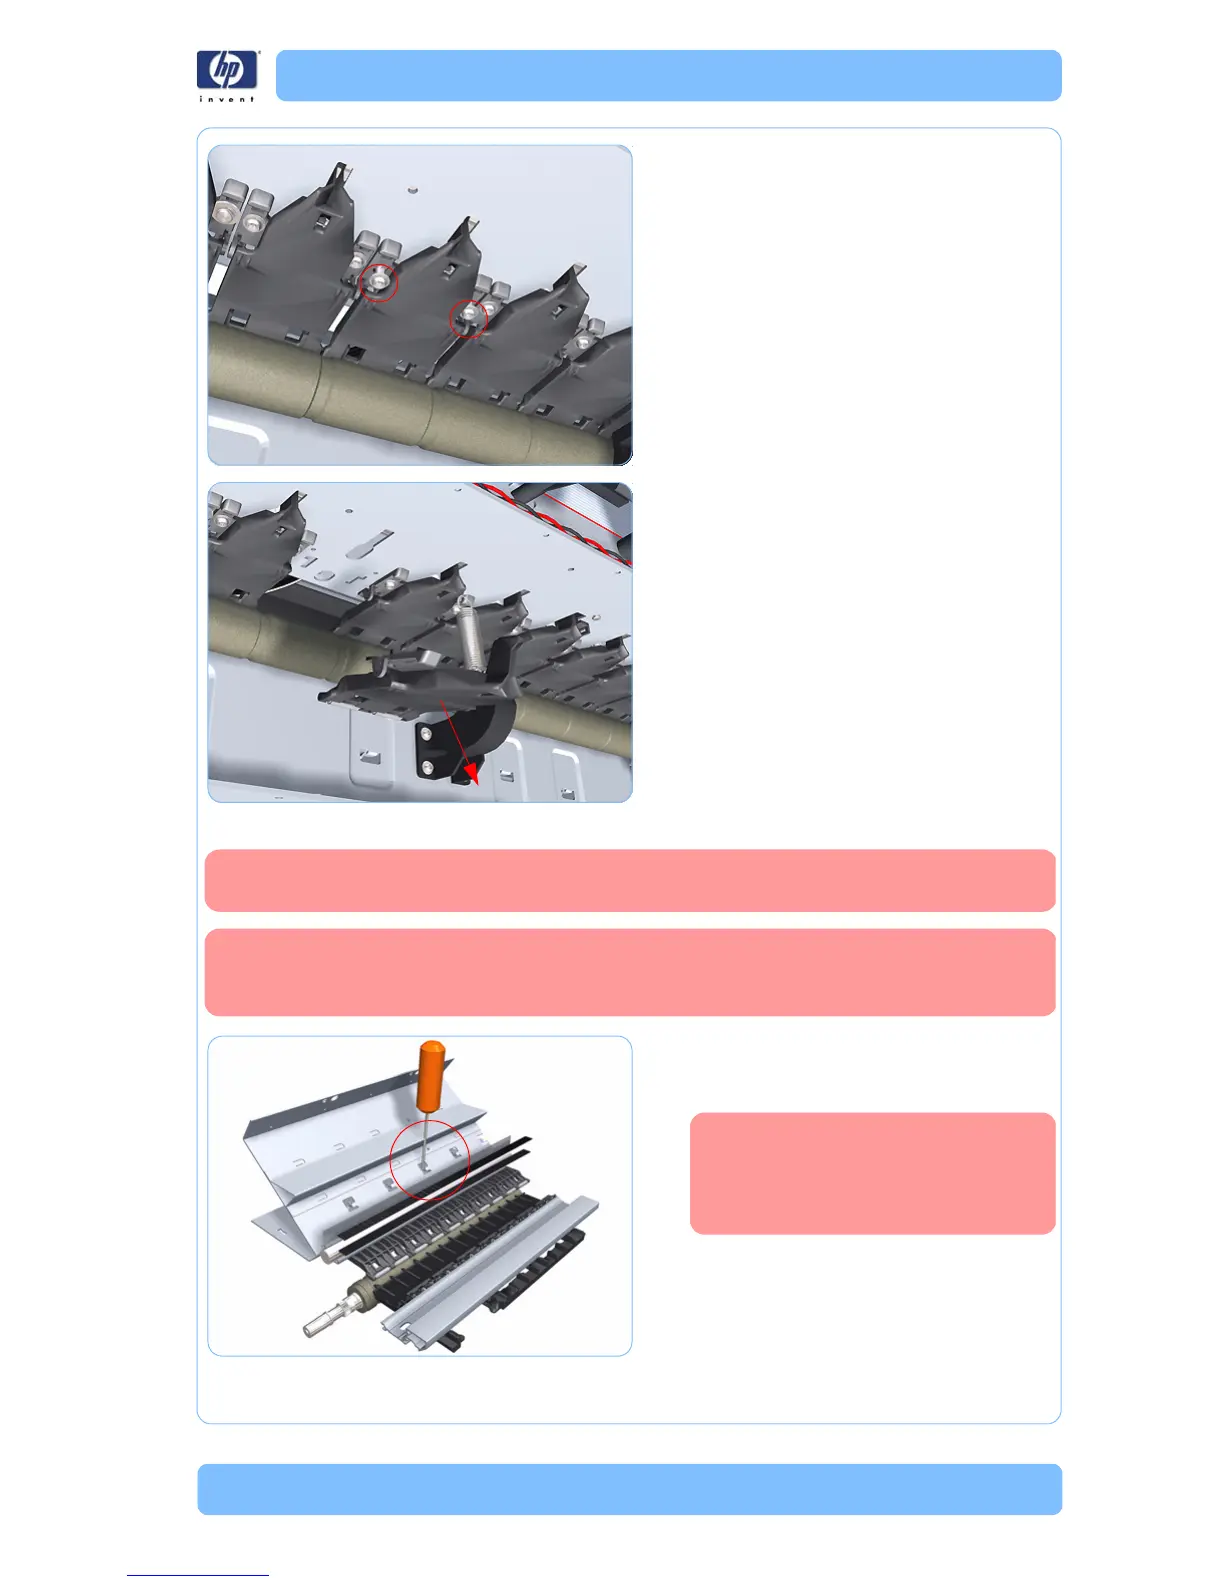
7. Remove two T-15 screws that secure the
Pinchwheel Assembly to the printer.
8. Remove the Pinchwheel Assembly from the
printer.
Installation
Use the following procedure to align the Pinchwheel Assembly using the
Pinchwheel Alignment Tool during reassembly
Never remove and replace all the Pinchwheel Assemblies at the same time. In
order to align a Pinchwheel Assembly, you need a minimum one Pinchwheel
Assembly correctly aligned by the manufacturer.
1. Insert the Pinchwheel Insertion Tool through
the appropriate access hole for the
Pinchwheel Assembly you are installing.
Be very careful not to damage
the Encoder Strip or the Belt
Assembly with the Pinchwheel
Insertion Tool.
 Loading...