HP LaserJet P2010 Series PCL – Printing
How do I Steps to perform
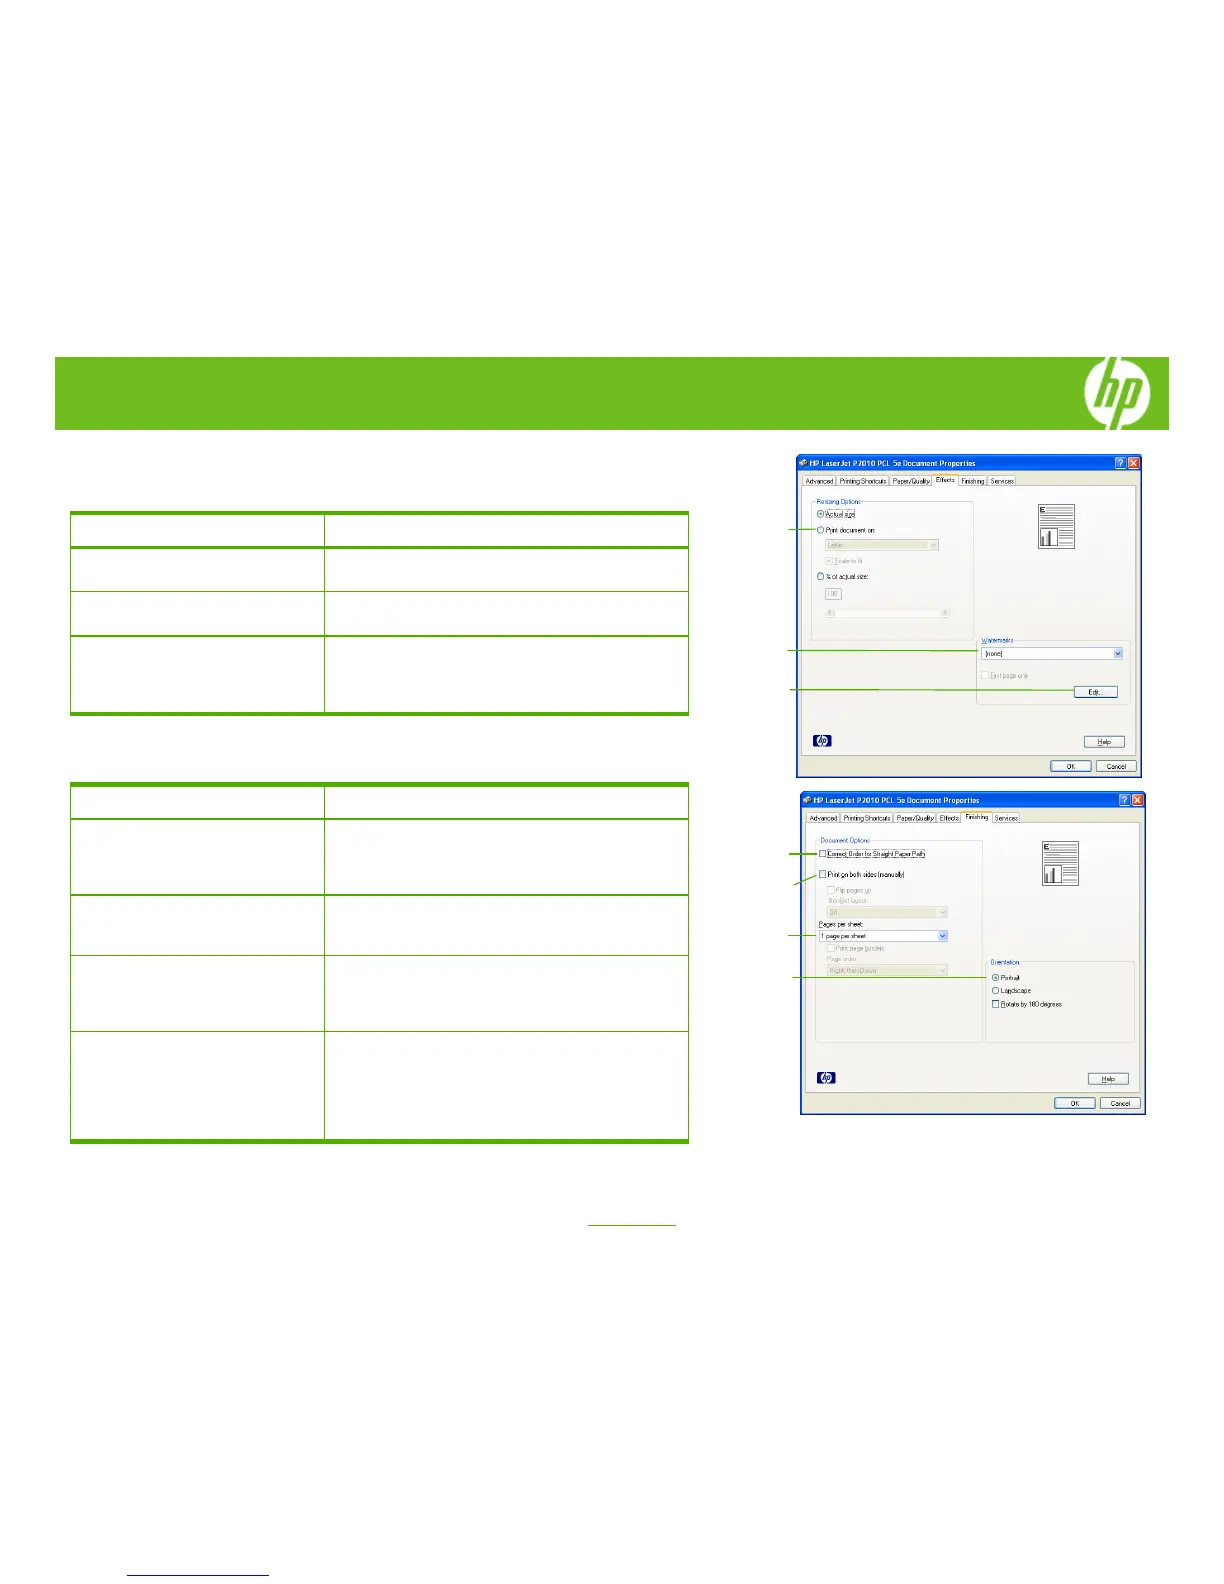
10 Scale a page to fit on a selected
paper size.
Click on the Effects tab, click on the Print Document
On, select a paper size, and then click Scale to Fit.
11 Print a watermark.
Click on the Watermarks drop-down menu, and then
select an existing watermark.
12 Add or edit watermarks (the printer
driver must be stored on your PC
for this to work).
Click Edit. Highlight an existing watermark and make
adjustments to its angle and font attributes. Click New to
add a new watermark, and then type in a new name.
Click OK to save the settings.
How do I Steps to perform
13 Correct order for straight paper
path.
Click on the Finishing tab, and then click Correct Order
for Straight Paper Path. This option corrects the order
of printed pages when printing to the straight-through
output path.
14 Print on both sides manually
(Duplex).
Click on the Finishing tab, and then click Print on Both
Sides (Manually). If you will bind the document along
the top, click Flip Pages Up.
15 Print multiple pages per sheet.
Select a number (between 1 and 16) in the Pages Per
Sheet drop down menu. Click Print Page Borders to
add a box around each printed page. You can also
change the Page Order.
16 Select page orientation.
Select an option in the Orientation box. In addition to the
Portrait and Landscape orientation options, you can
select the Rotate by 180 degrees check box. This
creates a landscape or portrait orientation in which the
image is rotated 180°.This setting is useful for printing
prepunched paper.
10
12
11
14
13
15
16
2
©2007 Copyright Hewlett-Packard
www.hp.com
Development Company, L.P.
 Loading...
