HP Smart Install
7
7
EN
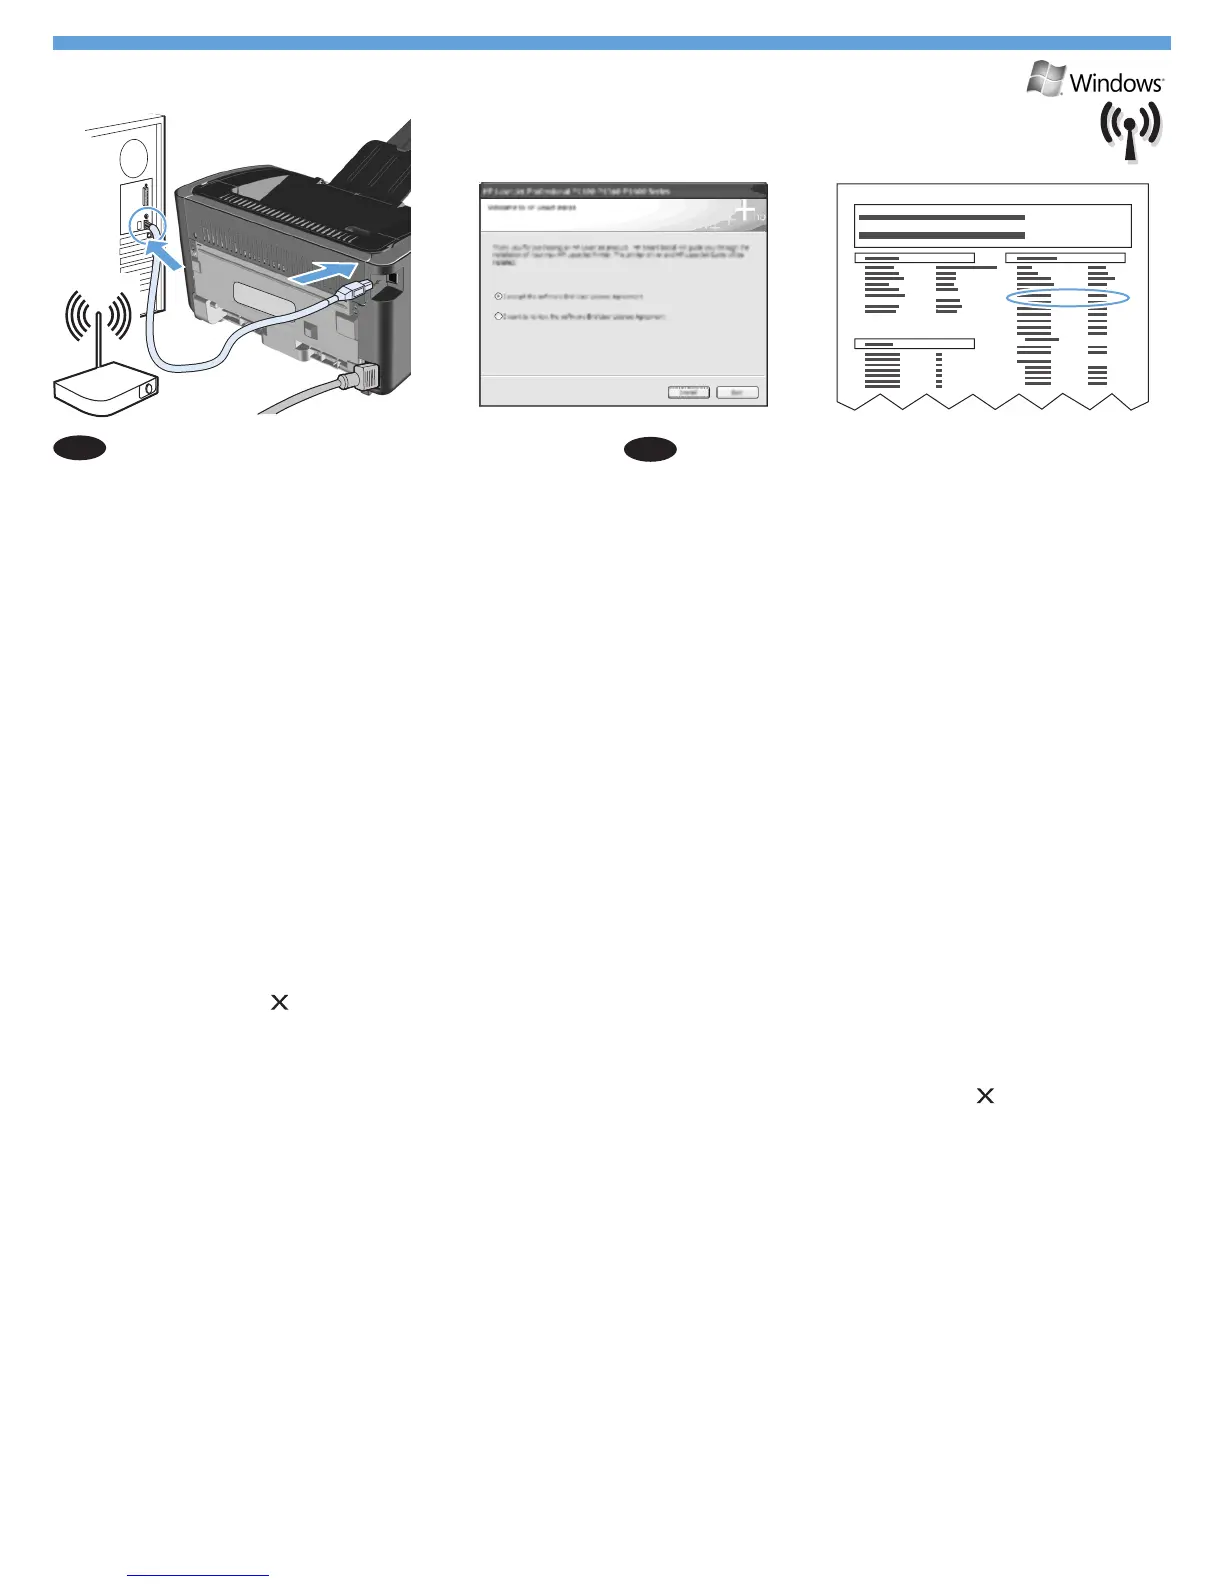
Perform a wireless installation (wireless models only)
Before starting the installation, verify that the wireless access
point is working correctly, the computer is connected to the
network, and the product is turned on.
If there is not a solid blue light on the top of the product, go •
to process A.
If there is a solid blue light on the top of the product, go to •
process B.
A.
Connect the USB cable between the computer and 1.
the product. The HP Smart Install program (see picture
above) should start automatically within 30 seconds.
Note: If HP Smart Install does not start automatically,
AutoPlay might be disabled on your computer.
Browse My Computer and double-click the
HP Smart Install CD drive. Double-click the
SISetup.exe le to run the program to install the
product. If you cannot nd the HP Smart Install CD
drive, use the software CD to install the product.
Follow the onscreen instructions.2.
When prompted to select a connection type, select the 3.
Congure to print over Wireless Network option.
B.
From the product control panel, press and hold the 1.
cancel button
for 5 seconds, and then release it to
print a Conguration page. This page will have an IP
address in the Network Information section.
At the computer, open a Web browser, type the product 2.
IP address in the address eld, and press the Enter key
to open the product embedded web server page.
Click the 3. HP Smart Install tab, and then click the
Download button.
Follow the onscreen instructions.4.
FR
Effectuer une installation sans l (modèles sans l uniquement))
Avant de démarrer l’installation, vériez que le point d’accès
sans l fonctionne correctement, que l’ordinateur est correctement
raccordé au réseau et que l’appareil est sous tension.
Si aucun voyant bleu xe n’apparaît sur le dessus de •
l’appareil, passez à l’étape A.
Si un voyant bleu xe apparaît sur le dessus de l’appareil, •
passez à l’étape B.
A.
Raccordez le câble USB entre l’imprimante et 1.
l’ordinateur. Le programme HP Smart Install (cf. image
ci-dessus) s’exécute automatiquement en 30 secondes.
Remar que : Si le programme HP Smart Install ne
démarre pas automatiquement, la mise en route
« AutoPlay » est peut-être désactivée sur votre
ordinateur. Parcourez votre Poste de travail et
double-cliquez sur le lecteur CD HP Smart Install.
Double-cliquez sur le chier SISetup.exe pour
exécuter le programme et installer le produit.
Si vous ne trouvez pas le lecteur CD HP Smart
Install, utilisez le CD du logiciel pour installer
le produit.
Suivez les instructions à l’écran.2.
Lorsque le programme vous invite à sélectionner un 3.
type de connexion, sélectionnez l’option Congurer
pour imprimer via le réseau sans l.
B.
À partir du panneau de commande de l’appareil, 1.
appuyez sur le bouton Annuler
et maintenez-le
enfoncé pendant 5 secondes, puis relâchez le bouton
pour imprimer la page de conguration. Cette page
comportera une adresse IP dans la section Informations
sur le réseau.
Sur l’ordinateur, ouvrez un navigateur Web, saisissez 2.
l’adresse IP de l’imprimante dans le champ de l’adresse
et appuyez sur la touche Entrée pour ouvrir le serveur
Web intégré de l’imprimante.
Cliquez sur l’onglet3. HP Smart Install, puis sur le bouton
Télécharger.
Suivez les instructions à l’écran.4.
 Loading...