2-18
Installing the Switch
Installation Procedures
5. Connect the Network Cables
Connect the network cables, described under “Cabling Infrastructure” (page
2-5), from the network devices or your patch panels to the fixed RJ-45 ports
on the switch or to any mini-GBICs you have installed in the switch.
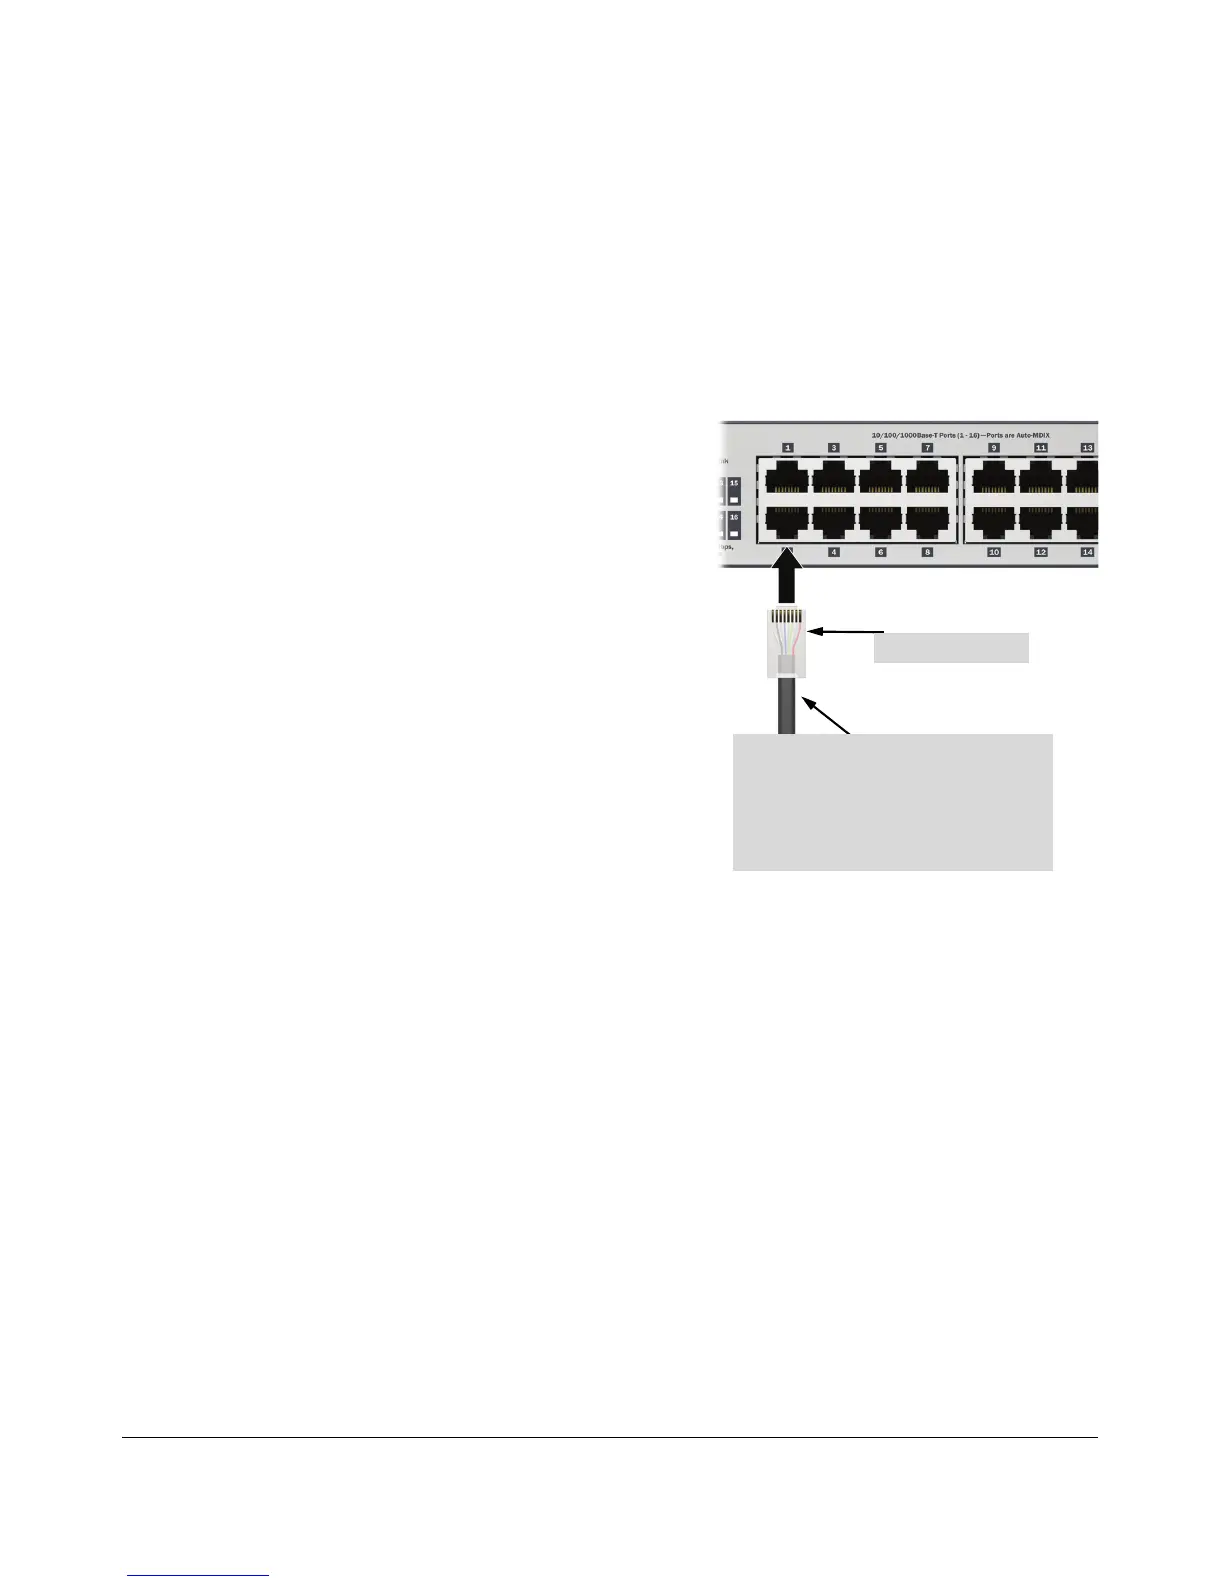
Using the RJ-45 Connectors
To connect:
Push the RJ-45 plug into the RJ-45
port until the tab on the plug clicks
into place. When power is on for the
switch and for the connected device,
the Link/Act LED for the port should
light to confirm a powered-on device
(for example, an end node) is at the
other end of the cable.
If the Link/Act LED does not go on
when the network cable is
connected to the port, see
“Diagnosing with the LEDs” in
chapter 4, “Troubleshooting”.
To disconnect:
Press the small tab on the plug and
pull the plug out of the port.
RJ-45 connector
Unshielded twisted-pair cable:
• Category 3, 4, or 5 for 10 Mbps ports
• Category 5 or better for 100 Mbps ports
• Category 5e or better for 1000 Mbps ports
Maximum distance: 100 meters
Figure 2-15. Connecting network cables
 Loading...