Removal and Replacement Procedures
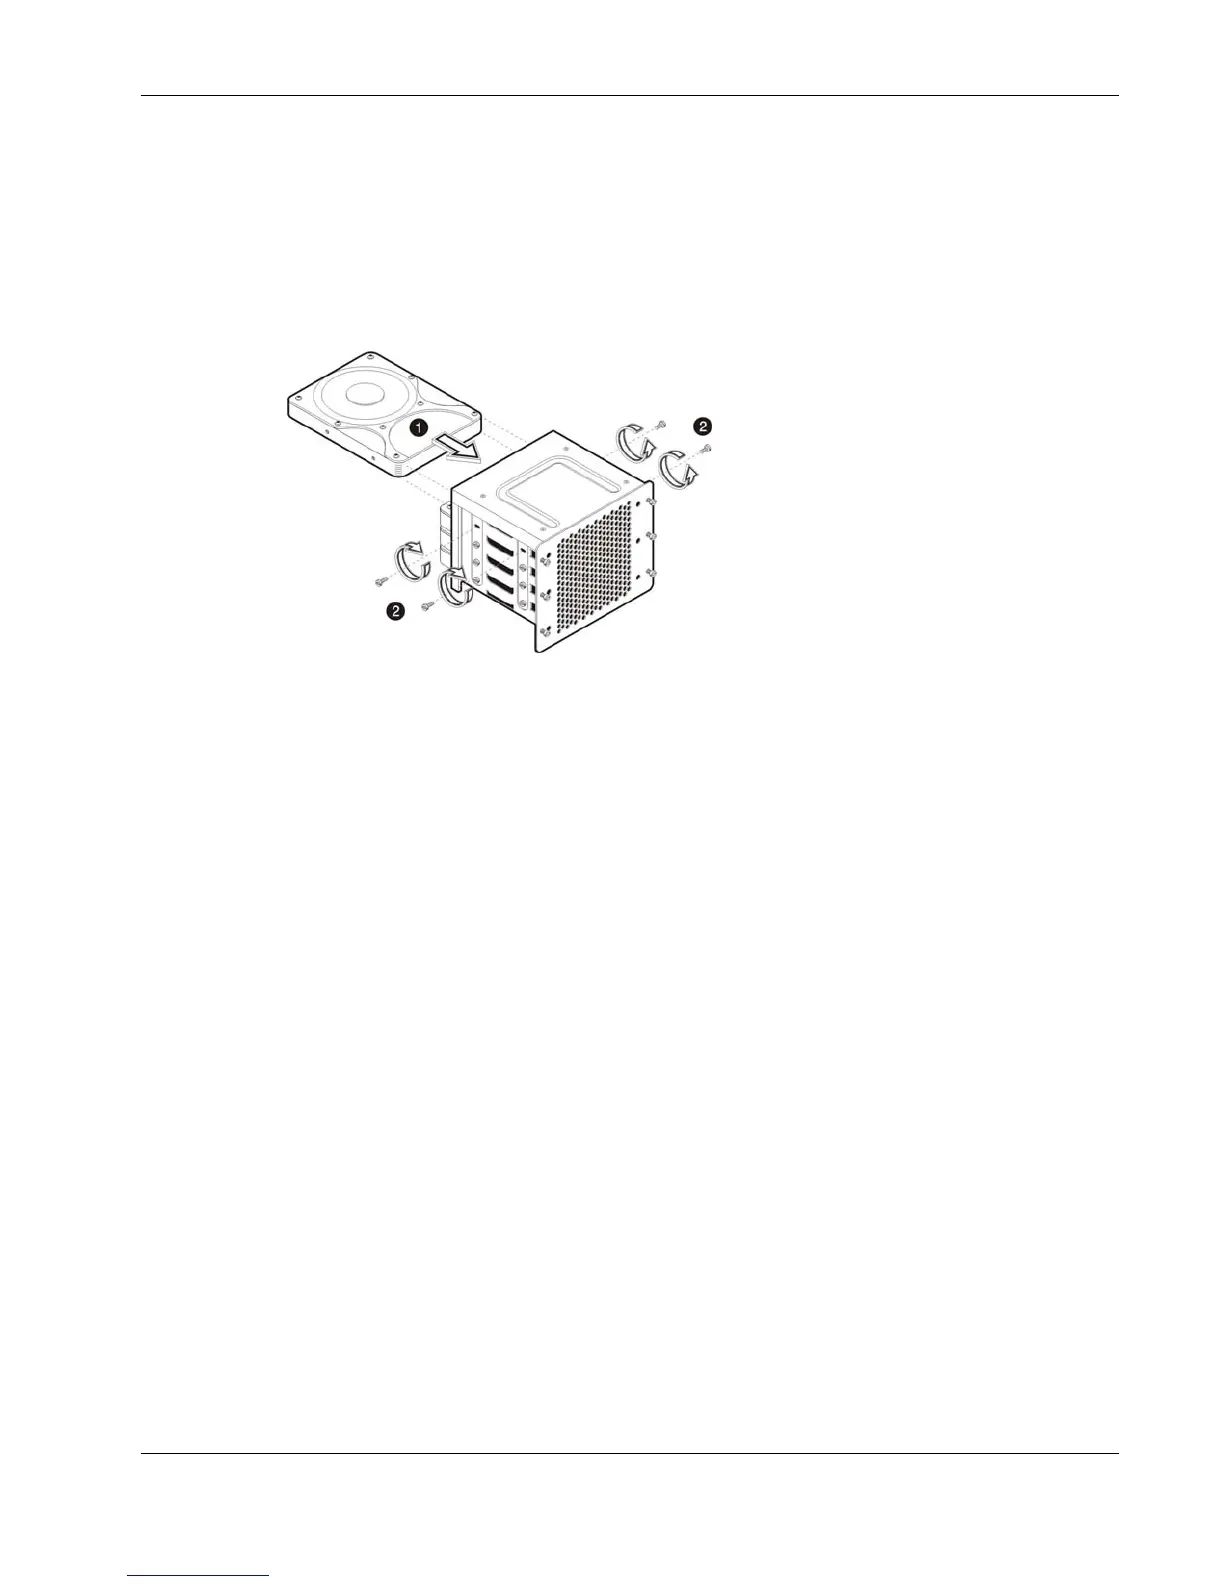
6. Install the new SCSI hard disk into the cage:
a. Slide the new hard disk into the selected bay.
b. If you are installing the new hard disk in a previously occupied drive bay, use the
screws you removed from that old drive to secure the new drive.
If you are installing the new hard disk in an empty drive bay, use the four screws you
removed earlier from the side of the chassis to secure the new drive.
Figure 2-23: Installing a SCSI hard disk in the non-hot-plug HDD cage
7. Reinstall the HDD cage into the chassis following the procedures described in step 4 of
the “To install an HDD cage” section.
8. Observe the post-installation procedures.
To install a SATA drive in a non-hot-plug HDD cage:
1. Perform steps 1 through 3 of the pre-installation instructions.
2. Remove the access panel.
3. Remove the front bezel.
4. Remove the non-hot-plug HDD cage:
Step (a) below assumes that a drive is currently installed in the cage. If the cage is empty,
go directly to step (b).
a. Disconnect the power and SATA cables from the rear of the drive.
Perform this step for all drives currently installed in the cage.
b. Remove the six Torx screws that secure the cage to the chassis.
Keep the screws for reinstalling the cage later.
c. Gently slide out the cage from the chassis.
HP ProLiant ML110 Generation 2 Server Maintenance and Service Guide 2-21
 Loading...


