Removal and Replacement Procedures
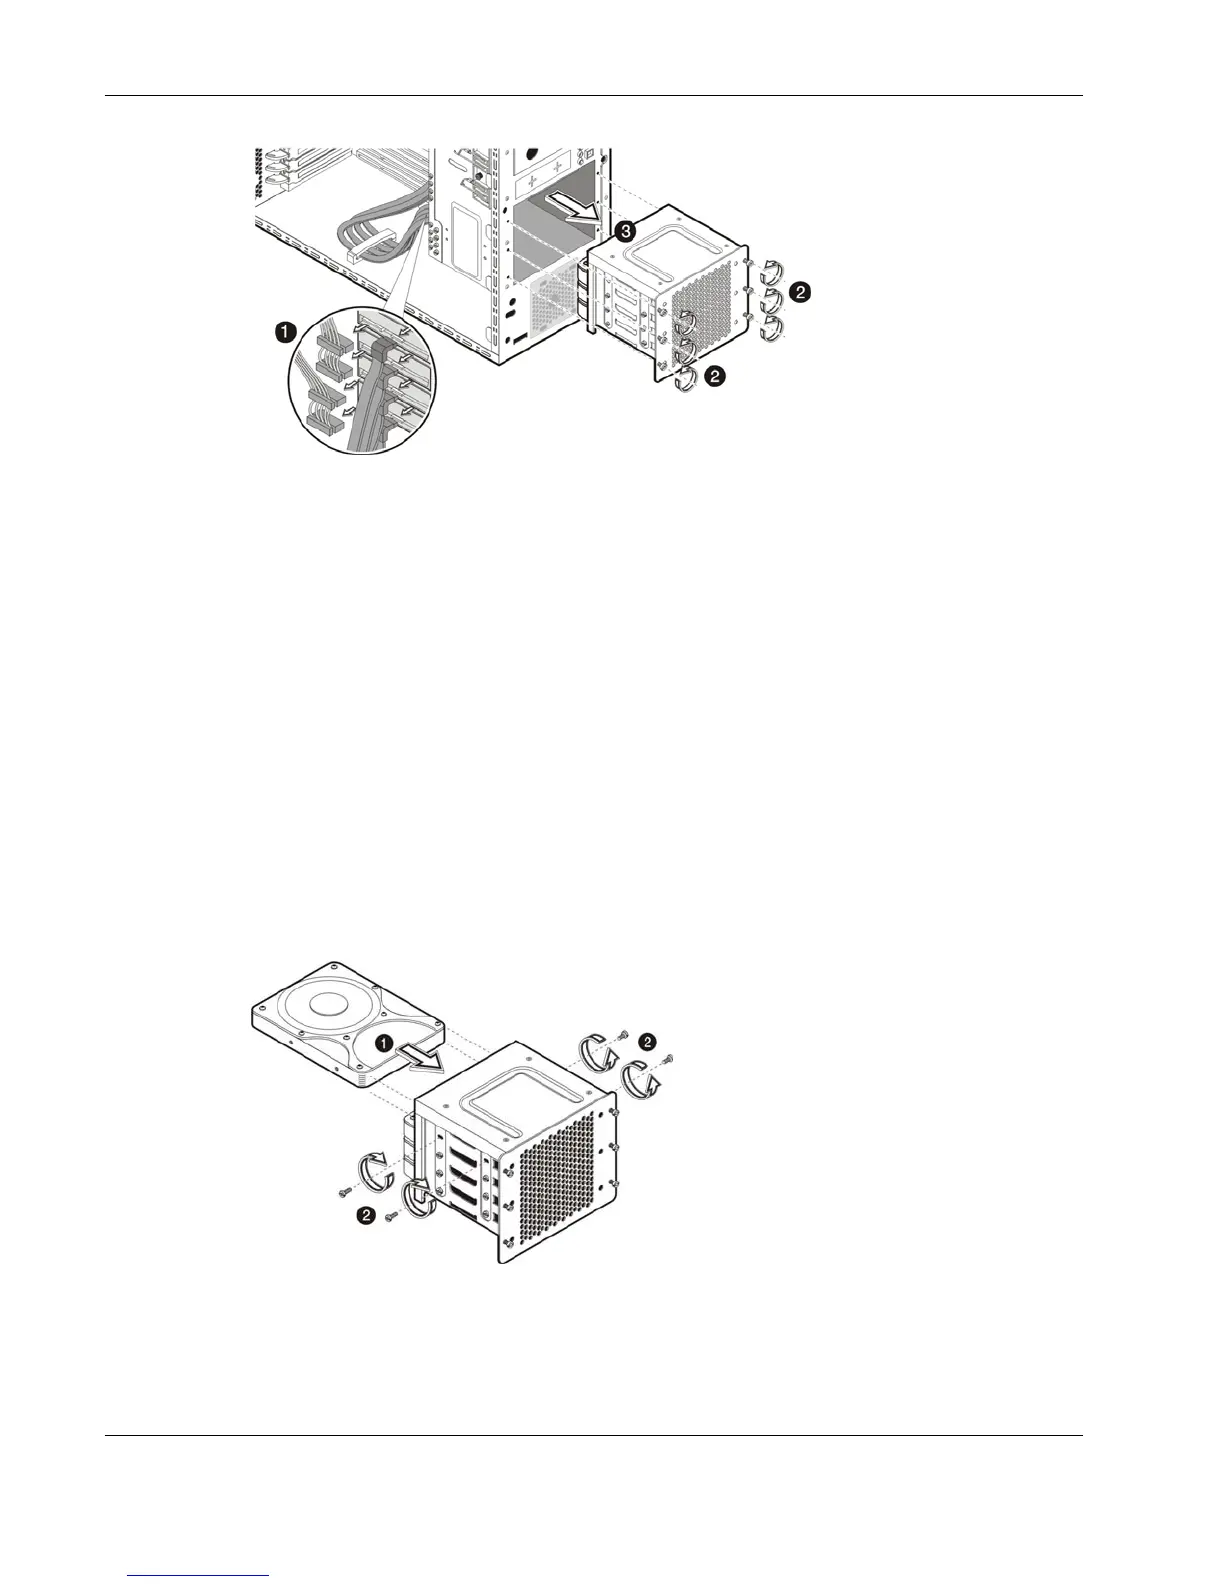
Figure 2-24: Removing the non-hot-plug HDD cage for SATA drive installation
5. Select a drive bay in the cage where you want to install the new SATA hard disk.
If you going to install the new hard disk in a previously occupied drive bay, pull out the
installed drive by removing the four screws securing the old drive to the cage, before
sliding the drive out of the cage. You will be reusing these screws when you install the
new hard disk.
If you are going to install a new hard disk in an empty drive bay, remove four screws
from the side of the chassis labeled ‘HDD SCREWS’. See Figure 2-22 for the location of
these spare HDD screws.
6. Install the new SATA hard disk into the cage:
a. Slide the new hard disk into the selected bay.
b. If you are installing the new hard disk in a previously occupied drive bay, use the
screws you removed from that old drive to secure the new drive.
If you are installing the new hard disk in an empty drive bay, use the four screws you
removed earlier from the side of the chassis to secure the new drive.
Figure 2-25: Installing a SATA hard disk in the non-hot-plug HDD cage
2-22 HP ProLiant ML110 Generation 2 Server Maintenance and Service Guide
 Loading...


