Removal and replacement procedures 43
Processor installation
WARNING: To reduce the risk of personal injury from hot surfaces, allow the heat sink fan and the
processor to cool before touching them.
CAUTION: To prevent the heat sink fan from tilting to one side during installation/removal
procedures, observe a diagonally opposite pattern (an “X” pattern) when loosening and tightening
the four spring loaded screws.
The procedure for replacing the current processor consists of five major steps which are as follows:
1. Remove the heat sink fan (HSF).
2. Remove the current processor.
3. Apply the thermal compound.
4. Install the new processor.
5. Install the heat sink fan.
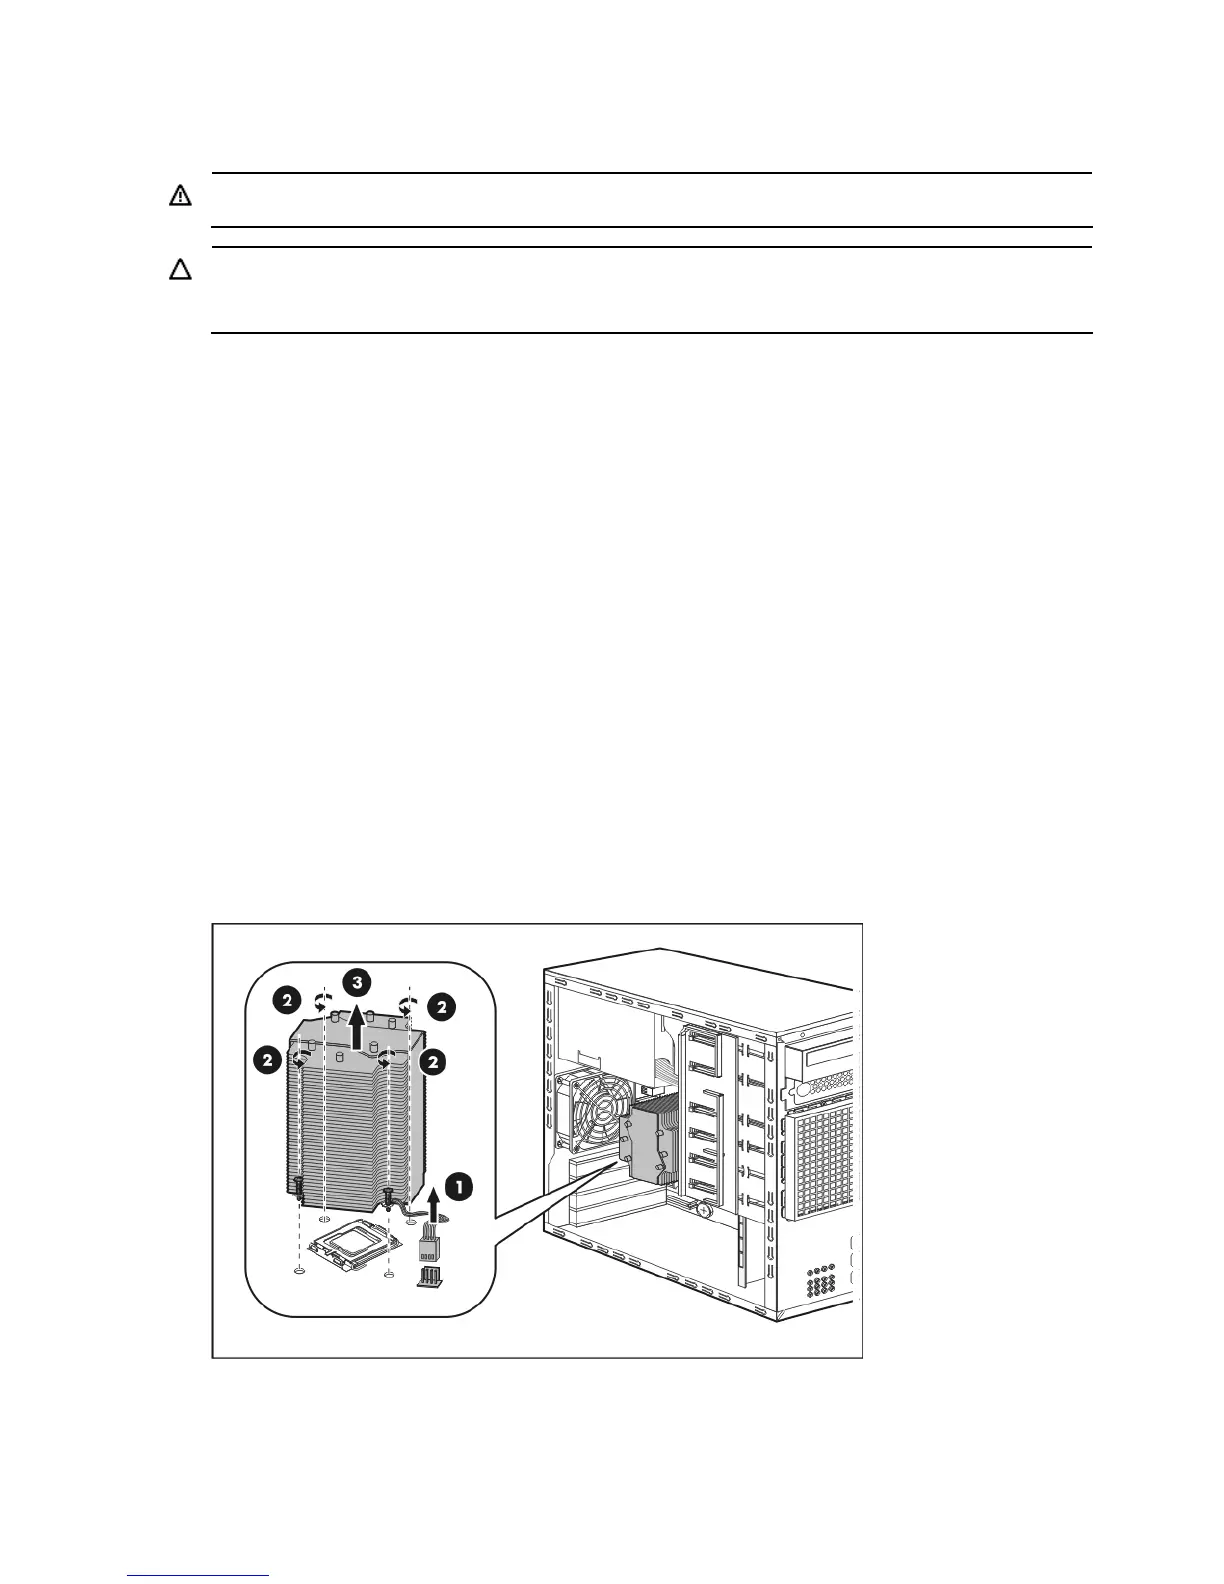
To remove the heat sink fan:
1. Prior to removing the heat sink fan, power on the system for a few minutes to soften the thermal
compound, so that the HSF can easily be removed.
2. Perform the pre-installation procedure.
3. Lay the server on its side (components showing).
4. Remove the heat sink fan.
a. Disconnect the HSF cable from its system board connector (1).
b. Use a T-15 Torx screwdriver to loosen the HSF’s four spring-loaded screws (2).
c. Lift the HSF away from the system board (3).
You may need to rotate the HSF a few degrees clockwise and counterclockwise to break the
thermal compound bond.

 Loading...