1
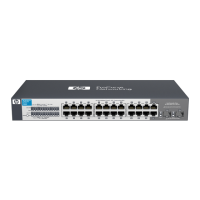
HP PS1810-8G Switch Quick Setup Guide,
and Safety/Regulatory Information
For more detailed instructions and information to set up your switch, view or download the Installation and Getting Started
Guide for your switch at www.hp.com/networking/support.
1. Unpack and check included parts. ■ Documentation kit
■ Switch
■ Accessory kit (installation hardware)
■ Wall mount AC/DC adapter, or in-line AC/DC adapter and
power cord
2. Prepare for installation. To avoid personal injury or product damage, follow the “Safety and Regulatory
Information for HP PS1810-8G Switch” on page 6.
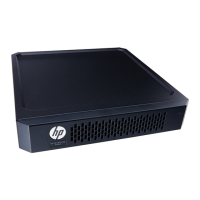
3. Mount the switch. Stack the switch with HP ProLiant MicroServers, or mount it on a wall, or on top of or under a
horizontal surface. Before stacking it with HP servers or positioning the switch on a horizontal surface, attach the rubber
feet that are supplied in the accessory kit.
If you are mounting the switch on a wall or under a surface, do not attach the rubber feet.
Stack with the HP ProLiant MicroServer Gen8: Stack the switch under
, or on top of the server.
Caution: The switch has a limitation on how much weight can be placed on top of it. To reduce the risk of personal injury
or damage to the equipment, stack no more than two servers on top of the switch.