2
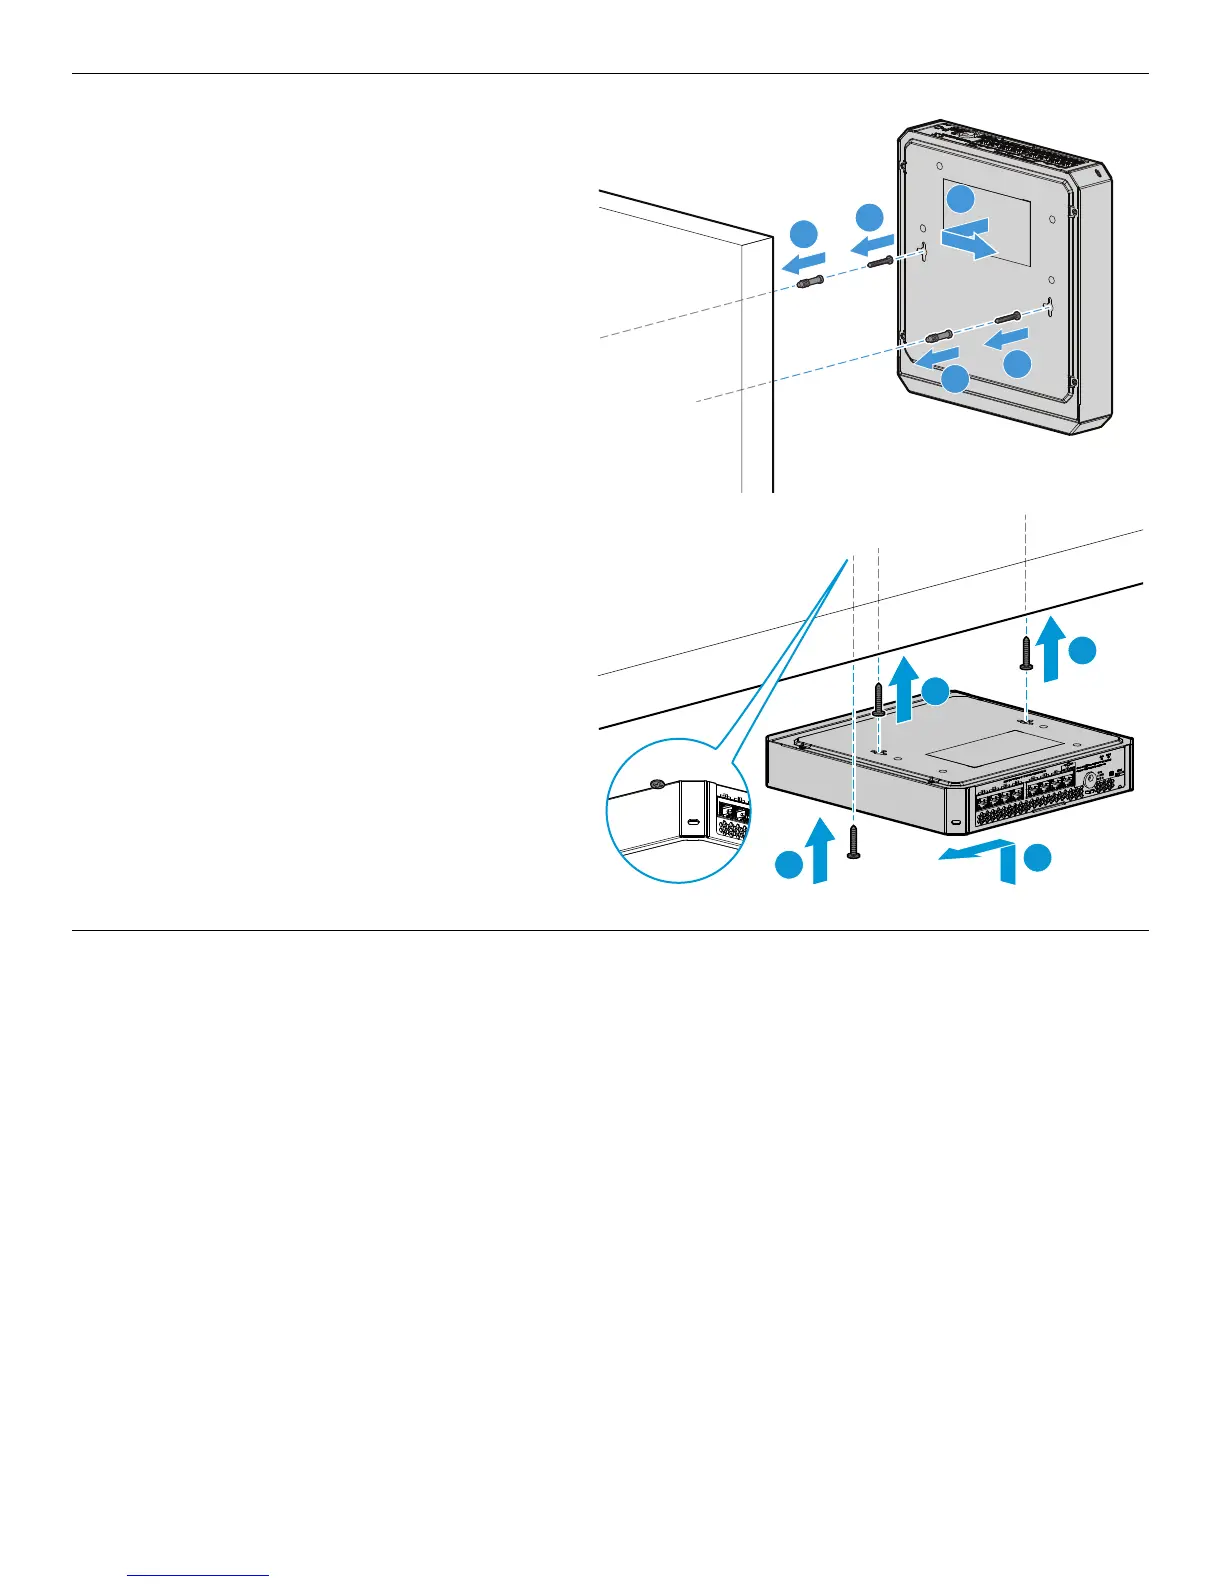
Wall Mounting: Install two 5/8-inch (15.875 mm) Number
12 wood screws, (included) into the mounting surface,
positioned 6.3 inches (160 mm) apart. Use the wall anchors
if necessary. Then, position the switch over the screws and
slide to lock in place.
Important: For wall-mounting, the network ports must be
facing up or down. (See “Installation Precautions” on
page 6.)
Under-Surface Mounting: Install the two screws on the
surface bottom similarly to the procedures for wall
mounting. Then, position the switch over the screws and
slide to lock in place. Install the third screw at the side of
the switch to prevent it from sliding out of the locked
position, if necessary.

 Loading...