Network settings Saving power
You can reduce battery power consumption
by turning off functions (Wi-Fi, Bluetooth, Wi-
Fi tethering and screen auto rotation, etc.)
that are not being used on Quick Settings
panel if you want to use the product for a long
time.
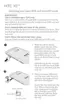
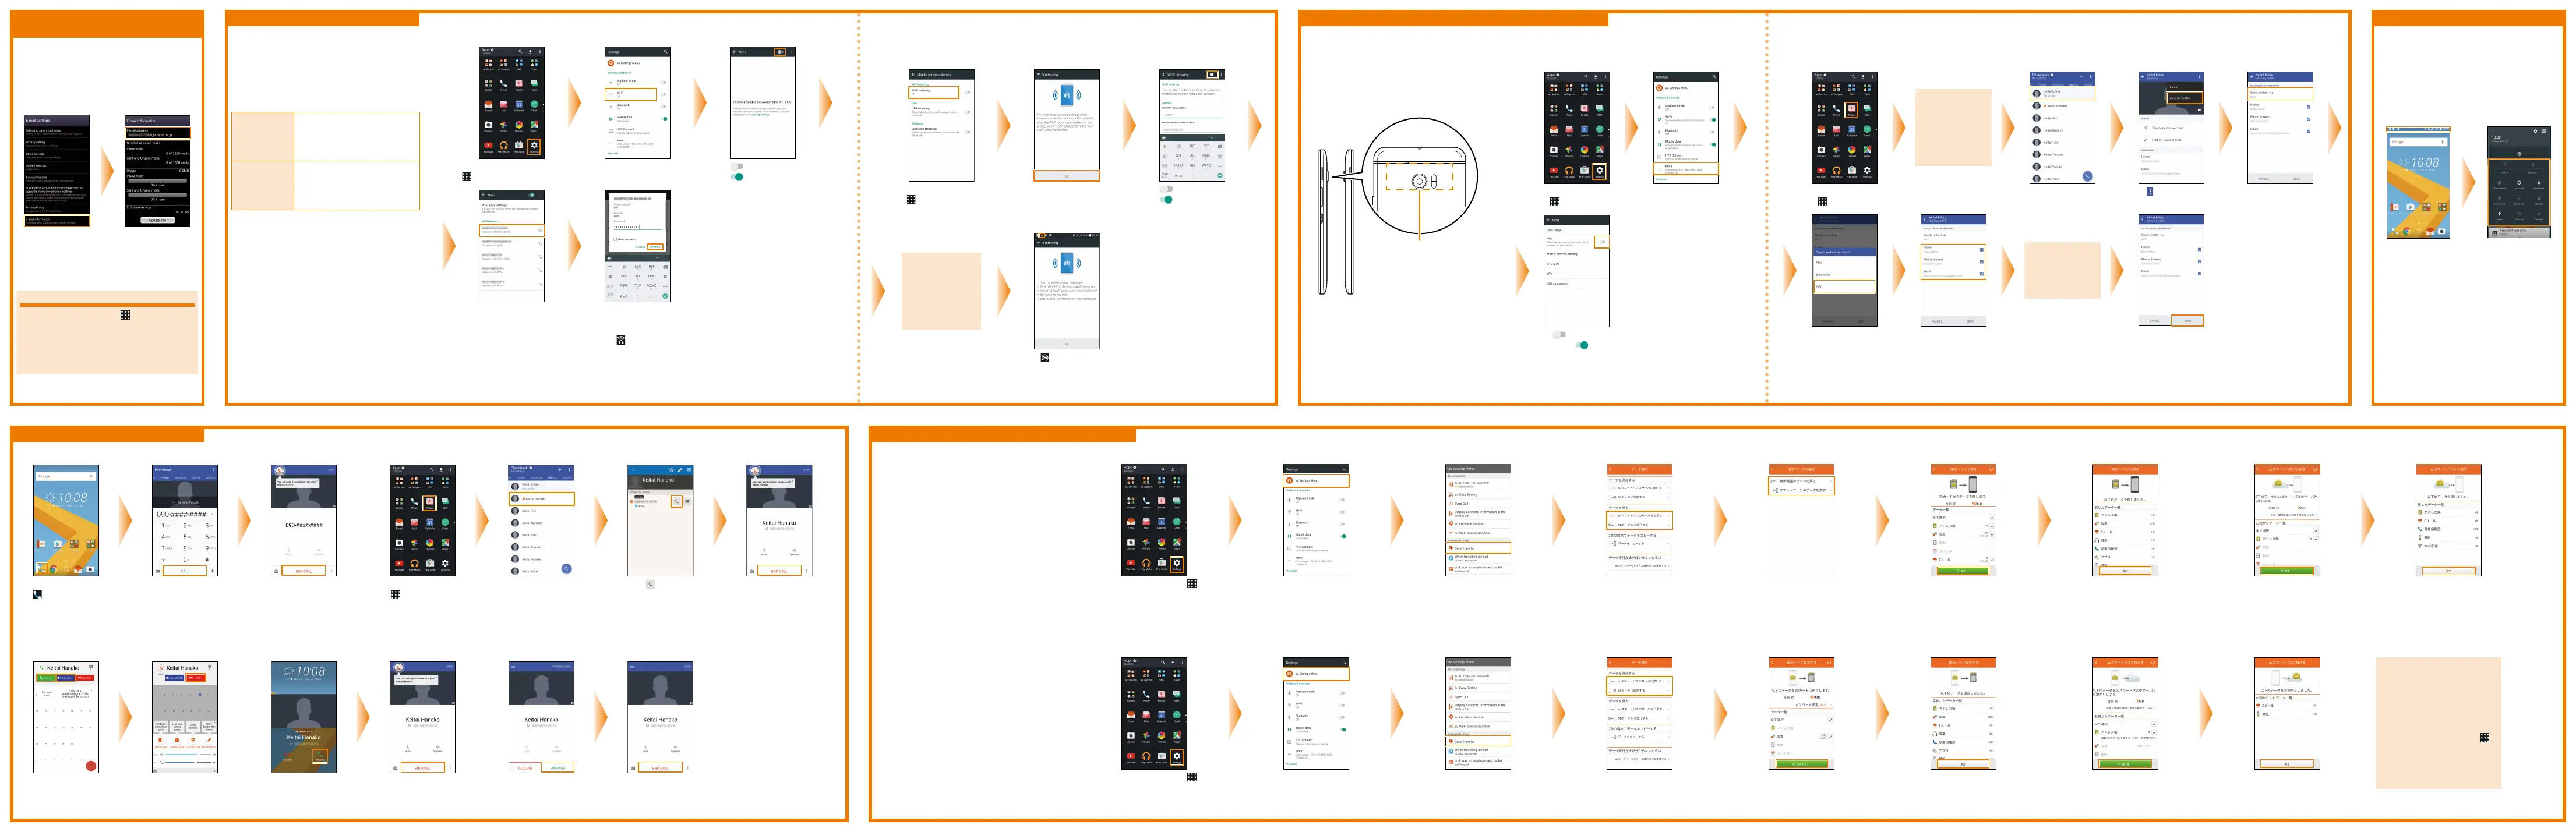
■ Turning functions on/off
Slide the status
bar down with two
ngers or slide the
status bar down
twice.
Tap the icon of the
function you want
to switch on/off.
Making and receiving calls Transferring data with au Settings menu
Sending and receiving data with Android Beam
■ Restoring data with au Settings menu
When you select [SDカ ード か ら 復 元 す る ] When you select [auスマートパスのサーバから戻す]
On the home screen, tap ⇒
Settings
Tap au Settings Menu Tap Data Transfer Select a desired method for
restoring data.
※ If you restore data with auス マ ート
パスのサーバから戻す
(restore data
backed up on the au Smart Pass
server), you need to set up an au ID.
If you tap SDカードから復元する
(Restore form SD card), select
the type of your old au phone.
※ This screen does not appear if you tap
au
スマートパスのサーバから戻す (restore
data backed up on the au Smart Pass
server) for data restoration method.
Tick the data to restore ⇒ 戻す
(Restore)
※ This screen appears if you tap ス
マートフォンのデータを戻す
(Restore
smartphone data) for the type of
your au phone.
Tap 完了 (Completed) Tick the data to restore ⇒ 戻す
(Restore)
Tap 完了 (Completed)
■ Backing up with au Settings menu
When you select [SDカ ード に 保 存 す る ] When you select [auスマートパスのサーバに預ける]
To automatically back up your
photos and address book in
the au Smart Pass server
by using a data backup
application, perform the
following operations.
On the home screen, tap
⇒ Settings ⇒ au Settings
Menu
⇒ Backup Setting
⇒ Tick the data to be
automatically backed up
On the home screen, tap
⇒
Settings
Tap au Settings Menu Tap Data Transfer
Select a location in which to back up data
※ If you back up the data with auスマー
トパスのサーバに預ける
(back up data
on the au Smart Pass server), you
need to set up an au ID.
Tick the data to save ⇒ 保存する
(Save)
Tap 完了 (Completed) Tick the data to back up ⇒ 預ける
(Back up)
Tap 完了 (Completed)
■ Checking your e-mail address
You can check your e-mail address from the
E-mail settings screen.
For the information on how to display the
E-mail settings screen, see 'Changing your
e-mail address' on the front side.
On the E-mail
settings screen,
tap E-mail
information.
This displays the
e-mail address of
the product.
About PC mail settings
On the home screen, tap ⇒ Mail to
set up PC mail (POP3/IMAP), company
Exchange Server mail, Gmail, Yahoo Mail,
and Outlook.com.
For details, refer to the "Instruction Manual
application".
E-mail (@ezweb.ne.jp)
settings (continued)
■ Setup of Wi-Fi tethering
You can use the product as the wireless LAN hot spot to enable Internet connection from the client (PC,
etc.) that supports wireless LAN (Wi-Fi).
※ To use the tethering function, a separate subscription is required.
On the home screen,
tap
⇒ Settings ⇒
More
⇒ Mobile network
sharing
⇒Wi-Fi tethering
Tap OK
Tap
. The icon turns
into
When a
conrmation
screen appears
telling that
a separate
subscription is
required, tap OK.
When is displayed at the
top of the screen, follow
the on-screen instructions
to connect the client (PC,
etc.) to the product
⇒ OK
■ Making calls ■ Making calls from People
On the home screen,
tap
Input the phone
number you want to
call
⇒ CALL
To hang up the call, tap
END CALL
On the home screen,
tap
⇒ People
Tap the contact you
wish to call
Tap the
of the
number you want to
call
To hang up the call, tap
END CALL
■ Receiving calls
• If SYNC call is turned on • If in screen lock
mode
• If SYNC call is turned off, and the product is in
Sleep mode (without lock screen)
When a call comes in,
tap Accept/Speaker
To hang up the call, tap
End
When a call comes in,
slide ANSWER upward
or to the right
To hang up the call, tap
END CALL
When a call comes in,
tap ANSWER
To hang up the call, tap
END CALL
■ Wi-Fi connection settings
You can connect to the Internet using a wireless
LAN (Wi-Fi) environment built in your home, or
a public wireless LAN environment away from
home.
Before making wireless LAN (Wi-Fi) settings,
check the following information.
SSID
The name set for the public
wireless LAN service or
wireless LAN device to be
connected to
Password
The password to connect
to the public wireless LAN
service or wireless LAN
device
※ Connection to all public wireless LAN services is not
guaranteed.
※ You may need a separate contract with the service
provider to use some public wireless LAN services.
※ Enabling the wireless LAN (Wi-Fi) function uses a lot
of battery power.
We recommend turning off the wireless LAN (Wi-Fi)
function when not using it.
※ We recommend making security settings such as
'WEP' or 'WPA/WPA2 PSK' to prevent unauthorized
access.
Perform this operation in the environment where you can receive signals from the wireless LAN
devices that you want to access and the public wireless LAN service.
On the home screen, tap
⇒ Settings
Tap Wi-Fi
Tap
. The icon turns
into
Tap the network (SSID)
to connect to
Input the password ⇒
CONNECT
※ The settings are nished
when
appears at the
top of the screen.
The product can exchange data with another
device that has a NFC function.
To send or receive data using Android Beam,
both sending and receiving devices must have
the NFC function activated.
Ensure to keep holding the product and
the other device back to back until the data
communication is complete.
NFCarea
■ Sending data
A user operation for sending data varies depending on the function. This section describes the operation to send a contact (prole).
e.g.) When sending a prole
If the account
selection screen
appears, select
the account from
which you want
to send your
prole.
On the home screen,
tap
⇒ People
Tap My prole
Tap
⇒ Send my
prole
Tap Send contact
via
Move the back
of the product
toward the back
of the other
device.
■ Receiving data
When holding the product
and the other device back
to back, data is received.
Tap NFC Select the checkbox
of the item to send
Tap SEND
⇒ tap the
screen
You can back up or restore data to the product
from your old au phone by using a microSD
memory card or au Smart Pass server.
• If you back up or restore data by using au
Smart Pass server, you need to set up an au
ID.
• If you restore data by using a microSD
memory card, save the data from your old
phone to the microSD memory card.
※ In this document, 'microSD memory card',
'microSDHC memory card' and 'microSDXC memory
card' are abbreviated as 'microSD memory card'.
■ Setup of NFC function
In order to transfer data using Android Beam, NFC function
must be activated.
On the home screen,
tap
⇒ Settings
Tap More
Tap . The icon
turns into
 Loading...