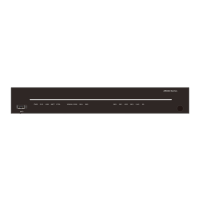
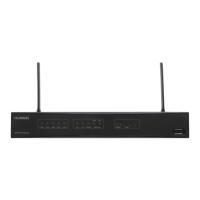
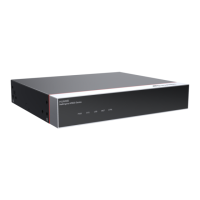
This document provides a quick installation guide for 1U devices designed for IEC 19-inch and ETSI 21-inch cabinets. It covers the ATN 910C-K/M/G, ATN 910D-A, NetEngine 8000 M1A/M1C, and OptiX PTN 916-F.
Function Description
These devices are network equipment, likely routers or switches, designed for installation in standard data center cabinets. They support both DC and AC power configurations, offering flexibility for various power environments. The guide details the physical installation process, including mounting in cabinets and connecting essential cables such as PGND, DC power, AC power, optical fiber, E1, and Ethernet cables. The devices are intended for indoor use in controlled environments, emphasizing the importance of proper site conditions for optimal performance and longevity.
Important Technical Specifications
The devices are 1U in height, with consistent dimensions across both DC and AC chassis: 44.45 mm (1.75 in.) in height, 442 mm (17.4 in.) in width, and 220 mm (8.66 in.) in depth.
Weight without packaging (base configuration):
- OptiX PTN 916-F: DC: 4.0 kg, AC: 3.6 kg
- NetEngine 8000 M1A: DC: 3.9 kg, AC: 4.5 kg
- NetEngine 8000 M1C: DC: 3.8 kg, AC: 3.9 kg
- ATN 910C-K: DC: 4.0 kg, AC: 4.1 kg
- ATN 910C-M: DC: 3.8 kg, AC: 3.9 kg
- ATN 910C-G: DC: 3.9 kg, AC: 4.5 kg
- ATN 910D-A: DC: 4.2 kg, AC: 4.3 kg
- OptiX PTN 916-F: DC: 2.5 A, AC: 1.5 A
- NetEngine 8000 M1A: DC: 4 A, AC: 1.5 A
- NetEngine 8000 M1C: DC: 10 A, AC: 4 A
- ATN 910C-K/M: DC: 10 A, AC: 4 A
- ATN 910C-G: DC: 4 A, AC: 1.5 A
- ATN 910D-A: DC: 10 A, AC: 4 A
- DC Chassis: -48 V/-60 V (Maximum input current: -40 V to -72 V)
- AC Chassis:
- OptiX PTN 916-F/NetEngine 8000 M1A/ATN 910C-G: 110 V/220 V
- NetEngine 8000 M1C/ATN 910C-K/M/ATN 910D-A: 200 V to 240 V/100 V to 127 V dual live wires, support 240V HVDC (Maximum input current: 100 V to 240 V)
Recommended Fuse Capacity for External Power Supply:
- DC Power Cables:
- NetEngine 8000 M1A/M1C, OptiX PTN 916-F, ATN 910C-G/K/M, ATN 910D-A: ≥4 A (user-side circuit breaker current no less than 4 A). Maximum cable size: 4 mm².
- ATN 910C-G/K/M, ATN 910D-A: ≥6 A (user-side circuit breaker current no less than 6 A). Maximum cable size: 4 mm².
- AC Power Cables:
- NetEngine 8000 M1A, ATN 910C-G: ≥1.5 A (user-side circuit breaker current no less than 1.5 A).
- NetEngine 8000 M1C, OptiX PTN 916-F, ATN 910C-K/M: ≥2 A (user-side circuit breaker current no less than 2 A).
- ATN 910D-A: ≥4 A (user-side circuit breaker current no less than 4 A).
Site Requirements:
- Long-term operating temperature: -40°C to +65°C
- Storage temperature: -40°C to +70°C
- Relative operating humidity:
- OptiX PTN 916-F: Long-term: 10% to 90% RH, non-condensing; Short-term: N/A
- Other devices: Long-term: 5% to 85% RH, non-condensing; Short-term: N/A
- Relative storage humidity:
- OptiX PTN 916-F: 10% to 100% RH, non-condensing
- Other devices: 5% to 100% RH, non-condensing
- Long-term operating altitude: ≤ 4000 m (Operating temperature decreases by 1°C for every 220 m increase in altitude between 1800 m and 4000 m).
- Storage altitude: < 5000 m
Cabinet Requirements:
- 19-inch or 21-inch cabinet with a depth ≥ 300 mm.
- Cabling space in front of the cabinet: distance between cabinet door and device board ≥ 120 mm.
- Clearance of at least 75 mm at the left and right sides for ventilation in 19-inch cabinets.
- Porosity of each cabinet door > 50% for heat dissipation.
- Cabinet must have installation accessories (guide rails, floating nuts, screws), a ground terminal, and a cable outlet (top or bottom).
- Recommended distance between side-by-side cabinets with left-to-right air channels: at least 500 mm (19.67 in.).
- Space for optical modules/attenuators with a puller: distance between cabinet door and front panel of board ≥ 120 mm (4.72 in.).
Usage Features
The devices are designed for straightforward installation in standard cabinets. The guide provides clear, step-by-step instructions for mounting the chassis and connecting various cables.
- Power Module Flexibility: DC and AC power modules can be installed in any power module slot on ATN 910C-K/M and ATN 910D-A chassis.
- Grounding Options: The PGND cable can be connected to either the front or side face of the device, with the side face being preferred.
- Cable Routing Guidelines: Emphasizes planning power cable routing, routing power and ground cables on the left, and optical fibers/Ethernet cables on the right side of the cabinet. Cables should not block air vents. Temporary and formal labeling of cables is recommended. Outdoor and indoor cables should not be bundled together.
- Optical Fiber Handling: Strict guidelines for bending radius (≥10 mm for single-mode G.657A2, ≥30 mm for multi-mode A1b), binding, and covering unused ports with dustproof plugs/caps. Recommends using corrugated pipes for excessive optical fibers, with a maximum of 60 fibers (2 mm diameter) in a 32 mm diameter pipe, and a pipe length of about 100 mm inside the cabinet.
- E1 and Ethernet Cable Routing: For ATN 910C-K chassis, E1 and Ethernet cables should be routed in interleaving mode. Ethernet cables should be bundled in a rectangle shape with even spacing. For 300 mm deep cabinets with flat doors, Huawei-customized conversion short pigtail shielded network cables are recommended when electrical modules are used.
Maintenance Features
The document outlines essential checks before and after powering on the device to ensure proper operation and safety.
- Pre-Power-on Checks:
- Verify fixed optical attenuators are installed according to configuration rules.
- Confirm external power supply fuse capacity meets requirements.
- Check external power supply voltage is normal.
- Power-on Check:
- Ensure all switches on the device and external power supply system are off before powering on.
- Address any abnormal indicator states after power-on.
- Device Indicators: Provides a table of indicators (STAT, ALM, PWR/STAT) and their normal states (Steady green for working status and power supply status, off for alarm) to help diagnose issues.
- Optical Fiber Inspection and Cleaning: Highlights the critical importance of inspecting and cleaning optical fiber connectors and adapters due to the sensitivity of 50G optical module links using PAM4 encoding technology. Dirty connectors can cause signal interference and instability.
- Documentation and Support: Provides links to Huawei enterprise and carrier technical support websites and communities for accessing product documentation and posting questions.
Safety Guidelines:
- Emphasizes observing all safety regulations and precautions provided by Huawei.
- Operator Qualifications: Only trained and qualified personnel are allowed to install, operate, or maintain the equipment.
- DANGER: Do not install/remove equipment or power cables while power is on. Ground the equipment before powering it on.
- WARNING: Use multiple persons to move/lift chassis. Laser beams can cause eye damage; do not look into optical modules/fibers without eye protection.
- NOTICE: Prevent collisions during transport/installation. Move unpacked chassis upright. Do not touch unpainted surfaces with wet/contaminated gloves. Do not open ESD bags until in the equipment room. When removing cards, do not use the connector to support weight to prevent damage.
- ESD Protection: Always wear an ESD wrist strap and connect it to the ESD jack on the chassis/cabinet before installing, operating, or maintaining the equipment. Remove conductive objects like jewelry and watches to prevent electrostatic discharge damage.