1 2 3 4 5 6
2 Connecting Cables
1.
Connect one end of a network cable to the PT500.
2.
Connect the other end of the same network cable to the router's LAN port.
3.
Plug the PT500 into a power outlet.
Taking the paired PT530 and PT500 as an example, this section introduce the installation method of PT530 by illustrating their connection to the Internet through a router.
Connect your devices in the sequence indicated in the following gure.
After the PT530 is powered on, the PT530 indicator turns on. The following table lists how the indicators behave when the PT530 is operating correctly. If the indicators
do not behave as expected, ensure that everything is plugged in correctly.
Indicator Expected State Description
PWR Steady on The PT530 is powered on.
PLC Steady on
The PT530 is paired with another
powerline device.
LAN1/LAN2 Steady on
The LAN port is connected to an Ethernet
device with a network cable.
WLAN Steady on WLAN is enabled.
If the basic conguration of your router has already been set (A computer
connected to the router can directly connect to the Internet) before you install
the PT530, Ethernet devices such as a computer connecting to the PT530
with cables can access the Internet directly after the PT530 completed the
installation as the gure shows above.
For the wireless connection method to the PT530, please refer to
the following section to complete the wireless conguration.
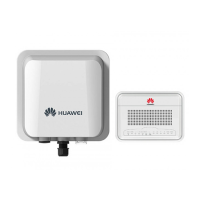
1 Pairing Powerline Devices
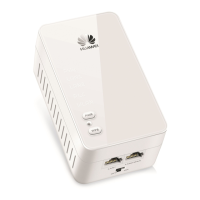
This product must be used with other powerline devices. This section uses a
PT530 and a PT500 to illustrate the pairing process.
1.
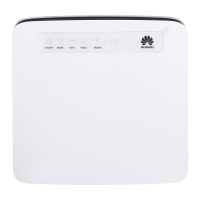
Plug the PT530 into a power outlet.
When the PT530 is powered on, its
PWR
indicator will turns to steady on.
2.
Plug the PT500 into a power
outlet nearby the PT530.
PT530
Steady on
PT500
3
.
Press and hold the
PAIR
button on the
PT530 for 1 second and then release
it. Its
PLC
indicator will start to blink.
PT530
Blinking
4
.
Within 2 minutes, press and hold
the
PAIR
button on the PT500 for
1 second and then release it.
PT500
PAIR
If you press the PAIR button and the
PLC
indicator starts to blink while
connection cannot be established, press and hold the
PAIR
button for 8 seconds
until the
PLC
indicator turns off, and then the PT530 will exit the current network.
Please repeat from step 1 to restart the pairing process.
5
.
Check the indicators' status on the PT530
and the PT500. If both two
PLC
indicators
on the PT530 and the PT500 turn to steady
on from blinking status within 10 seconds,
the connection between the PT530 and the
PT500 has been established successfully.
PT530
PT500
Steady on
4.
Connect one end of a network cable to the PT530's LAN port (either LIN1 or LAN2).
5.
Connect the other end of the network cable to your computer's network port.
6.
Plug the PT530 into a power outlet.
1
3
4
5
6
2
Router
PT530
Ethernet port
PT500
3 Setting the Computer IP Address
Before logging in to the PT530 web management page, set the IP address of the computer that will be used for the login.
Procedure on Computers Running Windows 7
1.
Choose
Start > Control Panel >
Network and Internet > Network
and Sharing Center
.
2.
Choose
Change adapter settings
.
Right-click
Local Area Connection
and choose
Properties
.
3.
Double-click
Internet Protocol
Version 4 (TCP/IPv4)
.
4.
Select
Use the following IP address
. Set
IP address
to
192.168.33.100
,
Subnet
mask
to
255.255.255.0
, and
Default
gateway
to
192.168.33.1
. Click
OK
to return
to the previous dialog box and click
OK
.
1.
Choose
Start > Control Panel
> Network and Internet
Connections
.
2.
Click
Network Connections
. Right-click
Local Area Connection
and choose
Properties
from the shortcut menu.
Procedure on Computers Running Windows XP
3.
Double-click
Internet Protocol
(TCP/IP)
.
4.
Select
Use the following IP address
. Set
IP address
to
192.168.33.100
,
Subnet
mask
to
255.255.255.0
, and
Default
gateway
to
192.168.33.1
. Click
OK
to return
to the previous dialog box and click
OK
.
4 Setting the PT530 Wireless Parameters
1.
Open a browser. In the address box, enter
192.168.33.1
. Press
Enter
.
2.
Enter the login user name (
admin
by default) and password (
admin
by
default). Click
Login
.
3.
Choose
SETUP
>
Wireless Setup
. Enter the SSID (WLAN name) and key you
specied into the
Wireless Name(SSID)
and
PasssPhrase
, and then click
Apply
.
Before the conguration, please ensure that your computer has been connected to
the PT530's LAN port and the IP address is 192.168.33.* (* indicates from 2 to 254).
For more details, please refer to the chapter 3 "Setting the Computer IP Address".
To protect against unauthorized access, change the user name and password
after the rst login.
If your router supports wireless function, setting the PT530's SSID and
password to the same values as your existing Wi-Fi network's SSID and key is
recommended.
1.
Setting your SSID to a
easily recognizable name is
recommended, for example,
"Huawei".
2.
Password can be set to a
combination of numbers or
letters, and the letter is case
sensitive.
You can record your SSID
and password below for later
examination:
SSID:
Key :
Quick Start
PT530 500Mbps Powerline Access Point