2
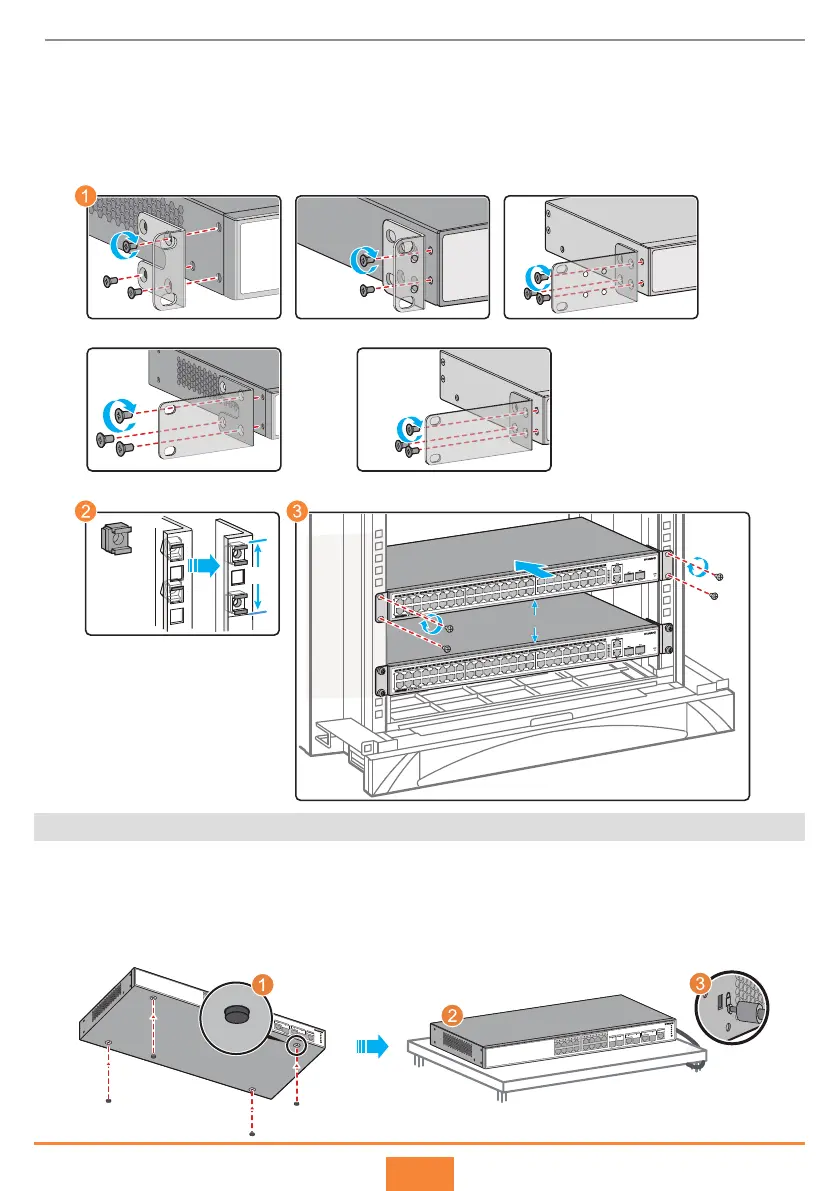
Installation Procedure
Step 1
Step 2
Step 3
Scenario 2: Installing the Switch on a Desk
Attach the rubber pads to the switch. The rubber pads are of dierent shapes depending on
the switch models but are attached to switches in the same way.
Install the switch on a desk.
(Optional) Install a security lock. You can use a security lock to fix the switch on the desk. The
security lock needs to be purchased separately.
Step 1
Step 2
Step 3
1
2
3
4
5
6
7
8
9
10
11
12
13
14
15
16
25
1G/STACK-5G
S1700V2-28GFR-2TP2P-AC
26
1G
27
1G
28
CONSOLE
1
2
3
4
5
6
7
8
9
10
11
12
13
14
15
16
25
26
27
1G
28
1G
CONSOLE
S1720-28GFR-4TP-AC
MODE
1G/STACK-5G
1 U
≥ 1 U
1
2
3
4
5
6
7
8
9
10
11
12
13
14
15
16
25
26
27
1G
1G/STACK-5G
Installing mounting bracket A Installing mounting bracket B Installing middle mounting bracket A
1
2
3
4
5
6
7
8
9
10
11
12
13
14
15
16
25
26
27
1G
27
1G
CONSOLE
MODE
1G/STACK-5G
Installing middle mounting bracket B (Optional) Installing a long mounting bracket
Secure mounting brackets to the chassis with M4 screws. To install the S1720-10GW-2P, S1720-10GF-2P
and S1720-10GW-2P-E switches in a cabinet/rack, use the long mounting brackets (purchased separately)
shown in the following figure, instead of the short mounting brackets delivered with the switch by default.
Install floating nuts.
Secure the chassis onto the cabinet/rack with M6 screws. An S1720-20GFR-4TP switch is used as
an example here to illustrate the cabinet/rack mounting procedure.
 Loading...