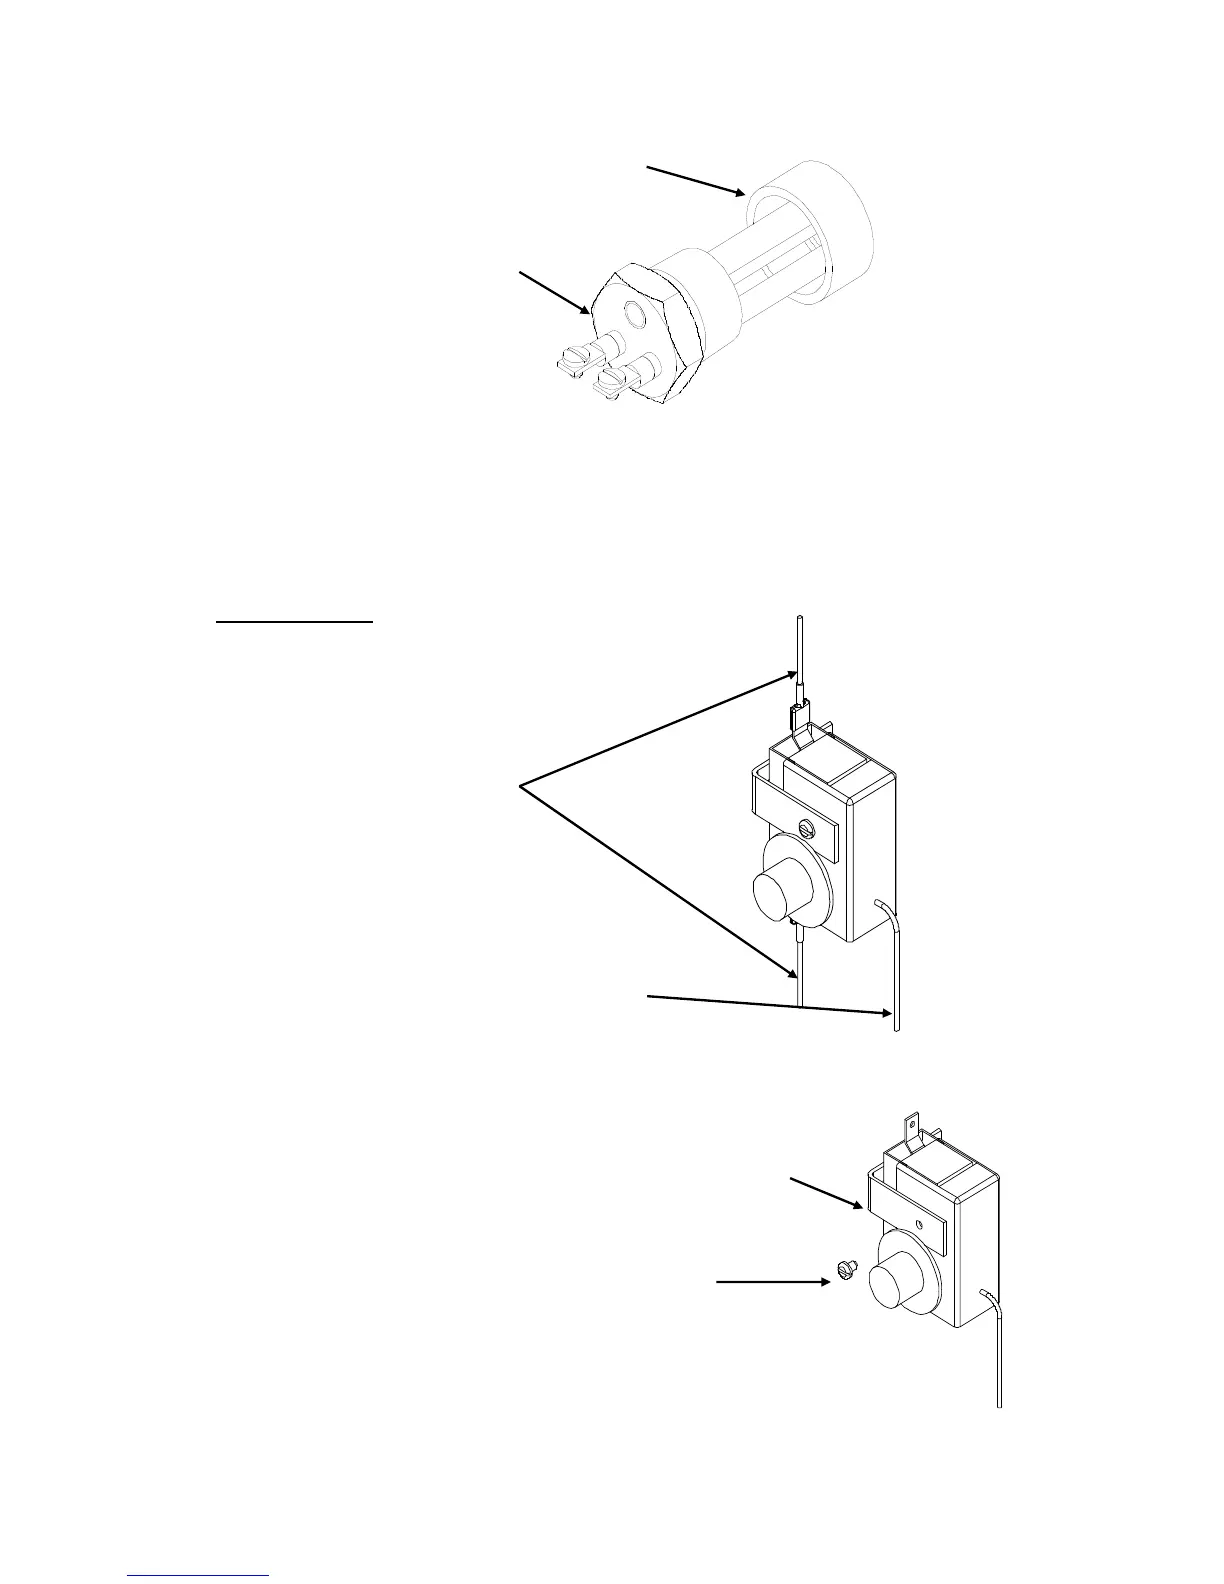
8. Unscrew heating element.
9. Withdraw element assembly.
Tank Coupling
Element Assembly
10. Install Teflon tape and insert new heating element. Thermowell must be above the
heating element, in the 12 o’clock position.
11. Rewire element; refer to wiring diagram in Section II. Torque screws per chart in
back.
12. Reinstall access cover.
13. Fill tank and check around element for any leaks.
THERMOSTAT
1. Disconnect power from unit.
2. Remove access cover and locate thermostat.
3. Disconnect the two (2) control wires.
Wires
Capillary Tube
4. Remove capillary tube and bulb from thermowell in element. See previous page.
5. Remove mounting screw and knob.
6. Remove thermostat by sliding out from behind mounting bracket.
Mounting Bracket
Mounting Screw
7. Replace thermostat using the reverse procedure; refer to wiring diagram in Section II.
15


 To Next Page