SECTION 2: INVERTER SETUP
PRE-LAUNCH INVERTER SETUP
Set your Inverter/charger to the corresponding settings below before you start charging or using
the lithium batteries.
VERY IMPORTANT NOTICE:
Set the voltages correctly as out
of range voltages can damage the
battery.
INVERTER/CHARGER SETTINGS
BULK / EQUALISATION CHARGE 53.6 V
FLOAT CHARGE 53.6 V
LOW DC CUTOFF 44 V
AXPERT RECOMMENDED SETTINGS
VOLTAGE POINT BACK TO UTILITY 47 V Axpert Type
VOLTAGE POINT BACK TO BATTERY 53 V Axpert Type
PLEASE NOTE: INVERTER SETUP GUIDES
If you are setting up a non-axpert type inverter, for example Deye or Sunsynk - please
navigate to the Inverter Setup Guides tab on our website and select the correct corre-
sponding inverter guide: https://www.hubblelithium.co.za/
The recommended cutoff is 44V ~ 45V. However, the internal battery cutoff is as low as 40V. Setting
the cutoff to 40V will drain the battery to 0%. For extended lifespan we recommend a cutoff of 44V
~ 45V.
CAN BUS SETUP (OPTIONAL)
The AM series models has an integrated CAN bus port on each battery. The CAN bus can be used
to connect to any inverter that is CAN bus ready.
To connect the CAN bus cable from the battery to the inverter, ensure you have the cor-
rect pin layouts. Firstly, ensure that you have the pin layout for the cable required
for your inverter. If you do not have this information, we list select inverter pin lay-
outs under the “Inverter Guides” tab on our website: https://www.hubblelithium.co.za/
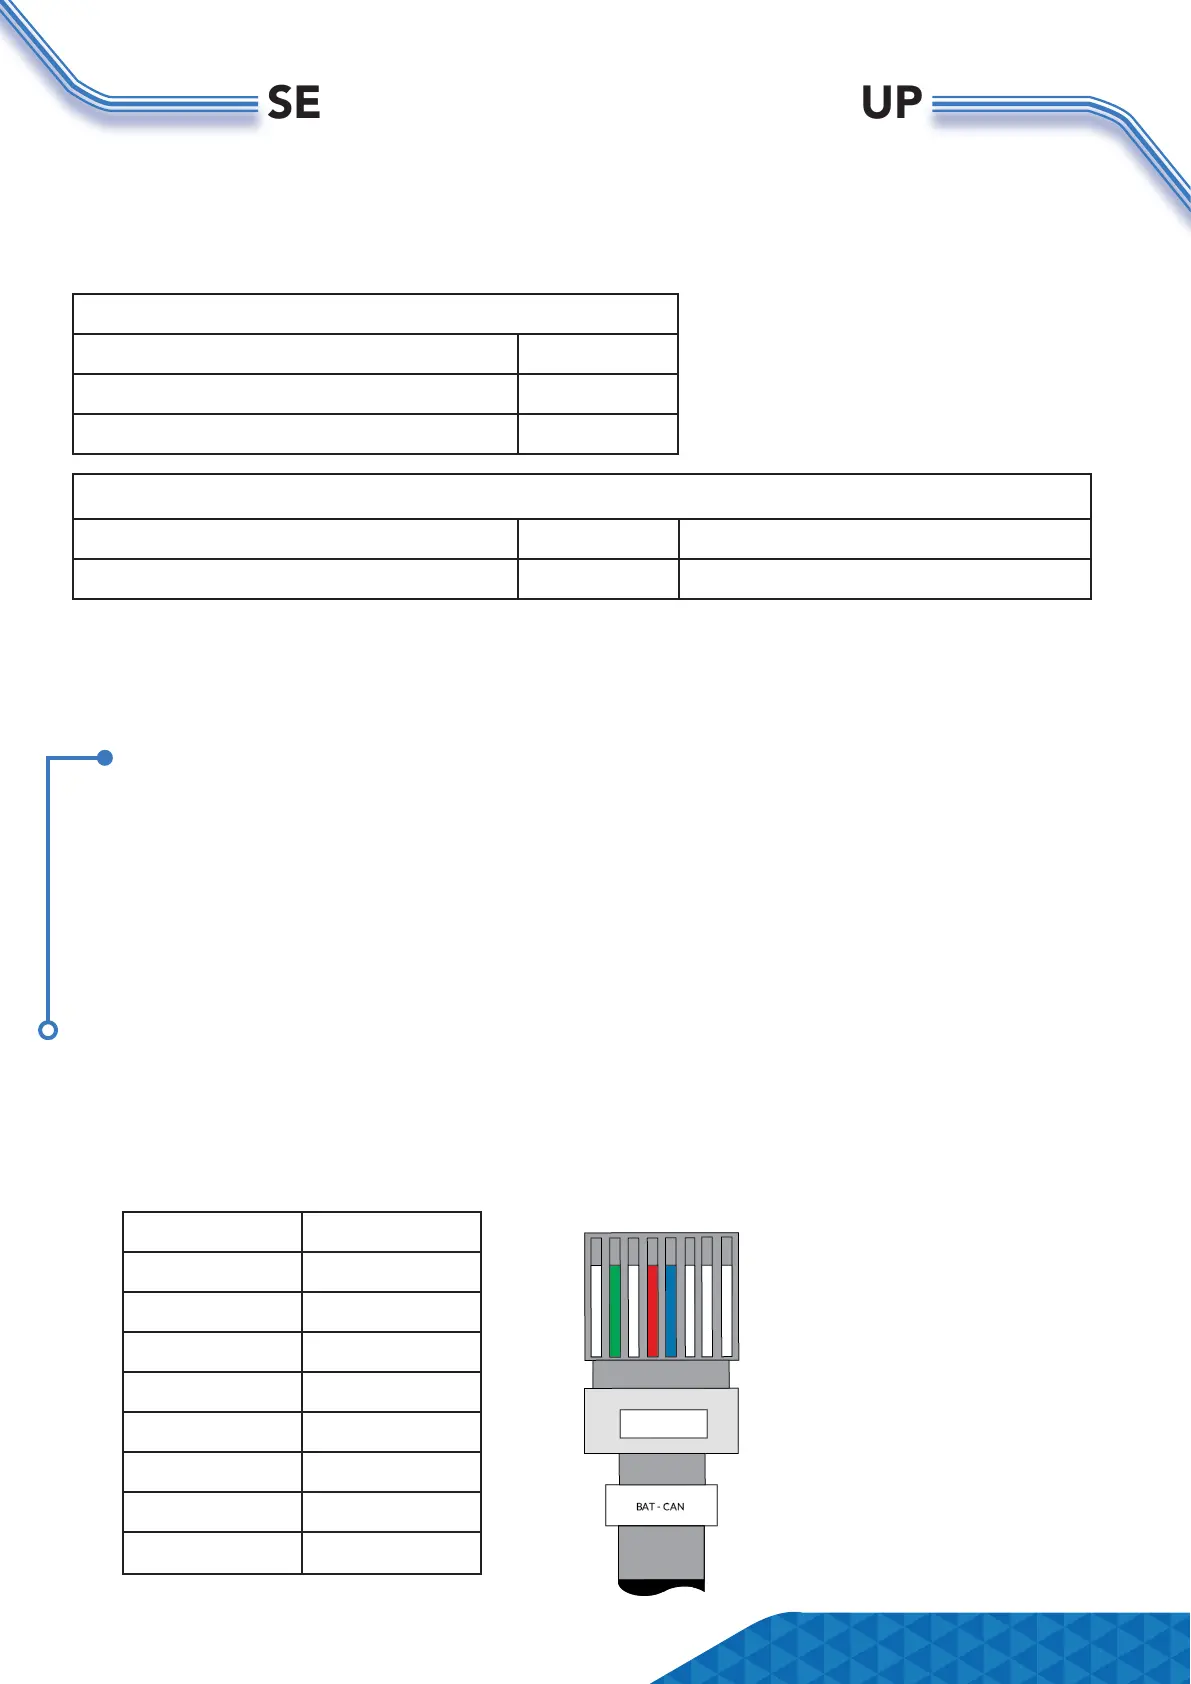
The below is the pin conguration for the Hubble battery CAN cable:
PIN DEFINITION
1 -
2 GROUND
3 -
4 CANH
5 CANL
6 -
7 -
8 -
1 2 3 4 5 6 7 8
Page 5