17
Training Wheels - continued
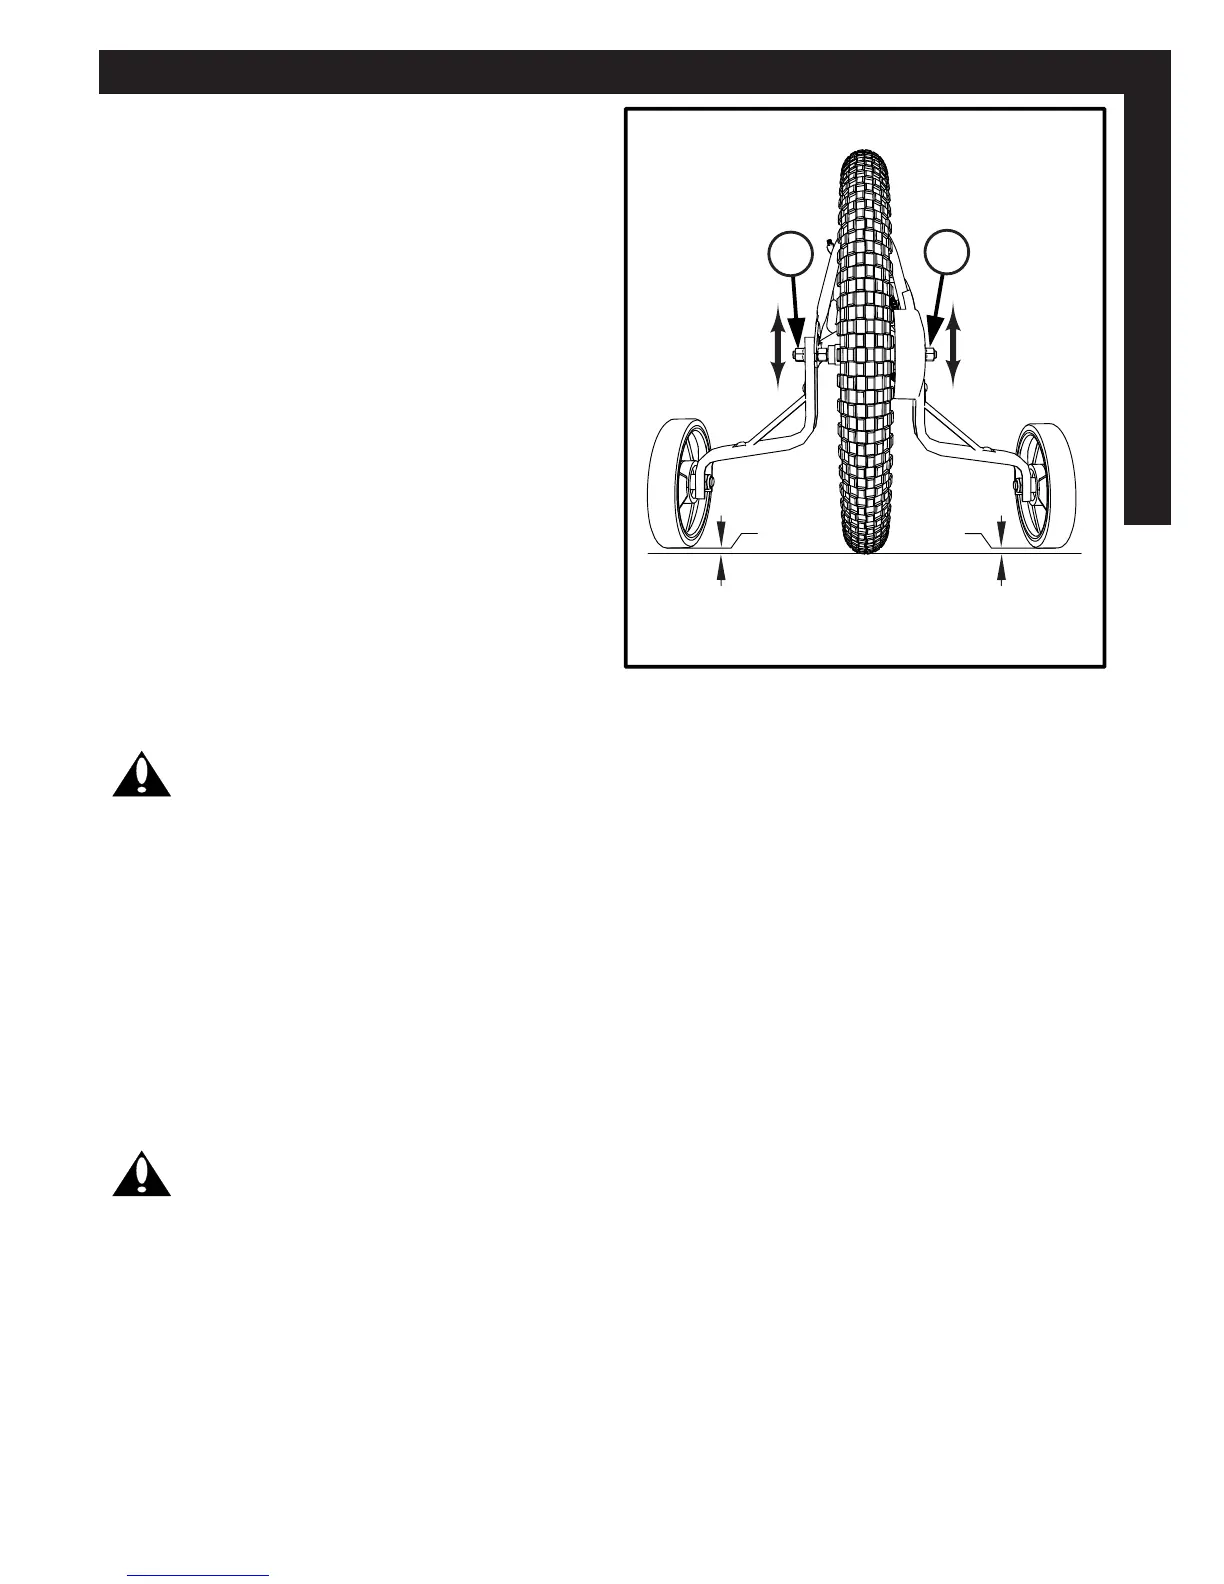
3. Make sure both Training Wheels are
the same distance from the ground
(fi g 20) and pointing straight down.
4. Tighten Axle Nuts (A) securely.
1/8” 1/8”
g 20
A
A
Operation:
WARNING: Before each ride, make sure both axle nuts are tight. Also make
sure both training wheels are the same distance from the ground (fi g 20).
As your child’s ability improves, you may raise and eventually remove the training
wheels. Raising the training wheels little by little will help them learn to ride on the
bike’s two wheels.
• To move the training wheels, loosen the axle nuts, slide the leg to the correct
position, and retighten the axle nuts.
• To remove the training wheels, remove the axle nut, leg and alignment tab. Then
reinstall and tighten the axle nut securely.
WARNING: When riding with training wheels:
• Ride only on level areas.
• Do not ride on steep hills, uneven sidewalks, or near steps. The bicycle can tip
over if a training wheel goes off the edge of the riding surface.
• Ride straight up and down sloped surfaces, because the bicycle can tip over
when riding across sloped surfaces.
• Slow down at corners because you can not turn as quickly as bicycles without
training wheels.
Bicycle Assembly