11/03 P/N 211644
9
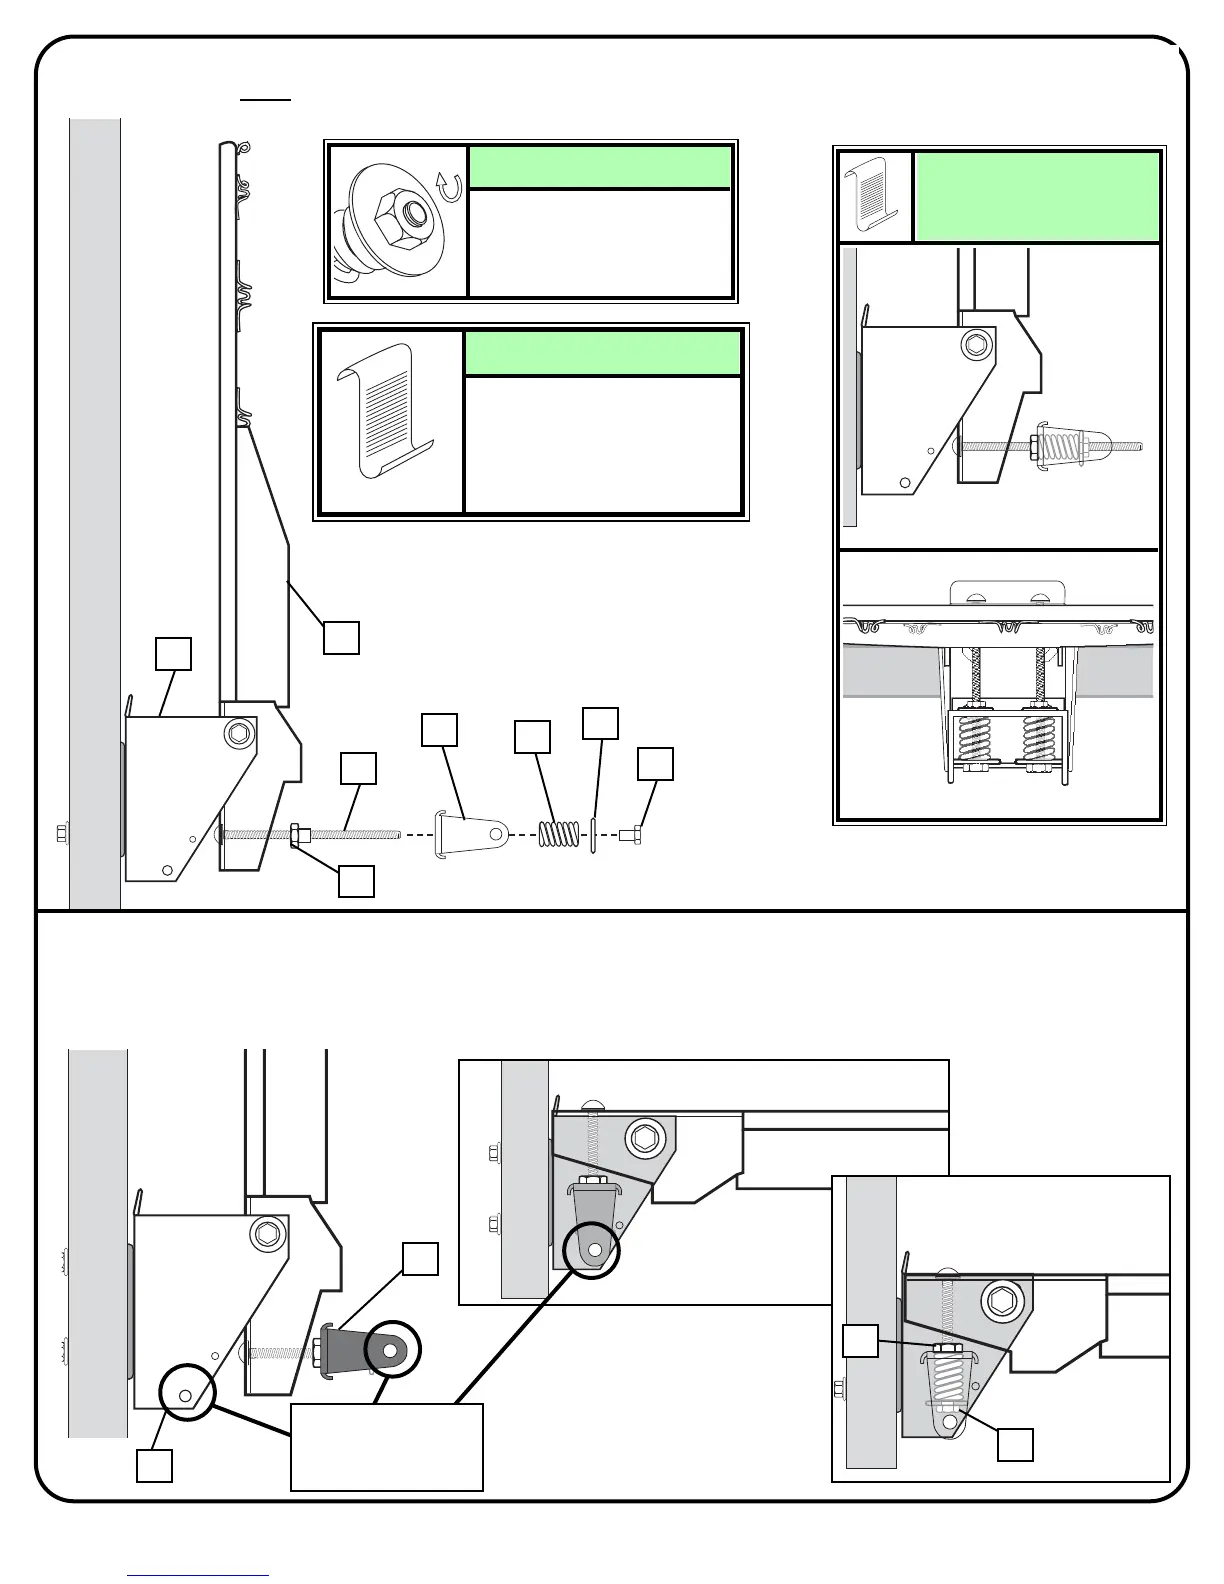
Position rim assembly (1) 90 degrees to back bracket (13) as shown. Place inner-bracket
(14) over both
carriage bolts (2) followed by springs (7), washers (8) and special nuts (21).
NOTE:
COMPLETED
ASSEMBLY:
6.
Tighten special nuts (21)
until flush with end of
carriage bolts (2)
as shown.
NOTE:
14
7
8
21
2
1
13
Do not over tighten as rim
will not flex properly. See
leveling instructions (Step
11) to determine how much
to tighten nuts (20) and (21).
NOTE:
Lower lower rim down. Holes in inner bracket (14) should line up with holes in
backboard bracket (13). If not, adjust special locknuts (20 & 22) until holes are aligned.
7.
20
22
Align these
holes.
13
13
20
 Loading...