10
P/N 211644 11/03
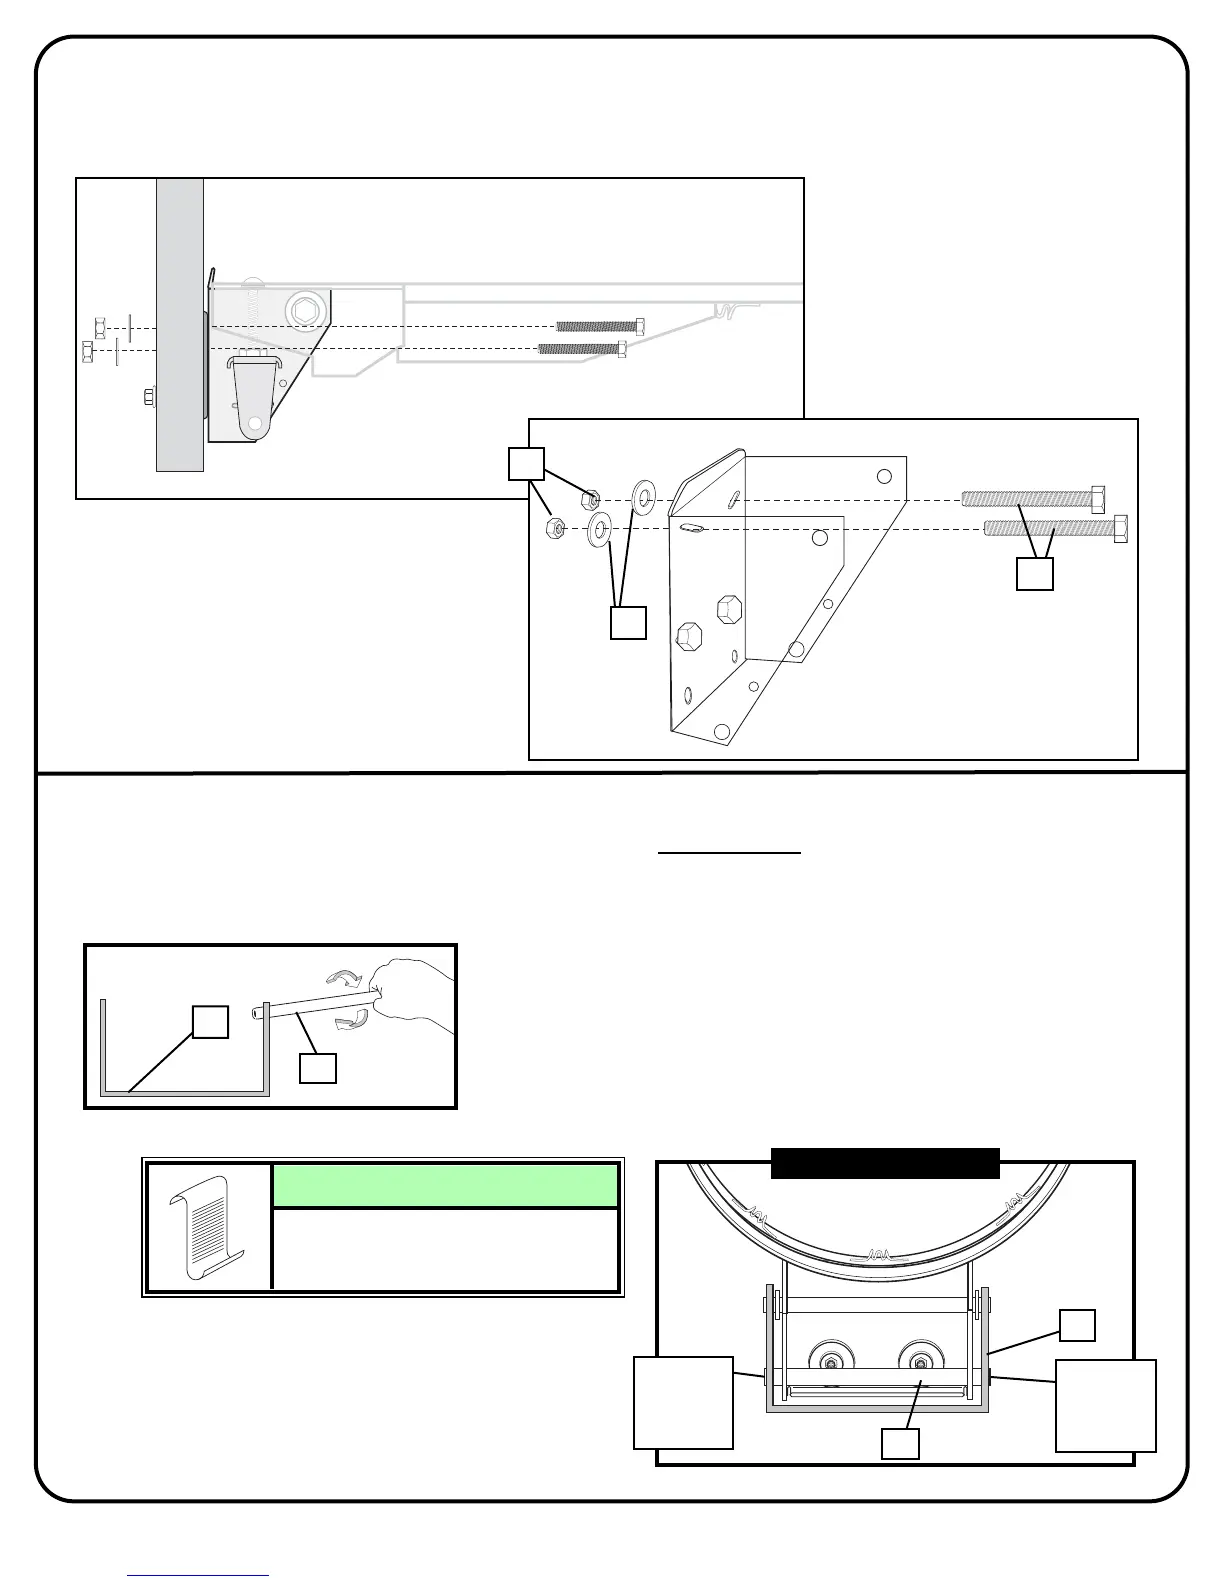
First, test fit spacer (10) into back bracket (13) and Carefully rock in a circular motion
to ream out any excess paint from holes if necessary
. Insert spacer (10) through
bottom holes in board bracket (13) and inner bracket (14).
9.
BOTTOM VIEW
13
10
13
10
Ends of spacer (10) should be
flush on both sides of board
bracket (13).
NOTE:
Spacer
flush with
bracket
Spacer
flush with
bracket
Secure back bracket (13) fully to backboard by inserting bolts (16) through upper
holes in back bracket (13), Add washers (6) and nuts (17) to bolts (16).
Tighten nuts (17) completely.
8.
17
6
16
 Loading...