EasyManua.ls Logo

Hulkman Sigma 5 User Manual

Hulkman Sigma 5
3 pages
To Next Page IconTo Next Page
Page #1 background imageLoading...
Page #1 background image
USER GUIDE
Sigma 5 Battery Charger
HOW TO USE
Connect the clamps/eyelets
to the charger and to your
battery.
Plug the charger into an
electrical outlet.
Select the appropriate charge
mode for your battery.
Press Confirm button or
wait 10 seconds to start the
charging process.
BUTTON OPERATION
STEP 1
BUTTON OPERATION
STEP 1 STEP 3 STEP 4
Press to cycle through "12V, 12V AGM, 12V Lithium, 6V, 6V AGM" modes.
Press & hold for 2 seconds to enter “12V Repair” mode.
Press & hold for 1 second to go back to "Standby" mode when charging.
Press & hold for 1 second to go back to "Standby" mode when is flashing.
Press it to start the charging process.
ERROR INDICATIONS
ICON
SOLUTIONREASON
1.) Charger will automatically resume
function once the it's internal temperature
drops to -4°F~104°F.
1.) Charger internal temperature is too high.
2.) Charger ambient temperature is too low.
Battery voltage is too high for the selected charge mode.
Reverse Polarity
Bad Battery
Reverse the battery clamps/eyelets.
Check the battery and confirm the appropriate charge
mode for your battery
2.) Charger will automatically resume
function once the it's ambient temperture
rises to -4°F~104°F.
1.) Connect the positive (red) clamp/eyelet terminal
connector to the positive (POS,P,+) battery terminal.
2.) Connect the negative (black) clamp/eyelet terminal
connector to the negative (NEG,N,-) battery terminal.
Battery will not hold a charge. Get the battery checked
by a professional.
Menu Button
Confirm Button
Question and Answer IconNeed help?

Do you have a question about the Hulkman Sigma 5 and is the answer not in the manual?

Hulkman Sigma 5 Specifications

General IconGeneral
BrandHulkman
ModelSigma 5
CategoryBattery Charger
LanguageEnglish

Summary

Button Operation

Menu Button

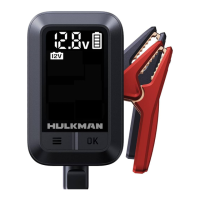
Press to cycle modes, press & hold for 2s for 12V Repair, press & hold for 1s for Standby.

Confirm Button

Press it to start the charging process.

Error Indications

Temperature and Voltage Errors

Indicates high/low charger temp or high battery voltage. Auto-resumes or requires mode check.

Connection Errors

Covers reverse polarity and bad battery detection, requiring connection checks or professional service.

Display and Operation

Display Screen Icons

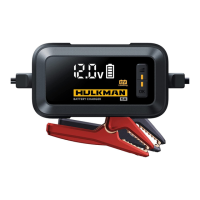
Icons indicate battery voltage, charging level (25%-100%), or repair time (1h-4h).

Charging Mode Descriptions

Details seven charging modes: 12V, 12V AGM, 12V Lithium, 6V, 6V AGM, 12V Repair, 12V Loading.

Cautions and Specifications

Using 12V Repair and Loading

Guidelines for 12V Repair duration and 12V Loading low-voltage activation.

Technical Specifications

Details input/output voltage, capacity, dimensions, weight, and operating temperature.

Warranty and Contact

Product Warranty

Provides a 3-year warranty against defects under normal use.

Contact Information

Lists address, phone, website, and email for customer support.

Related product manuals