2
DETERMINE THE CORRECT CHAIR VERSION
1. Remove the seat cushion from the chair.
2. If the seat cushion is supported by fabric secured with a zipper, you have Version 1. Go to “Removing a Version 1 Footrest Cable from the Bracket Underneath the Chair”.
3. If the seat cushion is supported by canvas secured with metal hooks you have Version 2. Go to “Removing a Version 2 Footrest Cable from the Bracket Underneath the Chair”.
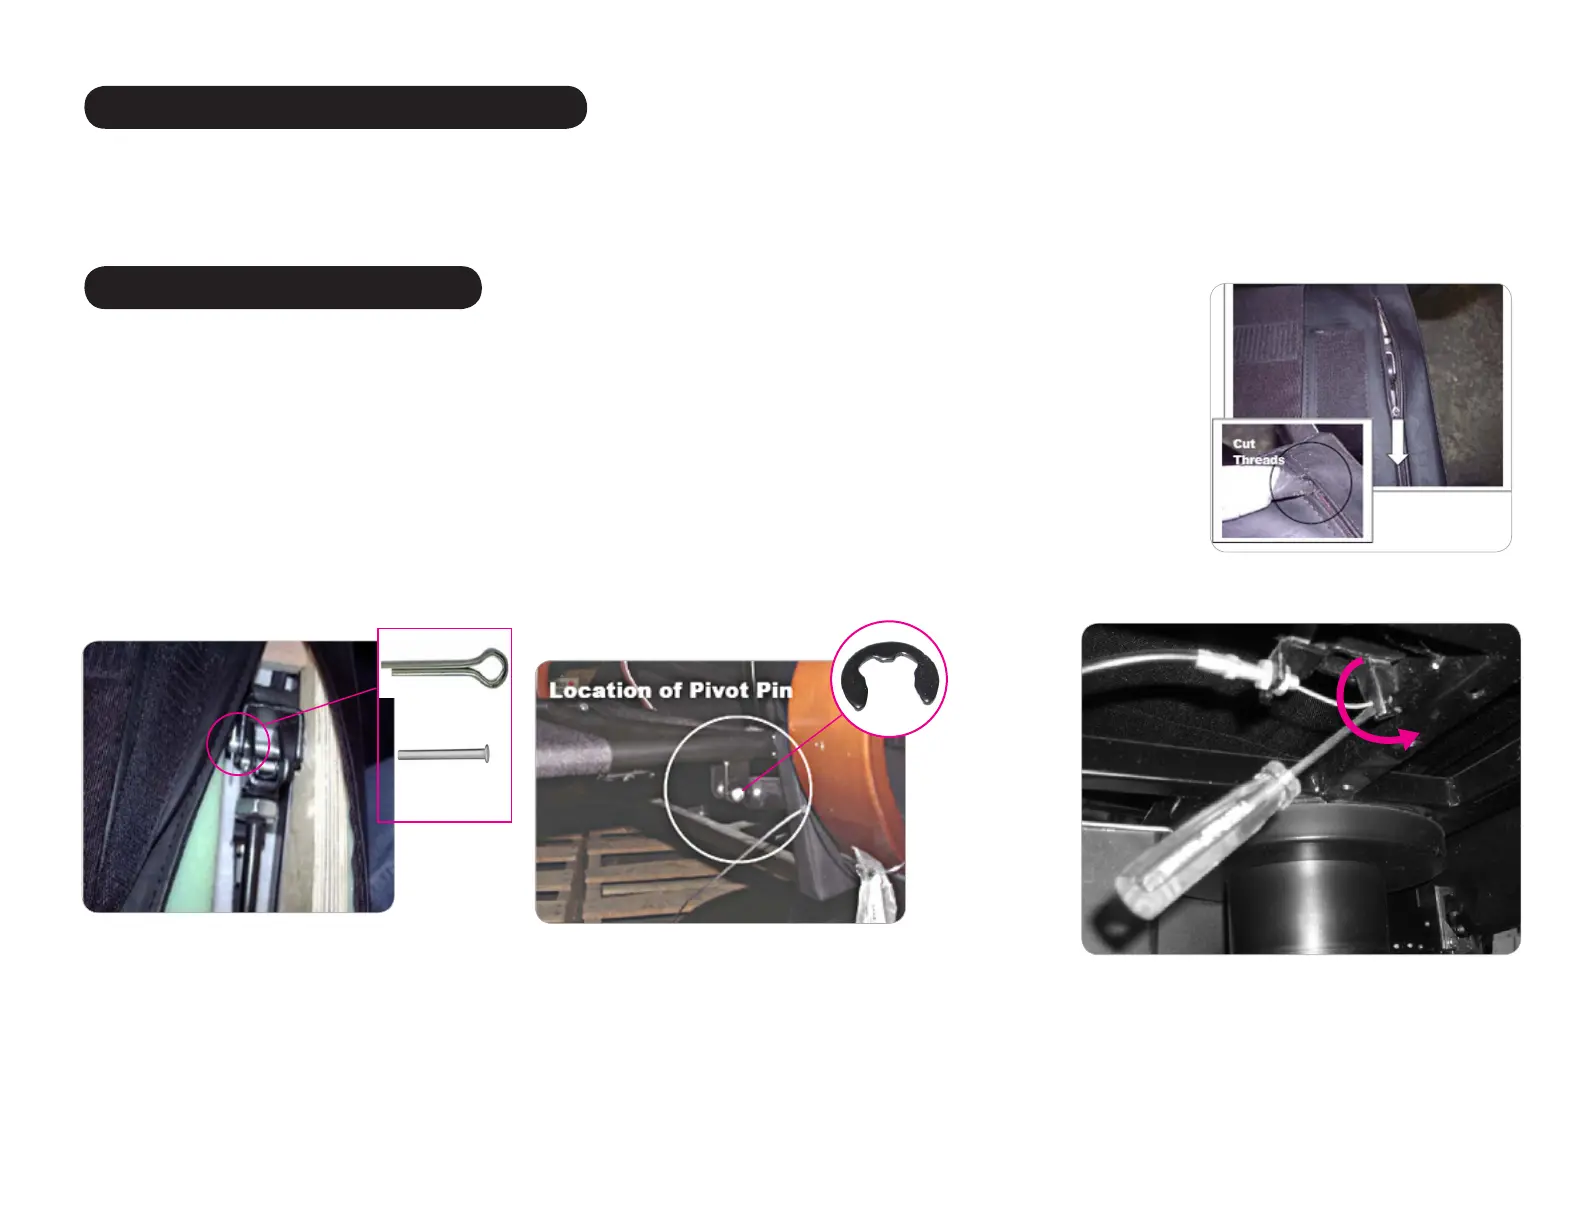
(Fig.8)
REMOVING A VERSION 1 FOOTREST CABLE FROM THE BRACKET UNDERNEATH THE CHAIR
1. Using a small scissors, cut the threads that secure the seat cushion support zipper then open the zipper to expose the gas cylinder (Fig.5)
2. Using needle-nosed pliers, remove the cotter hinge pin and the pin from the gas cylinder (Fig.6).
3. Locate the point at which the gas cylinder connects to the footrest, secured by a silver pin.
4. Using a small flat-head screwdriver, remove the “C” clip from the pin, then remove the pin (Fig.7).
5. Lift the rear of the gas cylinder then pull it and the footrest cable through the seat opening.
6. Use a small flat-head screwdriver to open the split in the bracket that secures the cable to the bracket (Fig. 8).
7. Completely loosen the nut that secures the cable to the side of the bracket closest to the cable end.
8. Pull the cable away from the bracket to free the barrel from the bracket.
9. Remove the cable from the chair.
(Fig.5)
(Fig.6)
(Fig.7)
“C” clip
Cotter pin
Hinge pin
REMOVING A VERSION 2 CABLE FROM THE BRACKET UNDERNEATH THE CHAIR
1. Use a small flat-head screwdriver to open the split in the bracket that secures the cable to the underside of the chair (Fig. 8).
2. Completely loosen the nut that secures the cable to the side of the bracket closest to the cable end.
3. Pull the cable away from the bracket to free the barrel from the bracket.
4. Remove the cable from the chair.
REMOVING THE FOOTREST CABLE