5
①
④
⑤
③
B
NOTE: Before adding each link, adjust the smart stop (A)
according to step 2. The links should be positioned so that
the monitors do not extend beyond the desk surface.
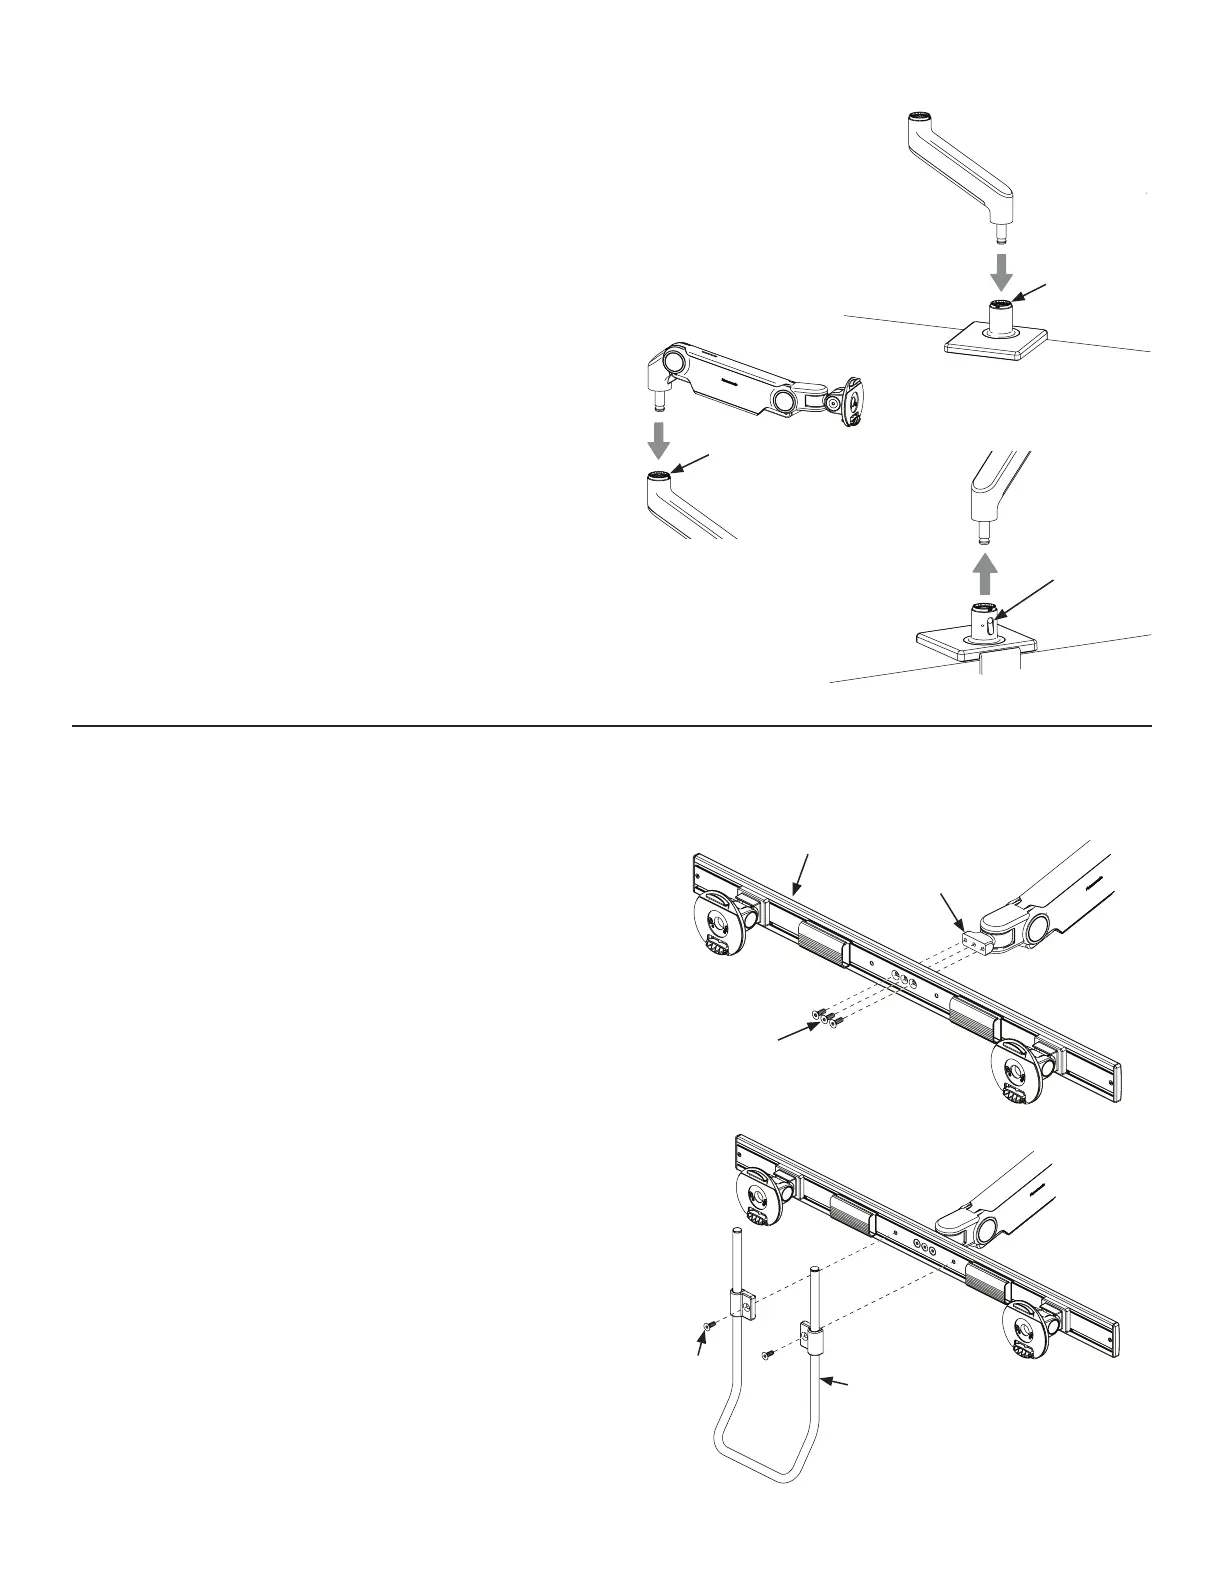
1
Insert the angled link into the mount until release
button locks in place.
2
Insert the dynamic link into the angled link until the
release button locks in place.
3
To remove links, press the release button (B) and lift
upward near the joint.
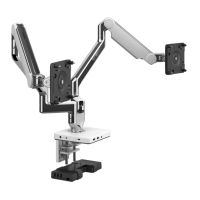
If using dual monitors, attach the crossbar according to the
following steps. If using triple monitors, use the instructions
included with the triple crossbar. If using a single monitor,
continue to Step 5.
1
Attach crossbar (A) to crossbar link (B) using crossbar link
screws (C). Tighten with 4mm hex key until secure.
2
(Optional) Attach handle (D) to crossbar by using included
screws (E). Adjust the handle to desired height. Tighten
with 4mm hex key until secure.
WARNING: Risk of Injury - Do not allow crossbars to be
positioned so that the monitors extend beyond the work
surface which the mount is installed to at all times.
Attach Arm To Base Stem
Attach Crossbar To Arm (Dual-Monitor Application Only)
A
A
B
C
D
E
A
②
 Loading...