HELIX® 5 Series In-Dash Mounting Installation Guide
2
532319-1_B
2. Cut the In-Dash Mounting Hole
To in-dash mount the HELIX control head, start by placing the components on the surfaces where you intend
to install them.
1. Review the instructions, measurements, and cutting options indicated on the In-dash Mounting
Template.
2. Tape the template to the chosen in-dash mounting location.
3. Using the template, select the cutting method that is best for your boat:
• Drill one entry hole away from the main cut line that is large enough to insert the blade of your
cutting tool.
OR
• Drill a corner hole away from the main cut line using a drill bit that will create a hole as close to a
diameter of .42 inches (10.7 mm) as possible. Repeat for the other three corners as indicated on the
template. Use one of the corner holes as an entry hole, or drill an additional entry hole away from
the main cut line.
4. Carefully begin cutting toward the dotted cut line, and continue cutting to the inside of the line around
the template.
5. Test the fit of the control head in the mounting hole and make adjustments to the mounting hole, as
needed. Remove the template when finished.
6. Thoroughly clean and deburr the mounting hole.
3. Install the Control Head
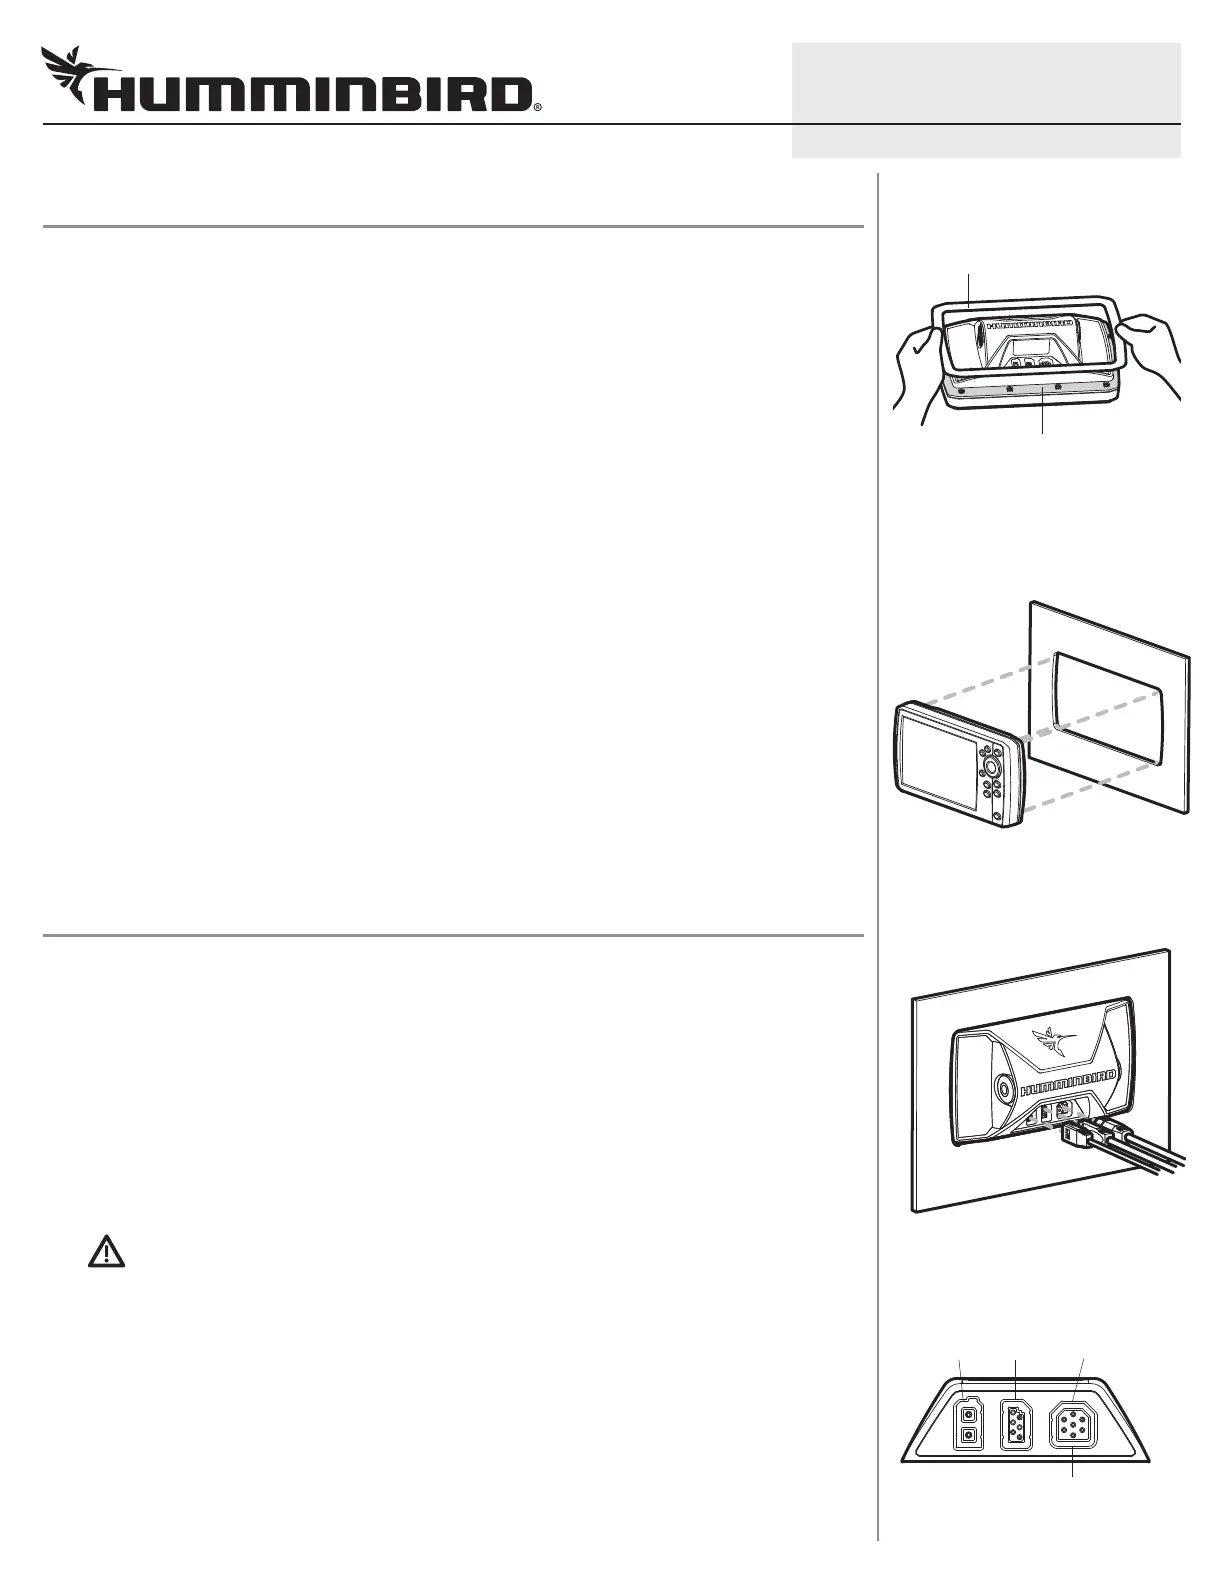
1. Clean the Mating Surfaces: Use rubbing alcohol to clean the edges of the in-dash mounting hole and
the back rim of the control head where the gasket will be installed (see the illustration Installing the
Gasket). Allow the cleaned areas to dry completely.
2. Place the control head, with the screen facing down, on a towel or cloth on a stable and level surface.
3. Peel the brown liner from the adhesive backing on the gasket.
4. Hold the sides of the plastic film attached to the gasket with the adhesive side facing down (see the
illustration Installing the Gasket). Carefully align the gasket around the rim of the control head so it is
centered. Confirm there are no uneven gaps.
WARNING! Use caution when handling the gasket. Do not allow the adhesive to touch the sides or rear
of the control head during installation.
5. Lightly press one side of the gasket down onto the flat rim of the control head.
6. Confirm the alignment has not changed and that the gasket is centered around the control head. Then
lightly press down on the remaining sides of the gasket. Make adjustments, as needed.
7. Carefully peel the plastic film from the gasket.
8. Insert the control head through the mounting hole from the front side of the dash. Press down firmly
around the sides of the control head for 20 seconds to secure the adhesive.
Connecting the Cables
power
COM
(communications)
transducer
Optional: Use a Y-Cable to connect
Transducer and Speed Sensor Accessory
Control Head Ports
Install the gasket along the flat rim of
the control head (highlighted in grey).
Installing the Gasket
Confirm the gasket is evenly centered
around the rim of the control head.
Installing the Control Head
 Loading...