HELIX® 7 Series In-Dash Mounting Installation Guide
3
532365-2_A
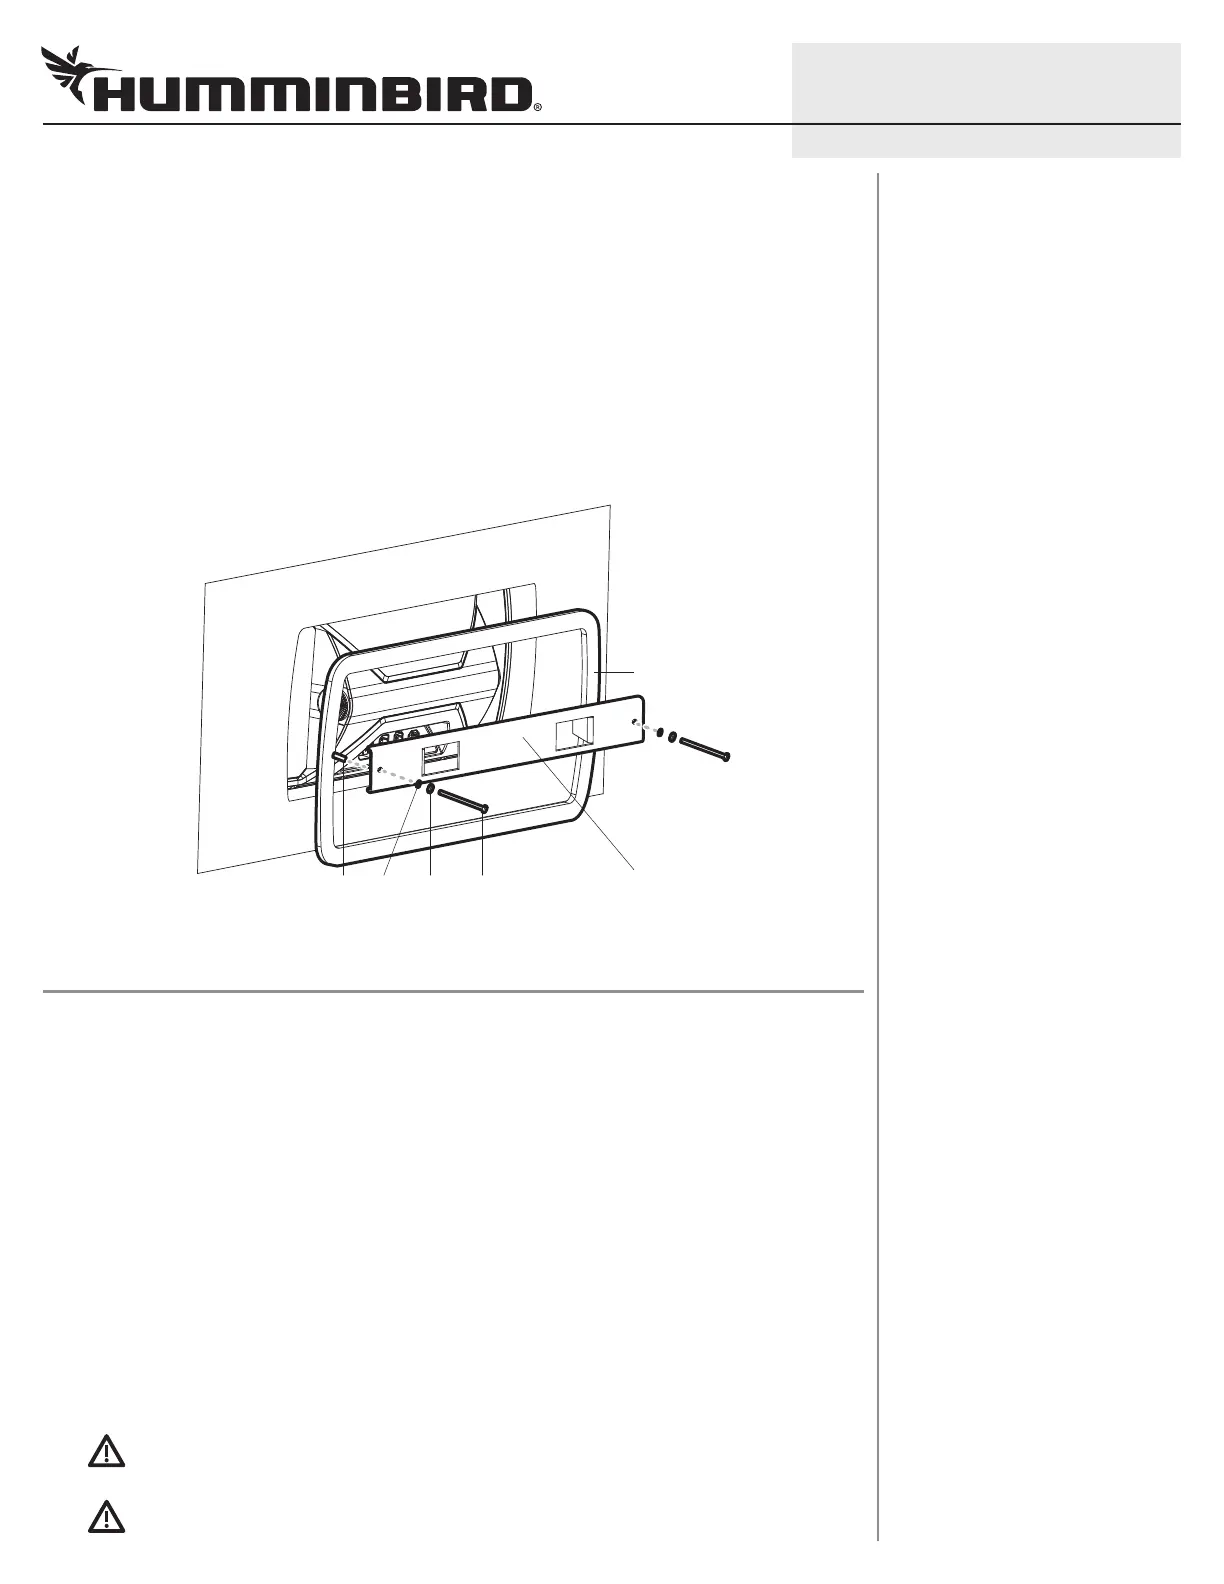
Install the Bolts
1. Place the hardware onto each bolt in the following order: nut and washer. See the illustration Installing
the In-Dash Mount Bracket on the Control Head.
2. Insert the bolts into the threaded bolt holes on the bracket. Hand-tighten the bolts until there is enough
of the bolt exposed on the other side of the bracket to install the end cap. You will fully tighten the bolts
in a later procedure.
3. Install one end cap on the end of each bolt.
4. Install the Control Head
1. From the front of the dashboard, with the control head screen facing out, carefully lower the control
head diagonally into the mounting hole. Insert one end of the bracket through the hole first.
2. Adjust the angle so the control head is centered in the mounting hole.
3. Press down lightly on the control head. Confirm the control head is seated flush against the dash. Make
adjustments, as needed.
4. From under the dash, place the bracket reinforcement plate around the back of the control head.
5. Finger-tighten each bolt until the end cap is flush against the bracket reinforcement plate. Then, use a
5/16" socket wrench to hand-tighten the bolts no more than 2 additional turns. Hand-tighten only!
Do NOT over-tighten the bolts. There should be no play or gaps between the unit and the dash. The
bracket should remain straight without bending.
6. Finger-tighten each nut until the nut and washer are flush against the bracket. Fully tighten each nut
using a 3/8" wrench while holding the bolt in place. Do NOT over-tighten the nuts. Hand-tighten only!
WARNING! Do NOT use power tools to secure the hardware.
WARNING! Do NOT over-tighten the bolts. If the bracket is bending or bowing, it is too tight. Over-tightening
the bolts may damage the control head.
end cap
Installing the In-Dash Mount Bracket on the Control Head
Confirm the in-dash mount
bracket is parallel with the
face of the control head.
bracket reinforcement plate
nut boltwasher
 Loading...