Step 4 – Test & Start Using
1. Turn OFF the camera, then slide the Power Switch to “SETUP”
position again, wait until screen shows 4G signal bar(s).
2. Press “OK” button to take a photo, wait about 35 – 45 seconds, the
photo will be transmitted to your APP directly.
3. Slide the Power Switch to “ON” position, camera indicator light will
flash 5 times before it enters auto working mode.
Note! Two bars of signal strength are required for the camera to operate
well.
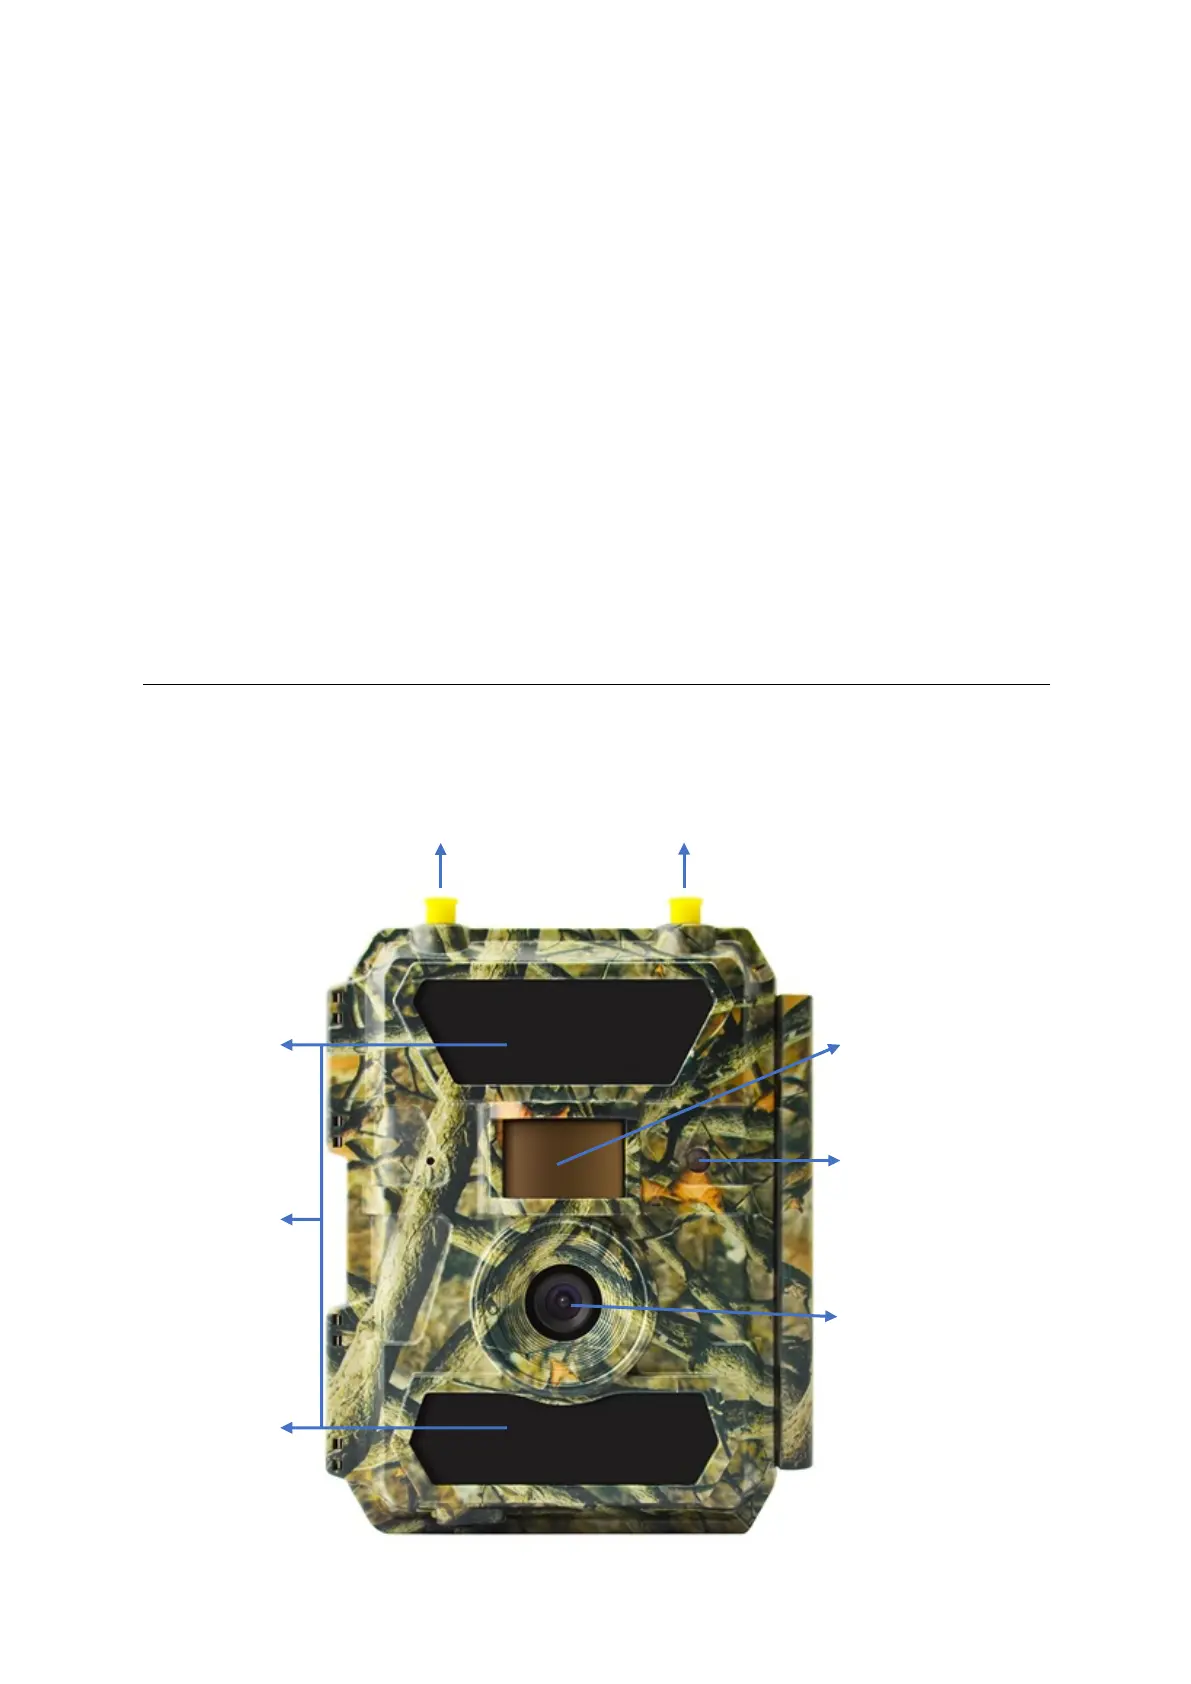
Whole View and Details of Camera
Front View of Camera
Antenna Antenna
27 IR LEDs PIR-sensor
Indicator Light and
Day/Night-sensor
57 IR LEDs
in Total
Lens
30 IR LEDs