4
Assembly
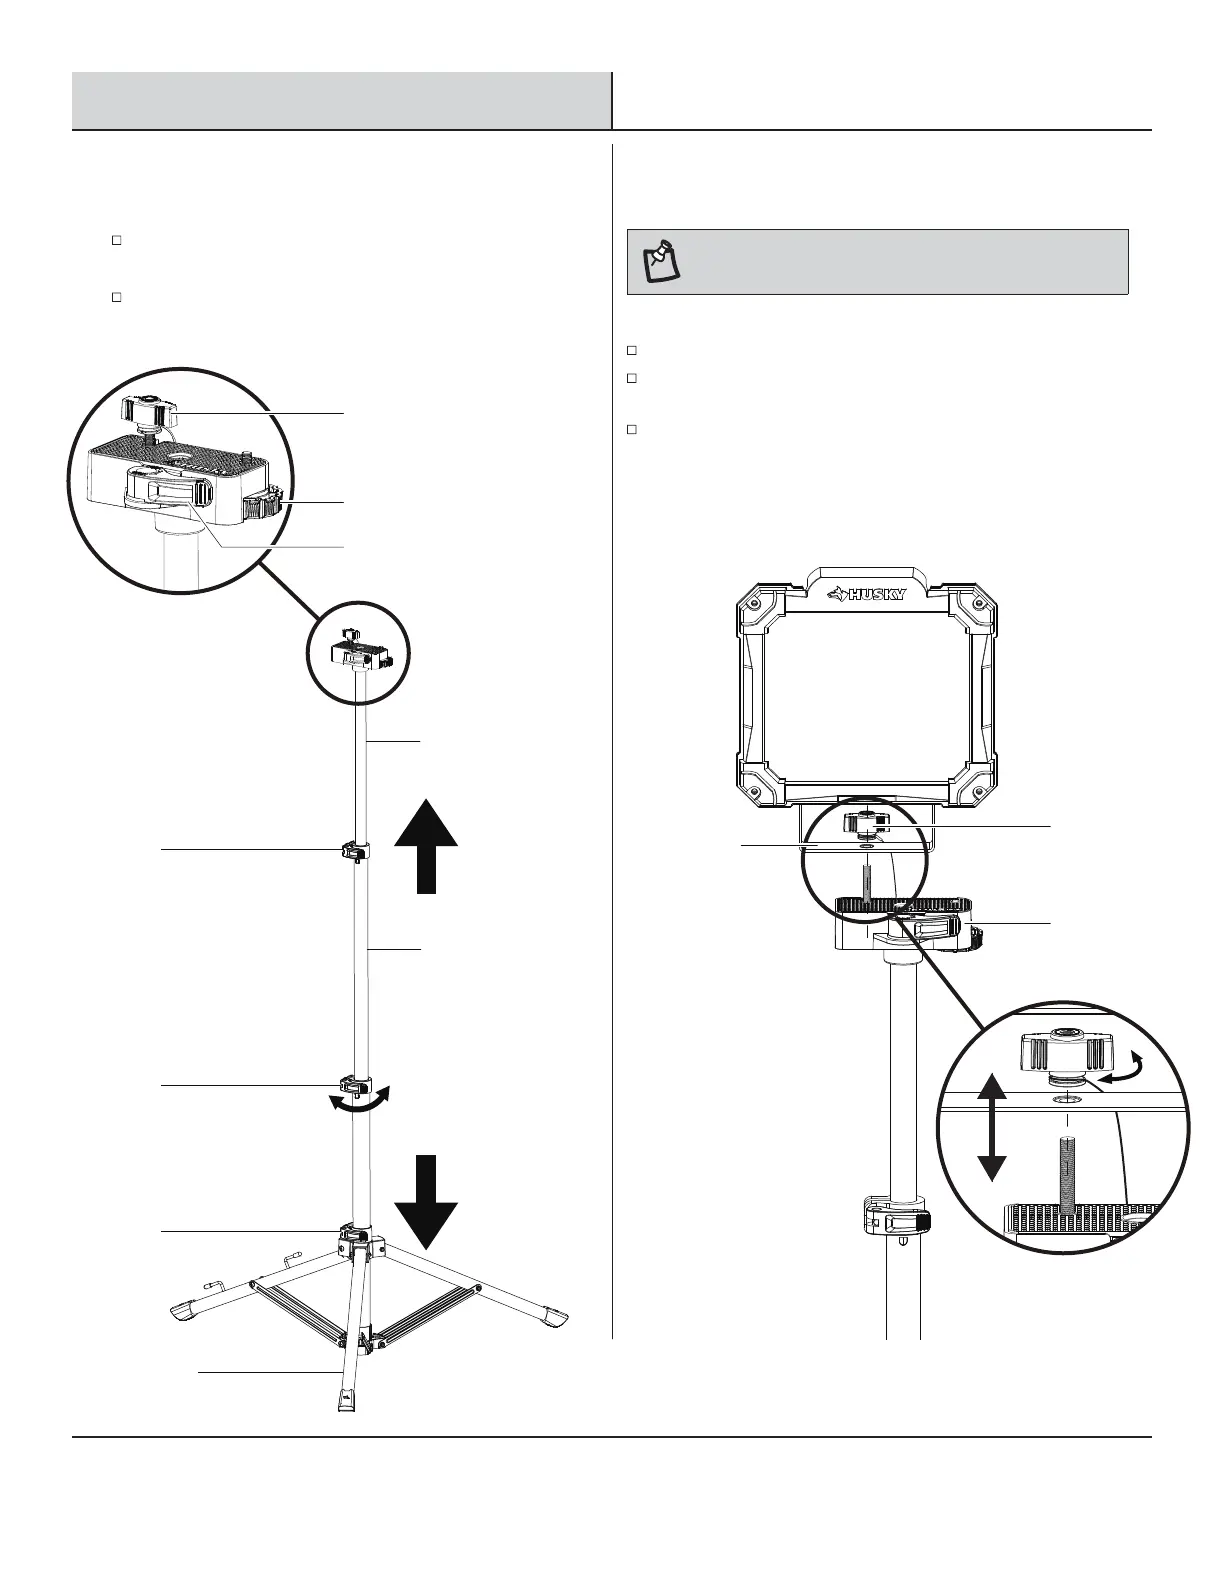
1
Preparing the tripod
Open the latch (B1), expand The
tripod legs (C1) outwards,
adjust to the bottom, and then x the latch (B1).
Open the latch (B2, B3), adjust the
telescoping tube (C2, C3)
upwards, and adjust them to the desired height.
Then x the latch (B2, B3).
2
Attaching lights to the tripod
Installation mode-1
NOTE: Lamp head and stand sold separately.
Place the bracket (2) over the screw of the mount (A), tighten
the wing nut (AA).
Remove tripod wing nut (AA) and lift screw upright.
To remove the light from the mount (A), remove the wing nut
(AA) and lift the light.
Latch (B1)
Latch (B2)
Latch (B3)
Telescoping tube (C3)
Wing nut
Telescoping tube (C2)
Tripod legs (C1)
Bracket (2)
Mount (A)
Wing nut (AA)
Screw knob
Latch