8 | DOC-575_EN REV01
IMPORTANT
Do not turn lter inside out. It must be replaced over the cage on the same fabric
side as initially mounted in the factory.
It is very important that the lter be slipped over the metal rim located at the top of
the cage. In order to prevent any dust in ltration into the motor, the cage must be
completely covered by the lter;
f� Clip the dust canister back on the casing.
THE DISPOSABLE FILTRATION BAG
In order to maximize your system’s ltration capabilities, every Husky power unit comes with a
disposable ltration bag. See below instructions on replacing the disposable ltration bag:
DISPOSABLE FILTRATION BAG VACUUM MODEL
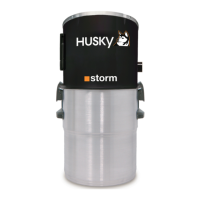
FILTRE-186 HUSKY STORM
The disposable ltration bag should be changed every three (3) months to ensure proper
functioning of the power unit.
To change the ltration bag, please proceed as follows:
1. Unlatch the dust canister;
2. Remove the disposable bag from the elbow attachment by gently pulling on both sides
of the cardboard cuff ;
3. Dispose of the used bag;
4. Slip the new disposable ltration bag onto the elbow xture by gently pressing on both
sides of the cardboard cuff until it reaches the stop notch on the elbow.
MOTOR
All units are equipped with a soft-start control module and have a LED communicating the
system status (see g. 4 in section 9 for more details on LED color interpretation). When the
LED changes to amber, it is time to make an appointment with a Husky certi ed technician for
a complete check-up of the unit. This mandatory maintenance will extend the life of the unit
and keep the warranty valid. If it is still not carried out after 20 hours of additionnal operating,
the device will automatically switch off as a safety measure.
All systems also have a mini breaker (power cut-off ) directly connected to the module which
protects the motor against an overload and prevents overheating.
HOSE HANDLE
Wipe the hose handle regularly with a moist towel to avoid buildup.
9. TROUBLESHOOTING
Failure of the power unit could be caused by:
• Inadequate power level (voltage / amperage) (ensure that power level complies with the power unit’s electrical requirements);
• Malfunction of the motor or controller module.
Simple checks can often help you nd out why your power unit is inoperative. We invite you to verify the following before calling a service technician.
SITUATION VERIFICATION
NO POWER
Check that the power unit’s electrical cord is plugged directly into a power outlet.
The power unit is equipped with a mini breaker (button on the side of the motor housing) which protects the motor against an overload. To reset the mini breaker, simply
push the button. If the power goes off one more time, call a service centre near you.
Using a screwdriver tted with a rubber handle, touch both pins of the low voltage terminals (short circuit the 2 pins) on the side of the motor housing. If the power unit
starts, the problem lies with the low voltage wiring (installed along the piping).
You should then verify if the 24 V circuit is adequately connected by checking each inlet. Open the inlet cover, touch the small contacts with the head of a pair of metal
pliers with rubber handles. This will establish power and start the motor. Repeat for each vacuum inlet.
NOTE
» If all vacuum inlets are functional and your exible hose is a low voltage technology handle, then there may be a defect in the
switch of the hose or the hose itself.
Check the breaker on your electric circuit panel.
DECREASED
SUCTION
The exible hose may be blocked. If you cannot unblock it, try inserting the opposite end of the hose into the wall inlet; touch the contacts which are located on the inside
of the inlet with the hose wand in order to start the power unit.
NOTE
» Frame the inlet with your hands or a large enough piece of cloth (such as a towel) to ensure the maximum suction to unblock the
hose.
Check whether the dust canister / disposable ltration bag / permanent lter needs to be emptied / cleaned.
Make sure the canister is clipped properly to the motor housing and that the gasket, which ts around it, is in good condition.
Make sure all inlets are airtight.
If the pipes are visible in certain areas: check if the ttings are well glued and that there are no air leaks.
If the pipes should be blocked behind the walls, it is possible to determine where the blockage is located by starting from the furthest inlet from the central vacuum. Insert
a tissue paper and check to see if the tissue paper reaches the dust canister. Repeat the same for each inlet.
 Loading...