EasyManua.ls Logo

Husqvarna ECA308 - User Manual

Husqvarna ECA308
40 pages
Print Icon
To Next Page IconTo Next Page
Loading...
ECA308
EN Operator's manual 2-12
ES-MX Manual del usuario 13-25
FR-CA Manuel d’utilisation 26-38
Question and Answer IconNeed help?

Do you have a question about the Husqvarna ECA308 and is the answer not in the manual?

Overview

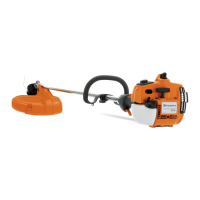
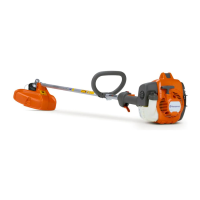
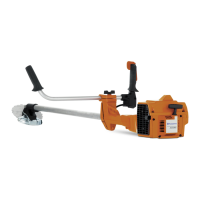
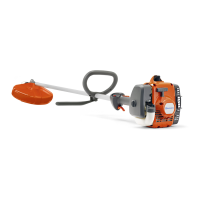
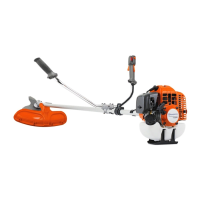
The Husqvarna ECA308 is an attachment designed for cutting grass and other soft ground cover. It is intended for use with compatible Husqvarna products, and users should refer to the accessory chapter in their product's operator's manual for specific compatibility information.

Technical Specifications

  • Model: ECA308
  • Weight: 4.9 lb / 2.2 kg
  • Cutting Equipment (Blade): Art. no. 531 30 02-33

Usage Features

The ECA308 attachment is designed for efficient grass and soft ground cover cutting. Key usage features and safety guidelines include:

  • Intended Use: Specifically for cutting grass and other soft ground cover.
  • Work Position:
    • Hold the product with two hands, on the right side of your body.
    • Keep the cutting attachment below waist level.
    • Ensure body parts are away from hot surfaces and the cutting attachment.
  • Safety Precautions:
    • Always wear approved eye, ear, head, and hand protection.
    • Use non-slip protective footwear; never operate barefoot or with open sandals.
    • Wear long trousers to reduce the likelihood of injury from thrown objects.
    • Keep bystanders, children, animals, and helpers at a minimum distance of 50 ft (15 m) from the work area. Stop the product immediately if anyone approaches.
    • Always use two hands to hold the machine to maintain control.
    • Hold the machine by insulated gripping surfaces only, as the cutting line or blade may contact hidden wiring.
    • Maintain proper footing and operate the machine only when standing on the ground. Avoid excessively steep slopes.
    • When working on slopes, always work across the face of slopes, never up or down, and exercise extreme caution when changing direction.
    • Keep all body parts away from the cutter, line, or blade when the machine is running.
    • Do not use the machine in bad weather conditions, especially during lightning storms.
    • Thoroughly inspect the work area for wildlife, stones, sticks, wires, bones, and other foreign objects before operation to prevent personal injury from thrown objects.
    • Visually inspect the cutter or blade and assembly for damage before each use.
    • Ensure the rated rotational speed of the cutter is at least equal to the maximum rotational speed marked on the machine.
    • Always stop the engine/motor before working on the cutting attachment. For gasoline products, remove the spark plug cap; for battery products, remove the battery. Ensure the cutting attachment has stopped completely.
    • Walk, never run, when operating the product.
    • Do not put the product down with the engine/motor running unless it is in clear view.
    • Do not overreach; maintain proper footing and balance.
    • Dress properly: avoid loose clothing, scarves, jewelry, and long hair that could get caught in moving parts.
    • Always have a first aid kit nearby.
  • Assembly:
    • Installing the shaft into the gearbox: Loosen the clamp screw and remove the set screw. Align the arrow on the shaft with the set screw hole in the gearbox. Push the shaft until the line mark touches the gearbox. Align the set screw holes, replace, and tighten the set screw. Finally, tighten the clamp screw.
    • Adjusting cutting depth: Loosen the wing nut, set the desired cutting depth, and then tighten the wing nut.

Maintenance Features

Regular maintenance is crucial for the longevity and safe operation of the ECA308 attachment.

  • Daily Maintenance:
    • Perform daily maintenance tasks for the power unit (refer to its operator's manual).
    • Examine the product before each operation to ensure correct installation and replace damaged parts.
    • Verify the blade is installed correctly and does not rotate when the throttle/power trigger is released.
    • Check the cutting attachment guard for damage or cracks; replace if impacted or cracked.
    • Inspect the blade for damage or cracks; replace if necessary.
    • Check the support flange for damage.
    • Ensure the locknut is tight.
  • Weekly Maintenance:
    • Check that the bevel gear is filled to ¼ with special grease; fill if necessary.
  • Checking the Bevel Gear:
    • The bevel gear is factory-filled with sufficient grease and normally does not require changing unless repairs are carried out.
    • Before use, ensure the bevel gear is filled to ¼ with special grease.
  • Lubricating the Flexible Drive Shaft:
    • Loosen the two screws on the bevel gear.
    • Remove the shaft assembly.
    • Firmly grip the hollow shaft and remove the flexible drive shaft from the opposite end of the gearbox.
    • Lubricate the entire length of the flexible drive shaft.
    • Insert the flexible drive shaft into the tube, turning it to ensure correct engagement with the bevel gear.
    • Attach the bevel gear on the drive shaft and tighten the two screws.
  • Replacing the Blade:
    • Note: The locknut has a left-hand thread.
    • Stop the engine/motor and ensure the cutting attachment has stopped.
    • Wear heavy-duty gloves as the blade is very sharp.
    • Place a small screwdriver or locking pin in the hole on the drive disc to lock the blade.
    • Loosen and remove the locknut (undo in the same direction as the cutting attachment rotates).
    • Remove the support flange, retainer, blade, and drive disc.
    • Examine all removed parts for damage and replace any damaged components.
    • Attach the drive disc on the output shaft, ensuring its outer edge is in the blade's hole.
    • Install the new blade on the drive disc.
    • Install the support flange, ensuring its outer edge pushes on the blade.
    • Install the locknut.
    • Tighten the locknut to a torque of 11-15 ft-lb / 15-20 Nm.
    • Remove the screwdriver or locking pin.
    • Only use original spare parts for repairs.
  • Checking the Cutting Attachment Guard:
    • Never use a cutting attachment without an approved guard. Incorrect or damaged guards can cause injury.
    • If the cutting attachment is connected to a battery power unit, ensure the front guard is installed.
    • Ensure both the cutting attachment guard and front guard are undamaged; replace if damaged.
  • Checking the Support Flange:
    • Check for cracks due to fatigue or overtightening; discard if cracked.
  • Checking the Locknut:
    • The nylon lining inside the locknut must not be so worn that it can be turned by hand. It should offer a minimum resistance of 13 in-lb / 1.5 Nm.
    • Replace the locknut after approximately 10 uses.
    • The locknut has a left-hand thread. Overtightening can damage the threads.
    • Protect your hand during assembly; use the cutting attachment guard as protection when tightening with a socket wrench.
  • Checking the Blade:
    • The blade is designed to withstand lawn edging loads.
    • Check the blade for damage or cracks; a damaged blade must always be replaced.

Husqvarna ECA308 Specifications

General IconGeneral
BrandHusqvarna
ModelECA308
CategoryTrimmer
LanguageEnglish

Related product manuals