EasyManua.ls Logo

Husqvarna FT900 - User Manual

Husqvarna FT900
28 pages
Print Icon
To Next Page IconTo Next Page
Loading...
Owner's Manual
532 43 99-99
FT900
"This machine is approved by the EPA for E10 (10% ethanol) and lower fuel only.
Do not use any fuel >E10 in this machine."

Other manuals for Husqvarna FT900

Questions and Answers

  • A
    Amy GonzalezAug 12, 2025
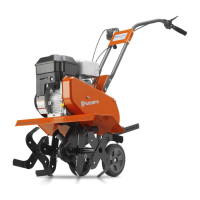
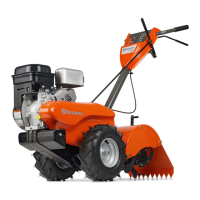
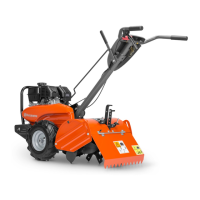
    How to fix Husqvarna Lawn and Garden Equipment that will not start?
    • E
      Emily SantiagoAug 12, 2025
      If your Husqvarna Lawn and Garden Equipment won't start, several factors could be at play. Start by ensuring the fuel tank is filled. If that's not the issue, refer to the Operation section to ensure the engine is properly choked. If the engine is flooded, wait a few minutes before trying again. Other potential causes include a dirty air cleaner (clean or replace it), water in the fuel (drain and refill with fresh gasoline), a clogged fuel tank (remove and clean it), a loose spark plug wire (reseat it), a bad spark plug or improper gap (replace or adjust), or a carburetor that needs adjustment.
  • C
    Crystal WilliamsAug 19, 2025
    Why is my Husqvarna Lawn and Garden Equipment hard to start?
    • M
      Michael NixonAug 19, 2025
      If your Husqvarna Lawn and Garden Equipment is hard to start, make sure the throttle control is in the “FAST” position. A dirty air cleaner can also cause this, so clean or replace the air cleaner cartridge. Other potential causes include a bad spark plug or improper gap (replace spark plug or adjust gap), stale or dirty fuel (drain fuel tank and refill with fresh gasoline), a loose spark plug wire (make sure spark plug wire is seated properly on plug), or a carburetor that needs adjustment.
  • T
    Timothy BrownAug 23, 2025
    What to do if Husqvarna Lawn and Garden Equipment engine overheats?
    • T
      Thomas JenningsAug 25, 2025
      If your Husqvarna Lawn and Garden Equipment engine overheats, start by checking the oil level and changing the oil if it's low or dirty. Also, ensure the engine air screen is clean. A dirty engine can also contribute to overheating, so clean the cylinder fins, air screen, and muffler area. If the muffler is partially plugged, remove and clean it. Finally, improper carburetor adjustment can cause overheating, so adjust the carburetor to a richer position.
  • C
    Corey WillisAug 27, 2025
    What to do if Husqvarna Lawn and Garden Equipment engine runs but tiller won’t move?
    • K
      Kevin BrooksAug 27, 2025
      If the engine runs but the Husqvarna Lawn and Garden Equipment tiller won’t move, first ensure that the tine control is engaged. If it is engaged, inspect and adjust the V-belt. Also, check if the V-belt is off the pulley(s).
  • M
    Michael HernandezAug 31, 2025
    Why does my Husqvarna Lawn and Garden Equipment have excessive bounce and difficult handling?
    • J
      jamiesosaAug 31, 2025
      If your Husqvarna Lawn and Garden Equipment experiences excessive bounce or difficult handling, it could be due to the ground being too dry and hard; in this case, moisten the ground or wait for more favorable soil conditions. It could also be due to incorrectly adjusted wheels and depth stake; adjust them accordingly.
  • A
    Ann CortezSep 3, 2025
    Why does my Husqvarna Lawn and Garden Equipment engine runs but labors when tilling?
    • C
      Colleen ChambersSep 3, 2025
      If the Husqvarna Lawn and Garden Equipment engine runs but labors when tilling, it might be because you are tilling too deep, set the depth stake for shallower tilling. Also, check the throttle control setting and make sure it is properly adjusted. It could also be due to the carburetor being out of adjustment; make necessary adjustments.
  • D
    Danielle BradleySep 8, 2025
    Why does soil ball up or clump when using my Husqvarna Lawn and Garden Equipment?
    • M
      Melissa PerezSep 8, 2025
      If the soil balls up or clumps when using your Husqvarna Lawn and Garden Equipment, it is likely because the ground is too wet. Wait for more favorable soil conditions.
  • F
    Franklin WallaceNov 15, 2025
    Why is my Husqvarna Lawn and Garden Equipment losing power?
    • D
      Douglas NorrisNov 15, 2025
      If your Husqvarna Lawn and Garden Equipment is experiencing a loss of power, there are several potential causes. Check if the engine is overloaded and adjust the depth stake and wheels for shallower tilling if needed. A dirty air cleaner can also cause this issue, so clean or replace the air cleaner cartridge. Additionally, check the oil level and change the oil if it's low or dirty. Other possible causes include a faulty spark plug (clean, regap, or replace it), oil or stale/dirty fuel in the fuel tank (drain and refill with fresh gasoline, clean carburetor), water in the fuel (drain fuel tank and carburetor, and refill tank with fresh gasoline), a clogged fuel tank (remove and clean it), a loose spark plug wire (connect and tighten), a dirty engine air screen (clean it), a dirty/clogged ...

Summary

Safety Rules

Training

Thoroughly familiarize yourself with controls, proper use, and stopping procedures.

Preparation

Inspect area, remove objects, check controls, and use proper attire for safe operation.

Operation

Follow safety practices during use, avoid hazards, and stop engine when leaving the unit.

Maintenance and Storage

Keep unit in safe condition, check fasteners, and store properly to prevent issues.

Product Specifications

Customer Responsibilities

Assembly

Tools Required for Assembly

List of tools needed for assembling the tiller, including wrenches and screwdrivers.

Operators Position

Defines operator's position for left/right references in the manual.

Contents of Hardware Pack

Inventory of hardware and components included in the tiller's package.

Unpack Carton & Install Handle

Procedure for unpacking the tiller and installing the handle assembly.

Install Depth Stake Assembly

Steps to correctly install the depth stake support and related hardware.

Handle Height

Information on adjusting the tiller's handle height for operator comfort.

Tilling Width

Guidance on adjusting tilling width based on soil conditions.

Tine Operation

Instructions for checking tine operation before first use.

Operation

Know Your Tiller

Familiarize yourself with tiller controls, symbols, and adjustments.

Meets ANSI Safety Requirements

Statement confirming tiller compliance with American National Standards Institute.

How to Use Your Tiller

Guide on operating tiller controls before adding fuel or starting the engine.

Stopping

Procedures for stopping the tiller's tines and engine safely.

Tine Operation

Instructions on engaging and disengaging forward and reverse tine controls.

Tilling

Explanation of how depth stake and wheel height regulate tilling speed and depth.

Depth Stake

How to adjust the depth stake for desired tilling depth and forward speed.

Wheels

Instructions for adjusting wheel position for optimal tilling.

To Transport

Safety precautions and steps for transporting the tiller.

Before Starting Engine

Important precautions regarding dirt, oil, and fuel before engine startup.

Fill Engine with Oil

Guide for correctly filling the engine with the appropriate type and amount of oil.

Add Gasoline

Instructions for safely adding unleaded gasoline to the tiller's fuel tank.

To Start Engine

Step-by-step guide for starting the tiller's engine using the recoil starter.

Breaking in Your Tiller

Procedure for initial break-in of belts, pulleys, and tine control.

Tilling Hints

Advice and tips for more effective and easier tilling in various soil conditions.

Cultivating

Guidance on using the tiller for cultivating, weed removal, and soil crust breaking.

Maintenance

Maintenance Schedule

A chart outlining required maintenance tasks at various service intervals.

General Recommendations

Overall advice for maintaining the tiller and preserving warranty coverage.

Before Each Use

Essential checks to perform on the tiller before starting any operation.

Lubrication

Guidance on keeping the tiller's components well-lubricated.

Lubrication Chart

Visual chart detailing lubrication points and types.

Engine

Maintenance procedures specifically for the tiller's engine.

Lubrication

Specifics on engine oil type, viscosity, and checking the oil level.

To Change Engine Oil

Step-by-step instructions for draining and refilling the engine oil.

Air Cleaner

Procedure for servicing the air cleaner cartridge for optimal engine performance.

Cooling System

Tips for maintaining the air-cooled engine's cooling system for longevity.

Muffler

Important information regarding the muffler and spark arrester.

Spark Plug

Recommendations for replacing the spark plug for seasonal starting.

Transmission

Information that the transmission is sealed and requires no regular lubrication.

Cleaning

Guidelines for safely cleaning the tiller and its components.

Service and Adjustments

To Adjust Handle Height

Instructions for adjusting the tiller's handle height to suit operator preference.

Tine Arrangement

Options for arranging tines to suit different tilling or cultivating needs.

Normal Tilling - 26 Inch Path

Configuration for standard tilling operations with a 26-inch path.

Mid-Width Tilling - 24 Inch Path

Configuration for tilling with a 24-inch path.

Narrow Tilling;Cultivating - 12-3;4 Inch Path

Configuration for narrow tilling or cultivating with a 12-3/4 inch path.

To Remove Belt Guard

Steps for removing the belt guard to access internal components.

Tine Operation Check

Procedure to verify that tines do not rotate when the control is in the 'OFF' position.

To Replace V-Belts

Instructions for replacing worn or damaged V-belts.

Engine

Information regarding engine maintenance and repair.

To Adjust Carburetor

Guidance on adjusting the carburetor if engine performance is affected.

Storage

Tiller

Steps for preparing the tiller for long-term storage, including cleaning and inspection.

Engine Oil

Procedure for draining and replacing engine oil for storage.

Cylinder(s)

Steps to protect the engine cylinder during storage by adding oil.

Other

General advice for storing the unit and its parts safely.

Engine

Precautions for fuel system preparation and storage.

Fuel System

Essential steps to prevent gum deposits and fuel system damage during storage.

Repair Parts

Handle Assembly

Diagram and part list for the tiller's handle assembly.

Belt Guard and Pulley Assembly

Diagram and part list for the belt guard and pulley system.

Wheel and Depth Stake Assembly

Diagram and part list for the wheels and depth stake components.

Tine Assembly

Diagram and part list for the tiller's tines.

Transmission

Diagram and part list for the tiller's transmission.

Decals

Diagram showing locations of various decals on the tiller.

Limited Warranty

Limitations and Exclusions

Details on what is not covered by the Husqvarna limited warranty.

How to Obtain Service

Procedure for getting warranty service and locating authorized dealers.

Authorized Husqvarna Servicing Dealer;Center

Information on contacting dealers for warranty service.

Documentation Required

Proof of purchase and other documentation needed for warranty claims.

Husqvarna FT900 Specifications

General IconGeneral
Engine Displacement208 cc
Number of Tines6
Tine RotationForward
Wheel Size8 inches
Fuel Tank Capacity3.6 qt

Related product manuals