6
1. Select a Location
When choosing a location for your HRC 100 C, consider the
following:
• Choose location near a power source (if hard wiring) or
electrical outlet when using the supplied power cord.
• Ensure operating temperatures are not below 32° or
above 158° Fahrenheit (below 0° Celsius or above 70°
Celsius).
• Place it away from direct sunlight if possible.
• Ensure at least 9” of space to the left of the sprinkler
controller box for the door to swing open after
installation.
• Locate the controller where there is easy access to
sprinkler wire (from valves). If mounted in an outdoor
location, shut the compartment door to keep the
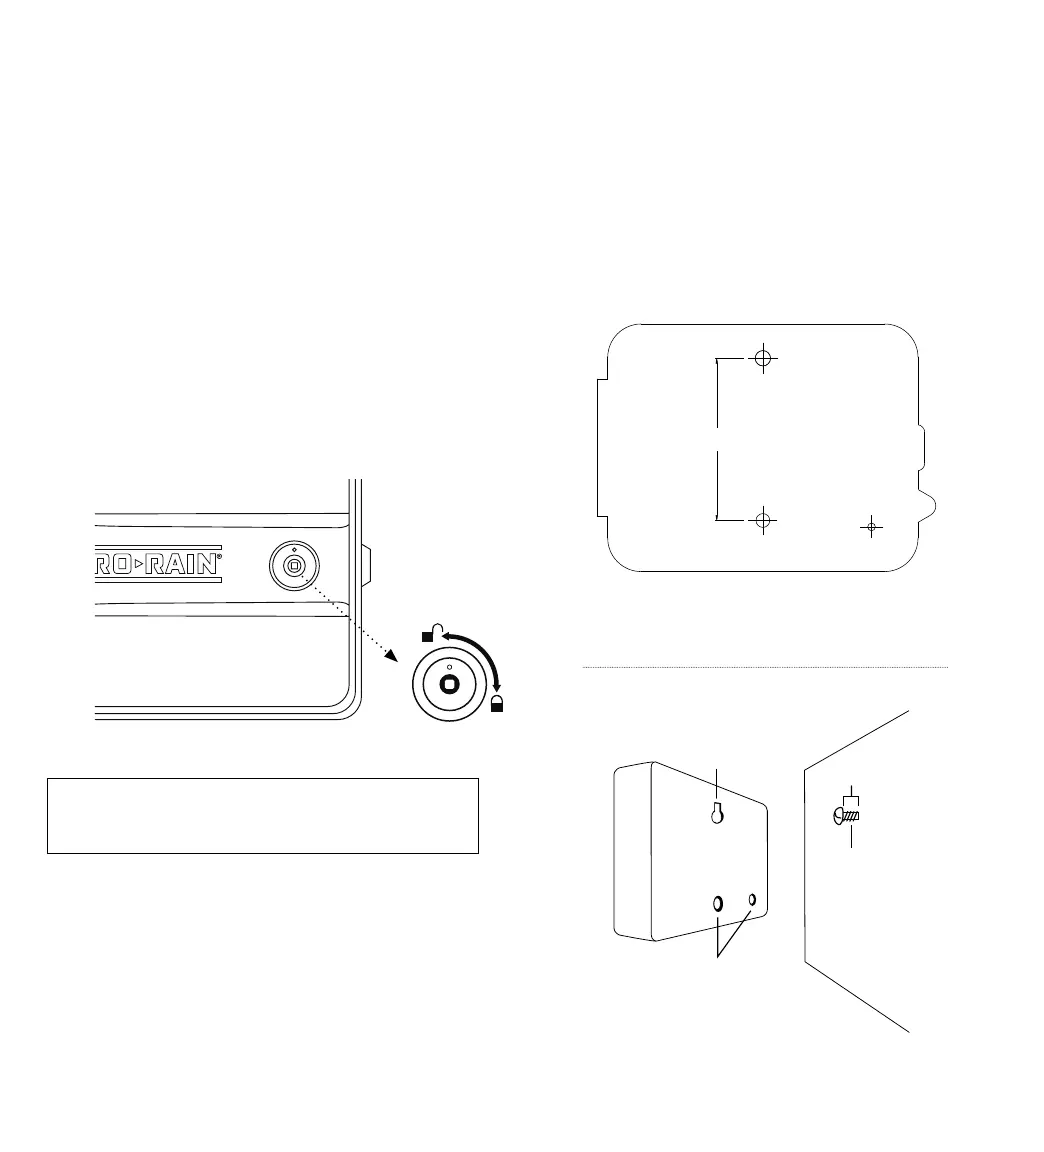
controller safe from weather damage. To lock: insert
the key and turn clockwise to the locked position.
Note: Sprinkler controllers are weather-resistant to UL-50
and ETL
®
Listings, but should not be placed in areas where
continuous water could cause damage.
2. Mount the Controller
• Use the mounting template (included) to mark the
mounting screw location on the wall. See figure 1
• Install a No. 8 screw (included) into wall in the upper
template location. Leave the screw head protruding 1/8”
(3mm) from wall. Use expanding anchors (included) in
plaster or masonry, if necessary, for a secure hold.
• Slip the HRC 100 C over protruding screw (using keyhole
slot in back). See figure 2
• Drive a No. 8 screw through one of the two pre-formed
holes located in lower back cabinet. See figure 2
Figure 2: Hang timer on screw using keyhole
Keyhole
Pre-formed
mounting holes
No. 8 Screw
Wall
1/8"
MOUNTING TEMPLATE
GABARIT D`INSTALLATION
PLANTILLA DE MONTAJE
4.17”
(106 mm)
Figure 1: Use Mounting Template (included)
 Loading...