REPLACING AN EXISTING CONTROL BOARD
NOTE: Prior to replacing the existing controller, note the DIP switch settings and the location of all wires. Taking
pictures is a good way to preserve the existing wiring and setup information for future reference.
WARNING
Electrical shock hazard. To prevent electrical shock,death or equipment damage, disconnect power supply before installing or
servicing control. Only qualified personnel may install or service this control in accordance with local codes and ordinances.
STEP 1: Remove the existing controller
1. Turn off power.
2. Note the DIP switch settings and the location of all wires on the original controller.
3. Remove the wire harnesses from the existing control board.
4. Remove the control board assembly from the furnace.
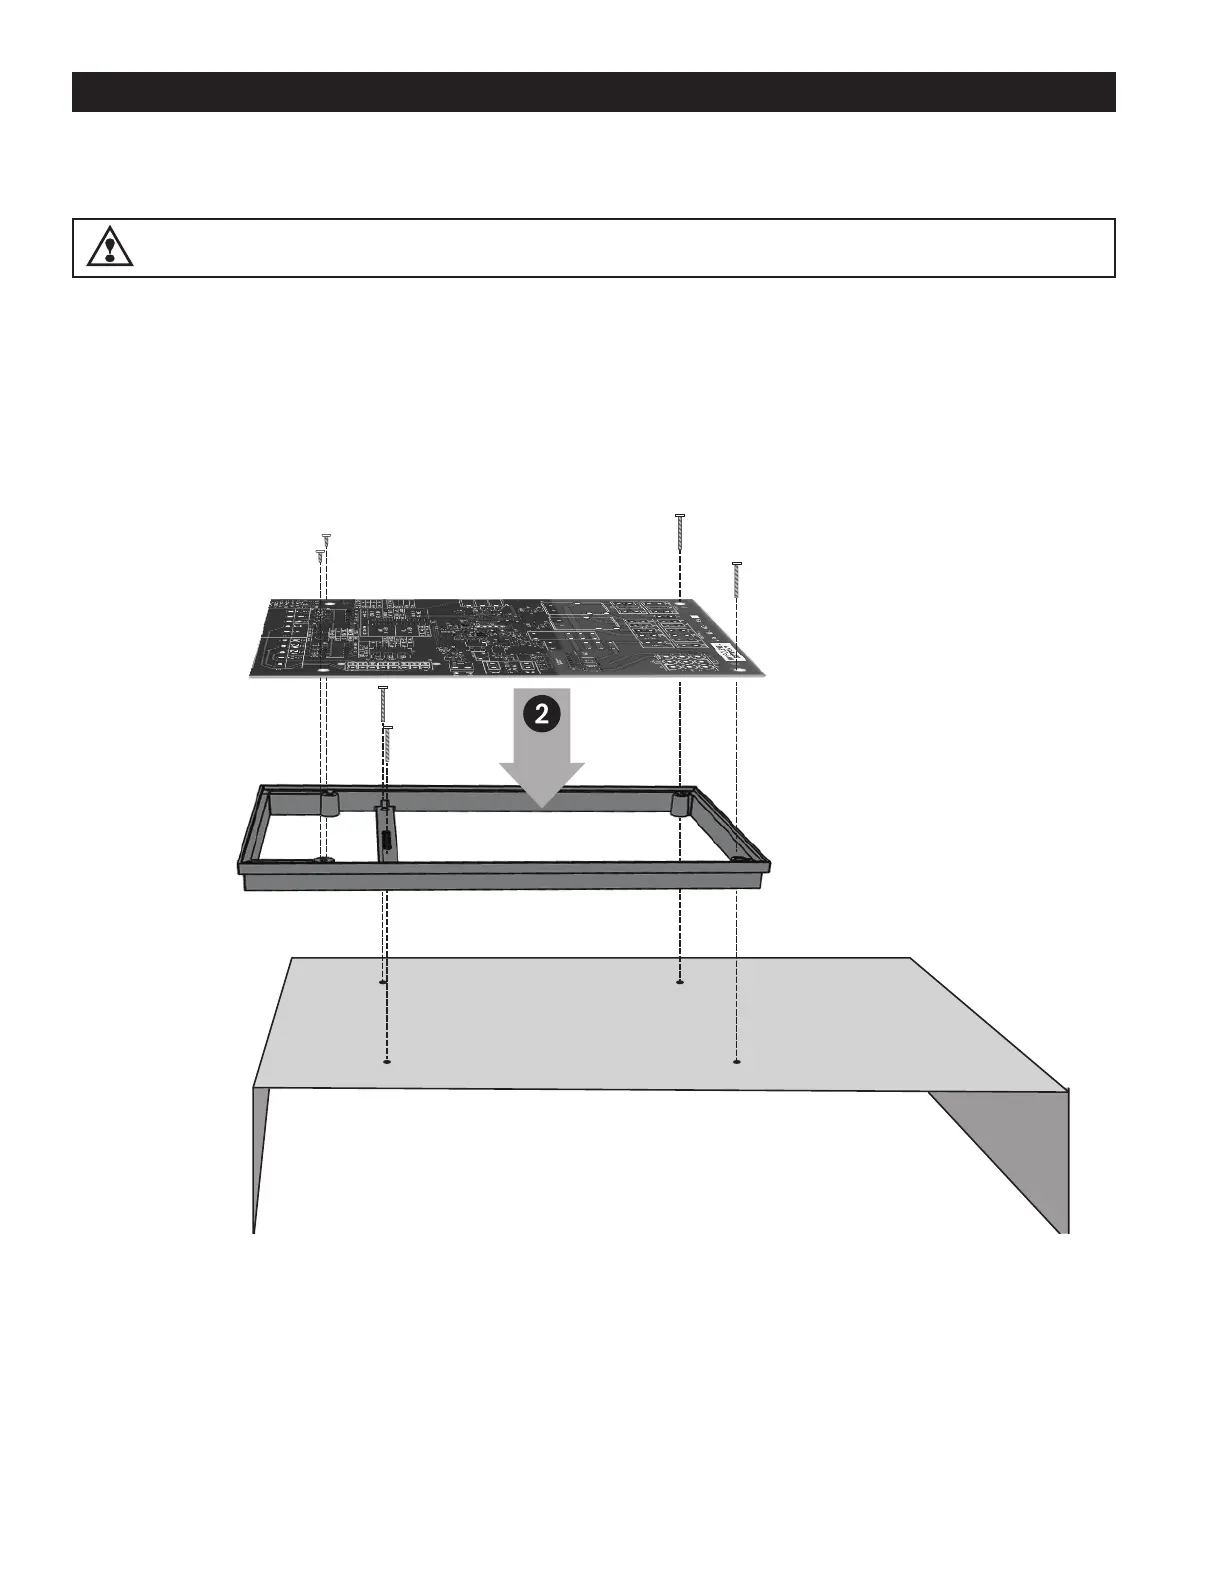
STEP 2: Install the mounting bracket and the new control board.
Controller Board
Mounting Frame
Furnace Panel
Attach the mounting frame to
the furnace panel using two long
screws.
Place the controller board into
the mounting frame so that the
thermostat terminals are to the left
and the line voltage terminals are
to the right.
Using the 2 short screws,
secure the left side of the control-
ler board.
Using the 2 long screws,
secure the right side of the con-
troller board.
STEP 3: Plug in the wire harnesses in the same locations as the original control. NOTE: For proper wiring and setup
consult the furnace manufacturer’s installation manual.
2
 Loading...