ArcGlide THC Replacement Parts Field Service Bulletin 806560 37
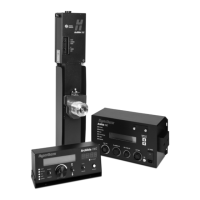
2 – Replacing ArcGlide parts
To replace the servo amplifier module:
1. Align the
notch on the top of the servo amplifier assembly with the notch in the silk screen on the control interface
board and align all the pins on the assembly with the connector on the control interface board.
2. Gently press the pins into the connector.
3. Carefully remove the two pieces of plastic film from the pink heatsink gasket and place it on top of the servo amplifier
assembly. Align the notch and holes for screws on both ends.
Handle the heatsink gasket with care. It is made of fragile material.
4. Slide the heatsink bracket through the opening in the side of the enclosure. Verify that the bracket sits snugly on top
of the servo amplifier assembly and gasket.
5. Insert screws into the top of the heatsink bracket but do not tighten them.
6. Fasten the screws through the outside of the heatsink into the enclosure. Tighten the screws to 2.25 N·m (20 lb·in.).
7. Inside the enclosure, tighten the screws in the heatsink bracket to 0.67 N·m (6 lb·in.).
8. Insert the connector for the red and black wires from the power supply into J11 on the processor board, inside the
top of the enclosure.
9. Reconnect the two halves of the white, in-line connector for the wires between the transformer and the power entry
module.
10. Insert the connector for wires from the transformer into J3 on the THC control interface board.
11 . Reconnect the ground wire to the ground screw on the back panel.
12. Replace the back panel and fasten the screws. Tighten the screws to 1.13 N·m (10 lb·in.).