Diagram 6
Diagram 7
The Installation Procedure
Hypervolt Limited, Unit 17, Innovation Business Centre, Rainham, RM13 8HZ, UK 7
Revision 1. Issue date: Feb. 2020
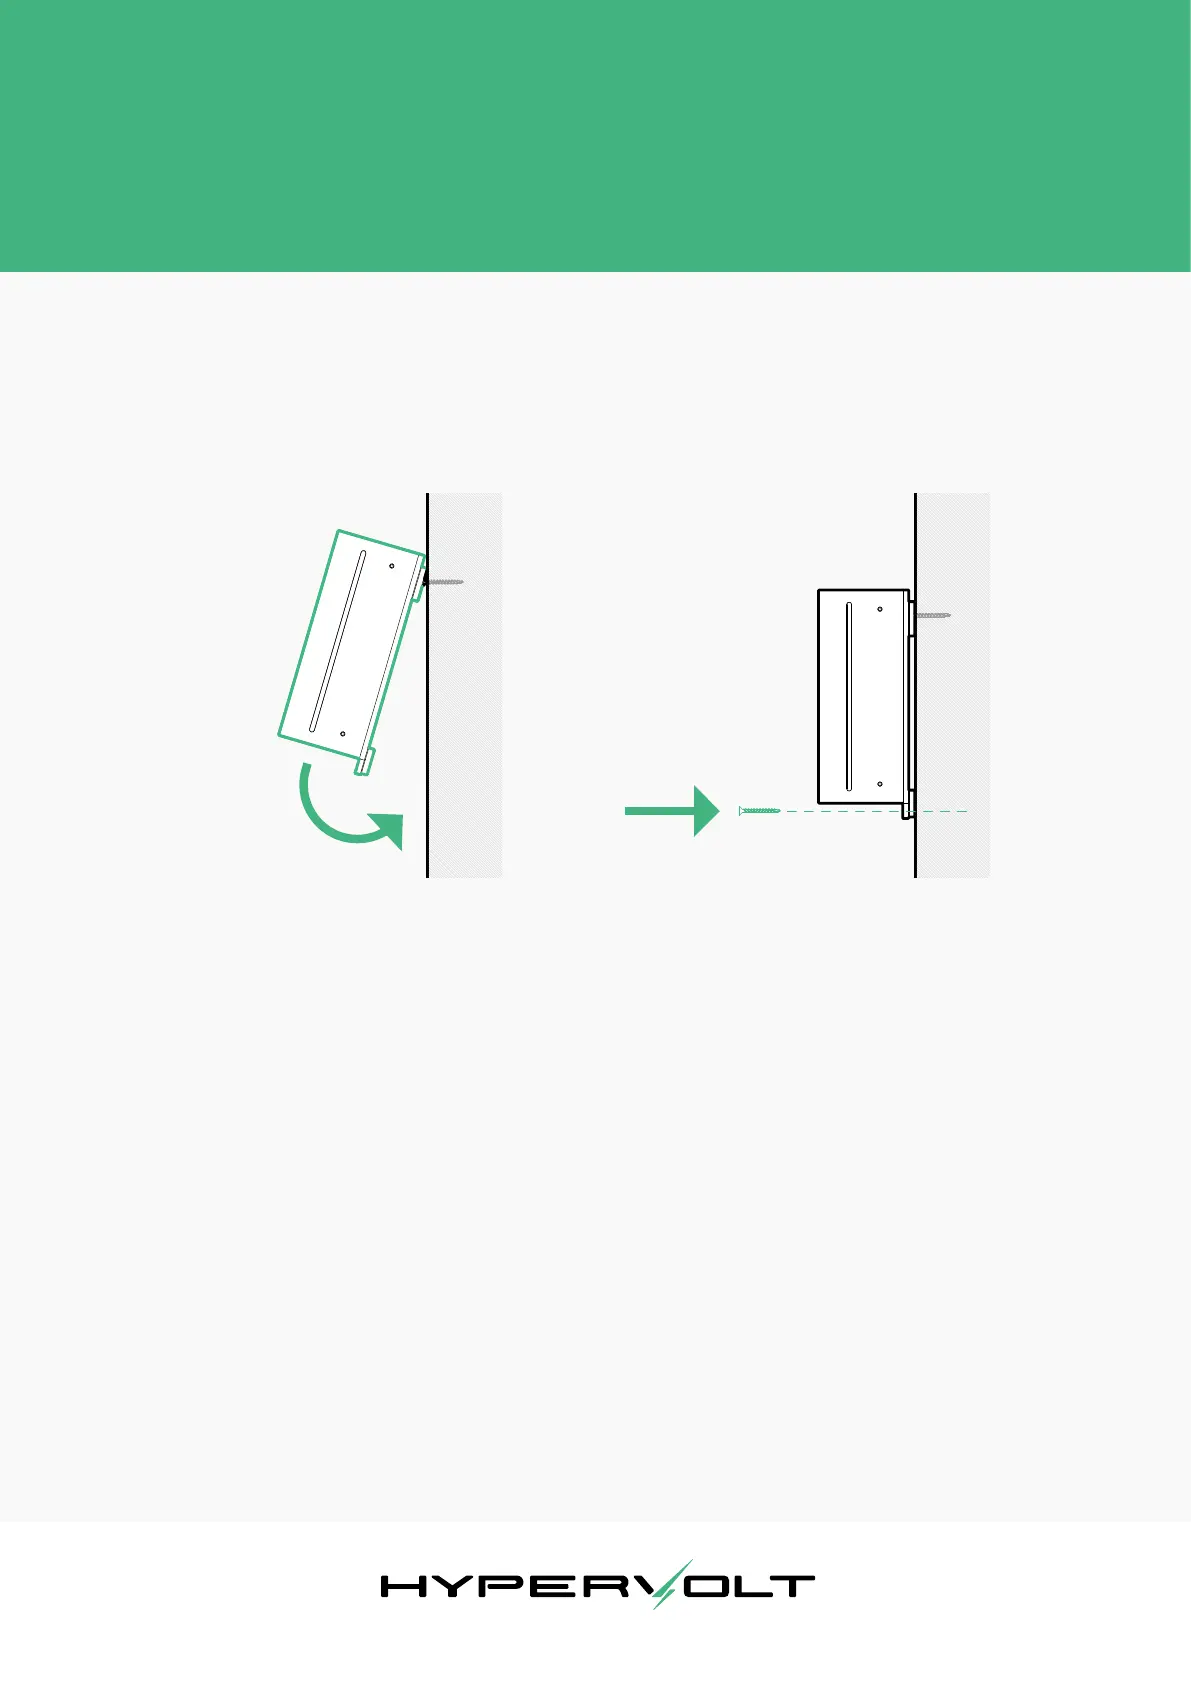
Next, position the Hypervolt and hang it onto the 2 mounting
points. Double check that the bottom 2 mounting holes are
well aligned and insert the last 2 screws. The unit should
now be safely in place.
You do not need to t the top cover back on yet, as you will
need access to the wiring terminals later on. However, you
may wish to place the cover on for protecting the insides
of the charger from dust and other debris during the rest of
the installation.
At this stage, conrm with the customer they are happy
with the location and height of the unit. Make sure you do
this prior to routing any cables as customers may change
their mind!
 Loading...