12 Installation Wiring and Cabling
Step 4 (At the Hypervolt)
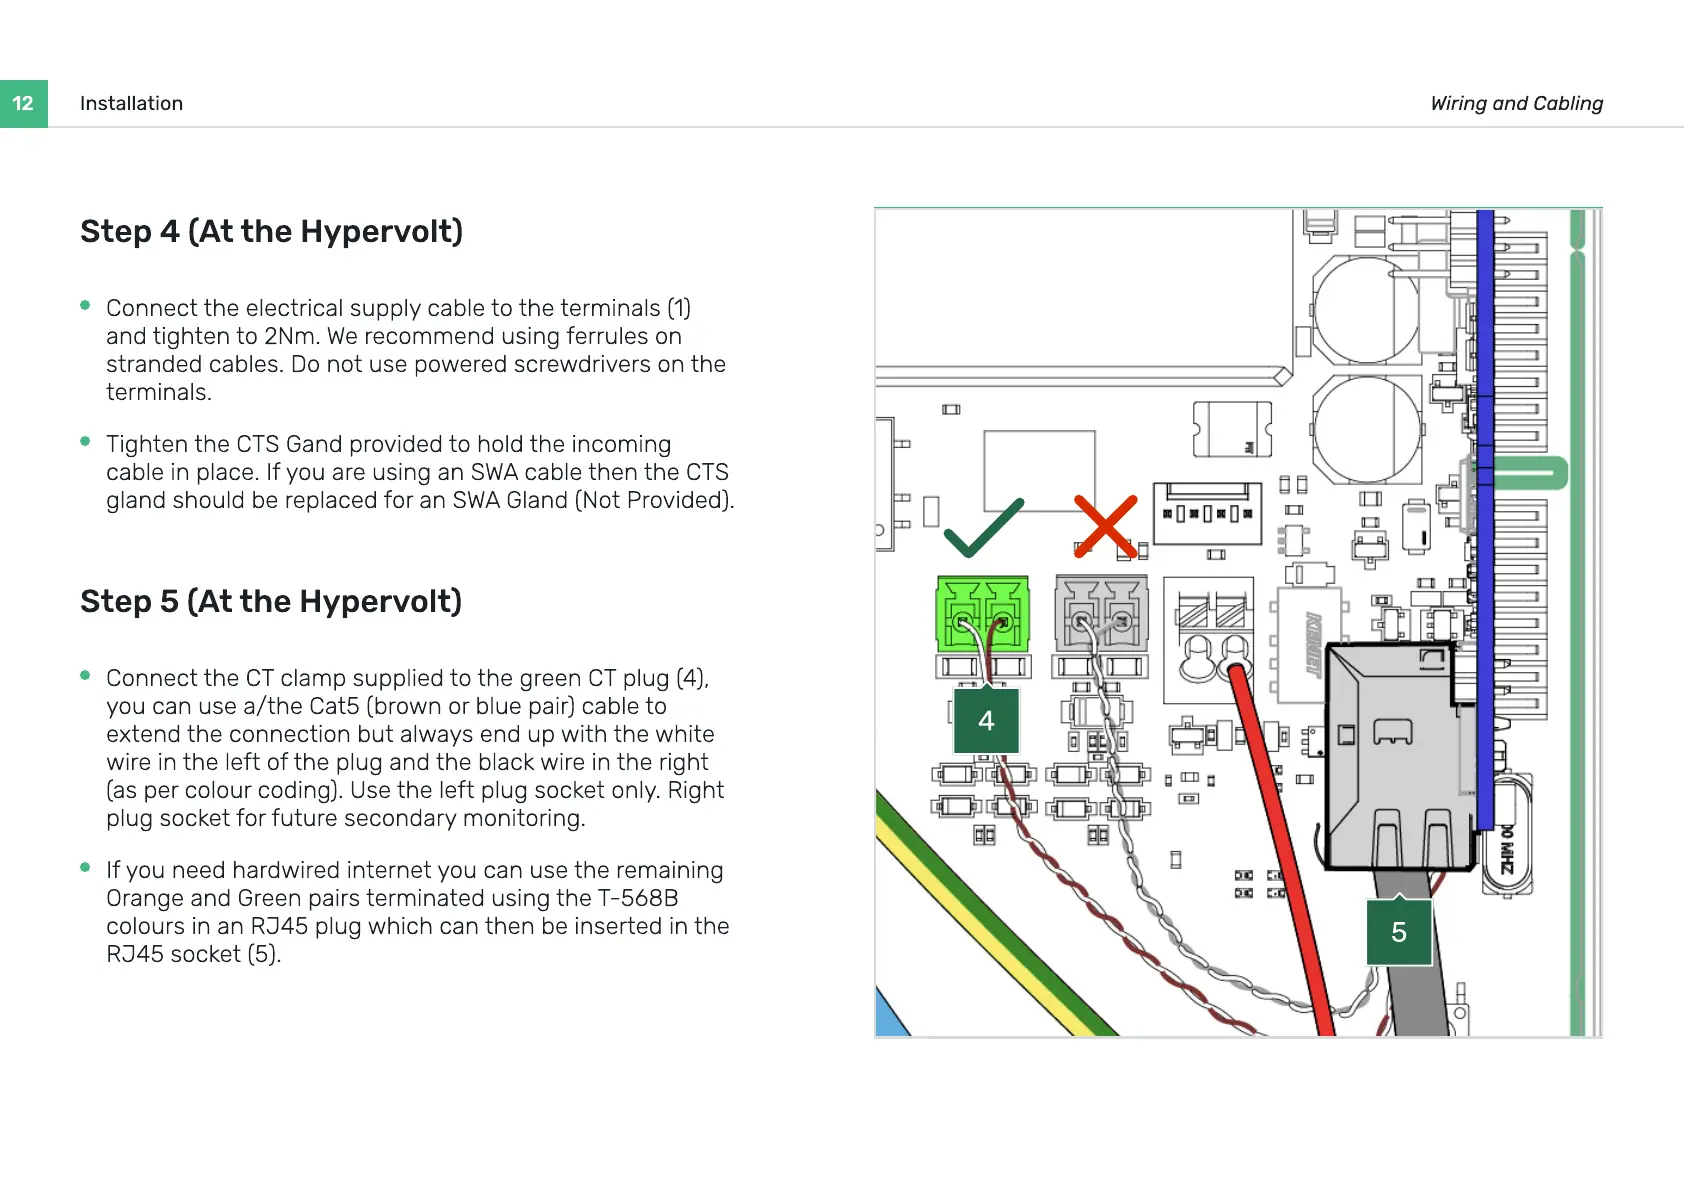
Connect the electrical supply cable to the terminals (1)
and tighten to 2Nm. We recommend using ferrules on
stranded cables. Do not use powered screwdrivers on the
terminals.
Tighten the CTS Gand provided to hold the incoming
cable in place. If you are using an SWA cable then the CTS
gland should be replaced for an SWA Gland (Not Provided).
Step 5 (At the Hypervolt)
Connect the CT clamp supplied to the green CT plug (4),
you can use a/the Cat5 (brown or blue pair) cable to
extend the connection but always end up with the white
wire in the left of the plug and the black wire in the right
(as per colour coding). Use the left plug socket only. Right
plug socket for future secondary monitoring.
If you need hardwired internet you can use the remaining
Orange and Green pairs terminated using the T-568B
colours in an RJ45 plug which can then be inserted in the
RJ45 socket (5).
5
4
 Loading...