14 Installation Connecting the LED Plate
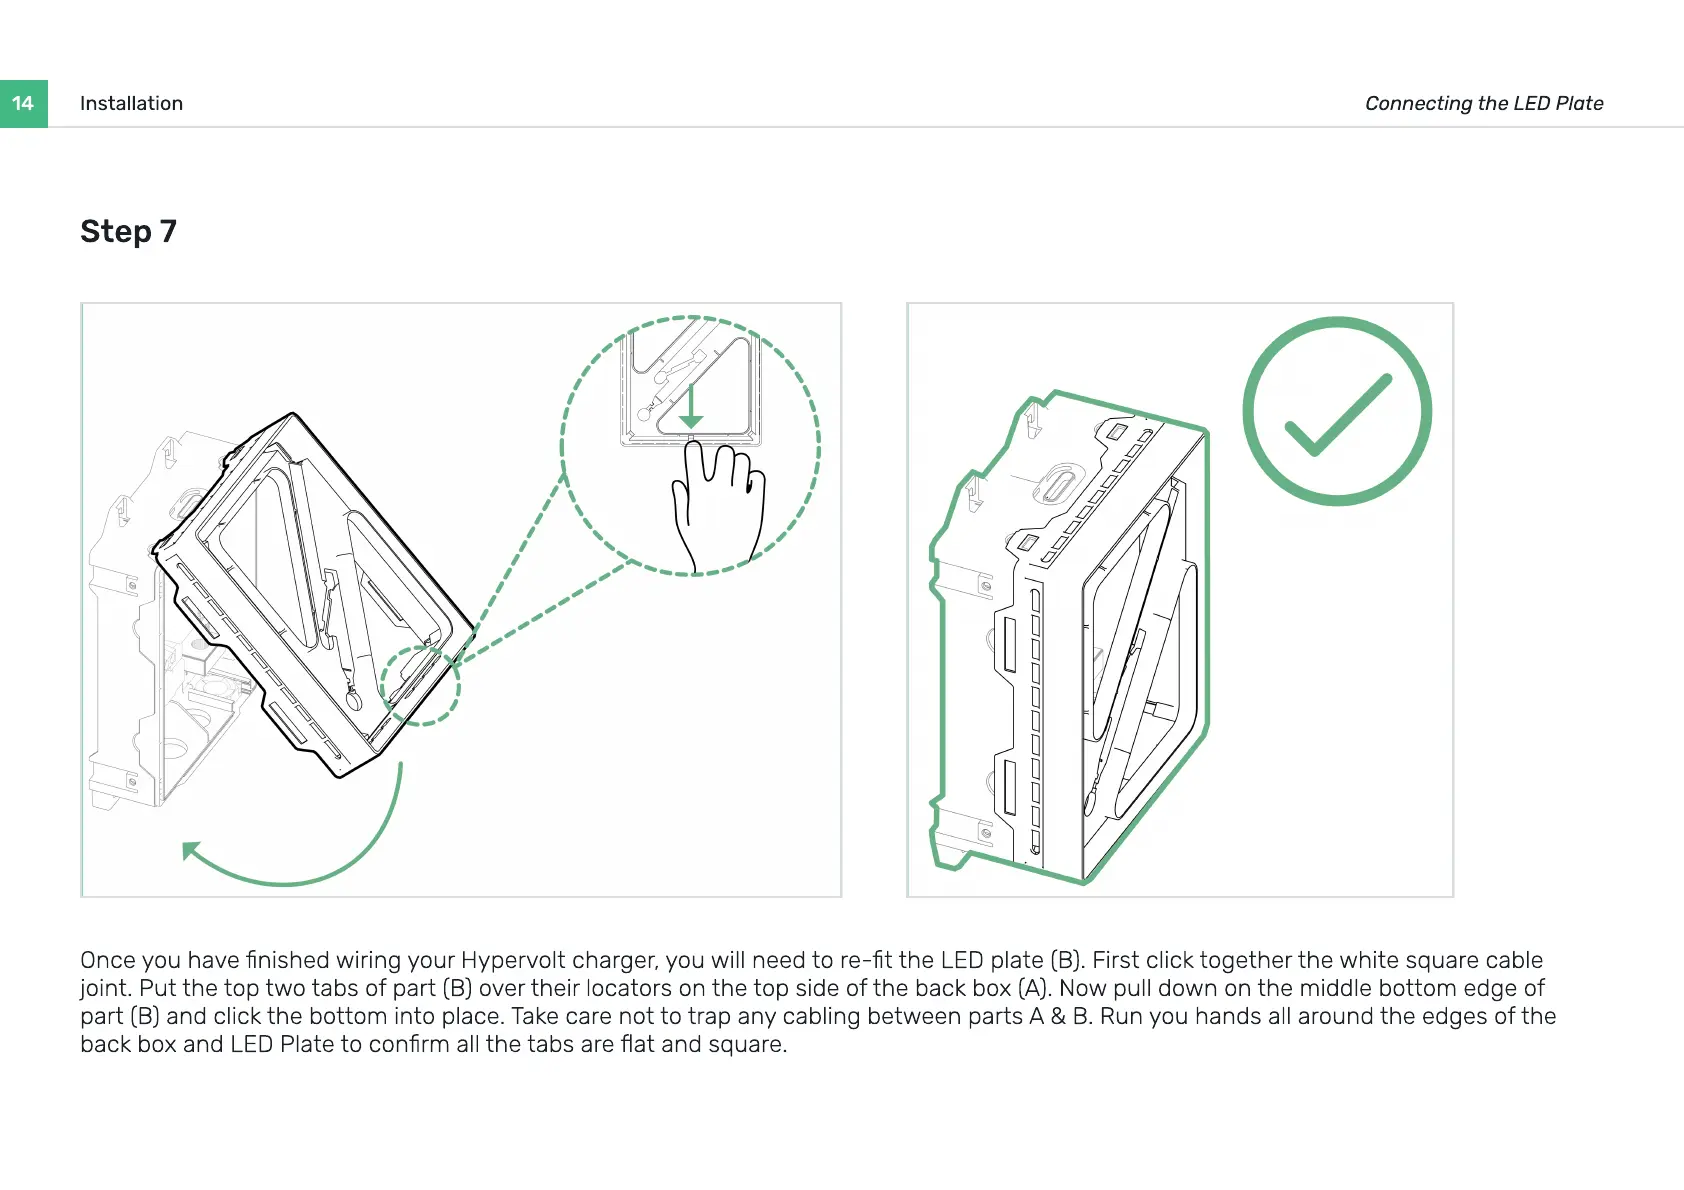
Step 7
Once you have nished wiring your Hypervolt charger, you will need to re-t the LED plate (B). First click together the white square cable
joint. Put the top two tabs of part (B) over their locators on the top side of the back box (A). Now pull down on the middle bottom edge of
part (B) and click the bottom into place. Take care not to trap any cabling between parts A & B. Run you hands all around the edges of the
back box and LED Plate to conrm all the tabs are at and square.
 Loading...