EasyManua.ls Logo

HyperX Armada User Manual

HyperX Armada
2 pages
To Next Page IconTo Next Page
Page #1 background image
1
OR
Drill a hole in the desktop.
15 – 60 mm
(0.6” – 2.4”)
2
1
15 – 50 mm (0.6” – 2.0”)
Secure the grommet mount to the pole using the four screws.
Then secure the stand to the desk.
2
1
1
2
3 mm
4
3
1
2
3 mm
2
1
2
3
1
2
4
1
2
5
2
1
6
7
8
3 mm
5 mm
M4 x L10
+
LB
kg
LB
kg
+
LB
kg
LB
kg
3 mm
5 mm
Remove the preinstalled mounting clamp.
HyperX Armada
Single Gaming Mount
Color Side 1:
Black + Pantone 186C
Flat size:
16.5 x 17 in. (419.1 x 431.8 mm)
Fold 1:
3-panel
accordion
Color Side 2:
Black + Pantone 186C
Finished size:
5.5 x 17 in. (139.7 x 431.8 mm)
Question and Answer IconNeed help?

Do you have a question about the HyperX Armada and is the answer not in the manual?

HyperX Armada Specifications

General IconGeneral
MountingDesk Mount
Cable ManagementYes
MaterialAluminum
CompatibilityMonitors
Mount TypeClamp or Grommet
AdjustabilityTilt, Swivel, Rotate, Height
Weight Capacity9 kg (19.8 lbs)
VESA Compatibility75 x 75 mm, 100 x 100 mm

Summary

HyperX Armada Single Gaming Mount Installation

Desk Clamp Mounting

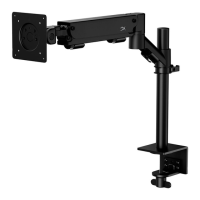
Instructions for attaching the mount using the desk clamp, suitable for 15-50mm desk thickness.

Grommet Hole Mounting

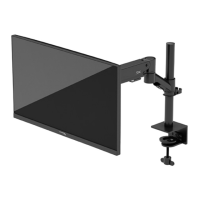
Guidance for installing the mount through a desk grommet hole, for desks 15-60mm thick.

Clamp Removal and Grommet Securing

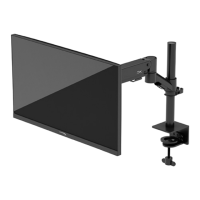
Steps to remove a pre-installed clamp and secure the grommet mount to the pole.

Monitor Attachment and Adjustment

Procedure for connecting the monitor to the mount and performing initial adjustments.

Product Specifications and Safety Warnings

Product Specifications Table

Details on monitor size, desk thickness, and weight capacity supported by the mount.

General Safety Warnings

Important safety precautions and warnings for using the HyperX Armada mount.

Related product manuals