ENGLISH
Overview
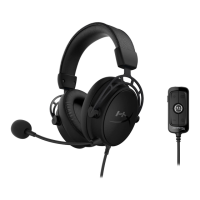
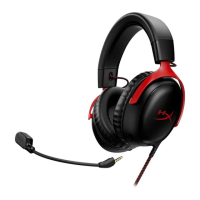
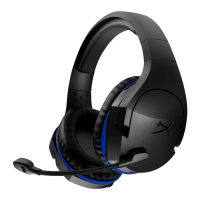
A - Status LED
B - Power button
C - Mic mute / mic monitoring button
D - USB-C charge port
E - Microphone port
F - Volume wheel
Usage
1. Connect the wireless adapter to your device 2. Power on the headset
Setting up with PC
Right click speaker icon > Select Open Sound settings > Select Sound control
panel
Playback Device
Set Default Device to “HyperX Cloud Alpha Wireless”
Recording Device
Set Default Device to “HyperX Cloud Alpha Wireless”
Setting up with PlayStation 5
Go to the home screen and select Settings > Sound
Microphone
• Input Device: USB Headset “HyperX Cloud Alpha Wireless”
Audio Output
• Output Device: USB Headset “HyperX Cloud Alpha Wireless”
• Output to Headphones: All Audio
Status LED
*Battery level indication
*The status LED will automatically turn o to conserve battery life
Power button
• Power on/o - Hold button for 3 seconds to power headset on/o
• Battery level status – Press button to hear current battery level voice prompt
Mic mute / mic monitoring button
• Mic mute toggle - Press button to turn the mic mute on/o
-LED On – Mic muted -LED O – Mic active
• Mic monitoring toggle – Hold button for 3 seconds to toggle mic monitoring
on/o
Volume wheel
Scroll up and down to adjust volume level.
Charging
It is recommended to fully charge your headset before rst use.
HyperX NGENUITY Software
Go to hyperx.gg/ngenuity to download the NGENUITY software. NGENUITY
software features include:
• DTS Headphone:X
• Adjustable EQ settings
• Adjustable auto shut-o behavior
• Battery level indicator
Questions or Setup Issues?
Contact the HyperX support team or see the user manual at:
hyperx.gg/support
WARNING: Permanent hearing damage can occur if a headset is used at high
volumes for extended periods of time.
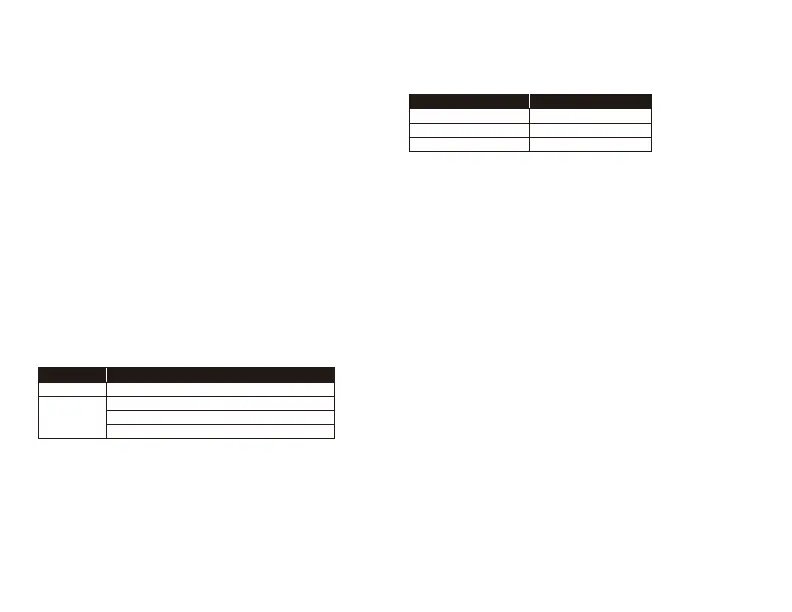
STATUS
LED
Slow breathing green
90% – 100%: Solid green for 5s
10% – 90%: Blinking green for 10s
Searching
Connected*
< 10%: Blinking red for 10s
STATUS LED CHARGE STATUS
Solid green
Breathing green
Fully Charged
10% – 99%
Breathing red< 10%
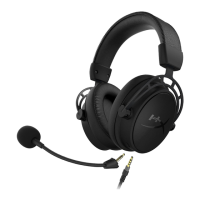
G - Detachable microphone
H - Microphone mute LED
I - USB adapter
J - Wireless status LED
K - Wireless pairing pin hole
L - USB-C charge cable